This entry is a few months late and highly motivated by the fact that the next kit arrived August 18th, 2021, so I better close off this chapter officially on the blog.
Here’s what Troy ended up completing on March 28th, 2021. The end.
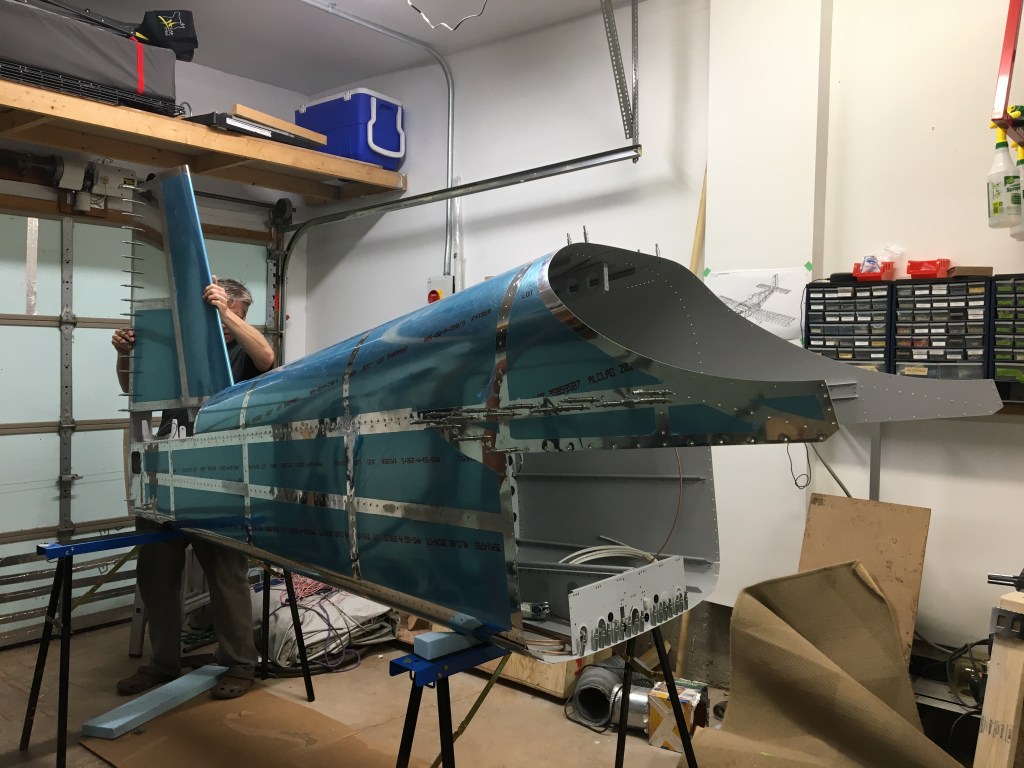
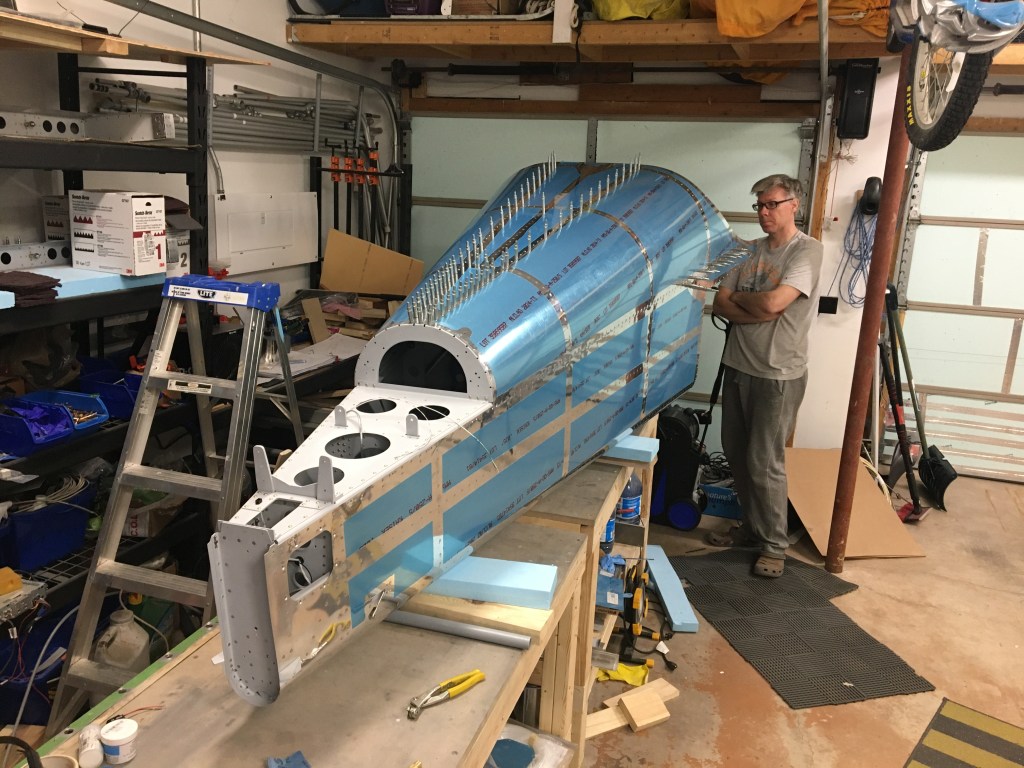
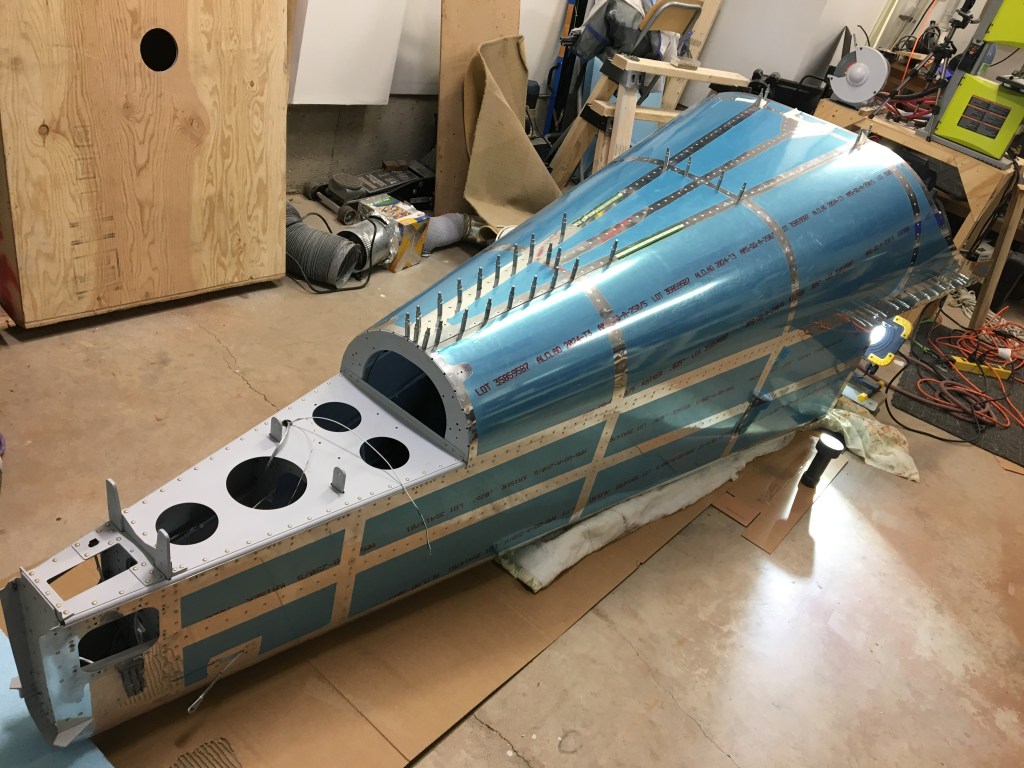
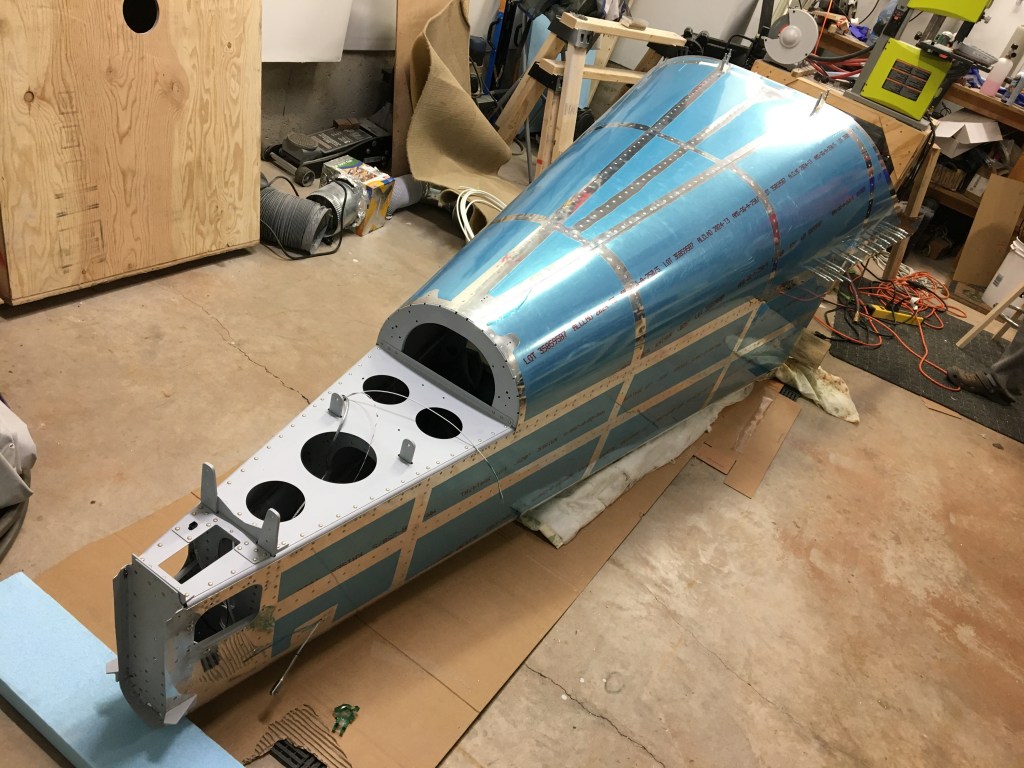
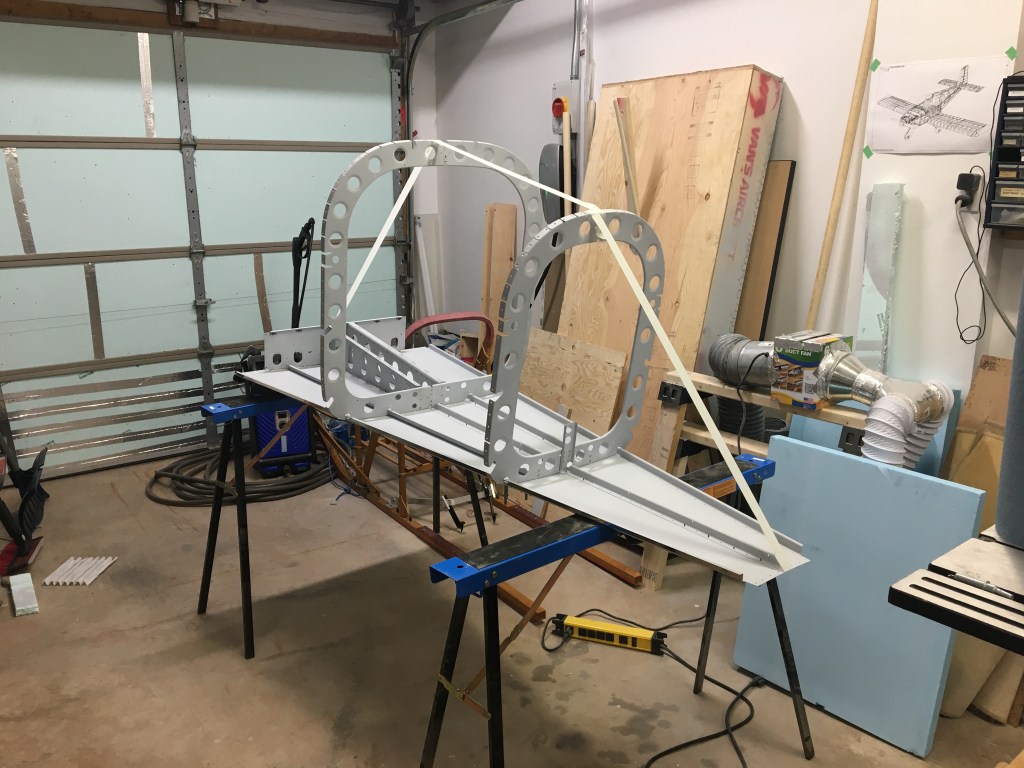
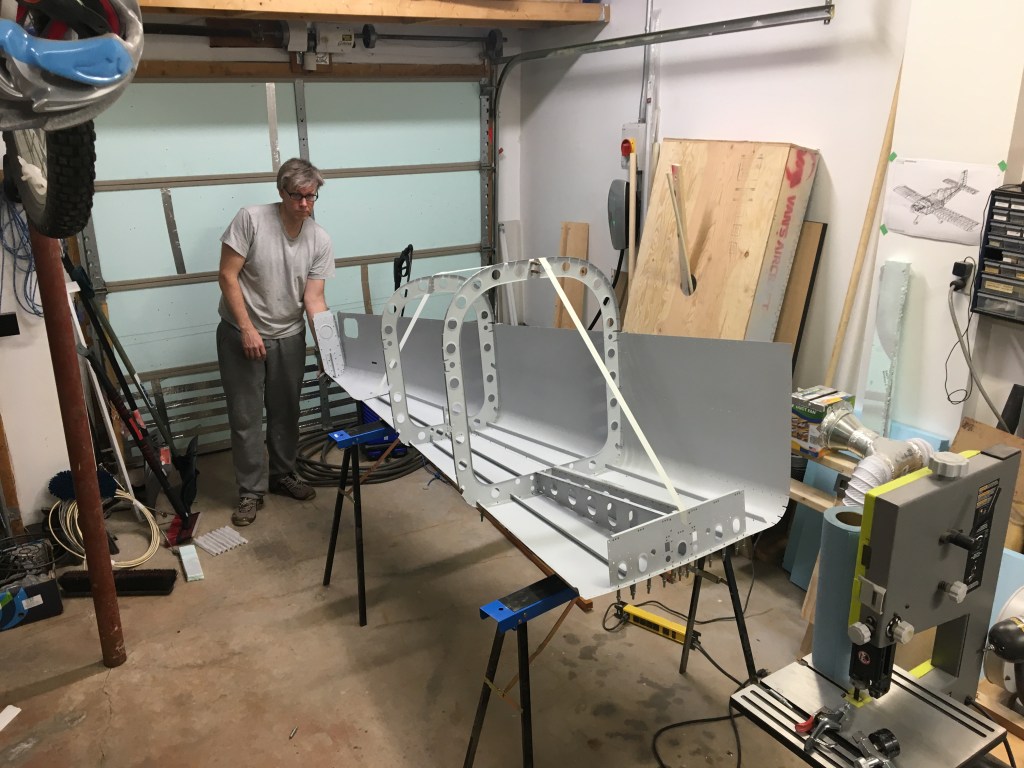
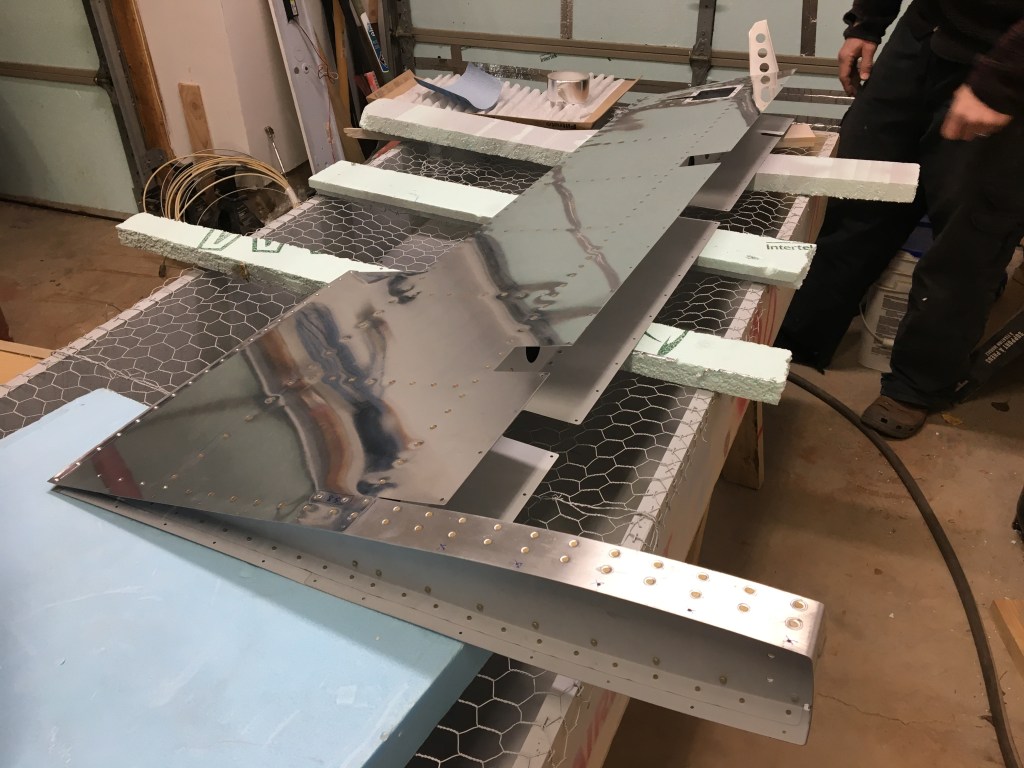
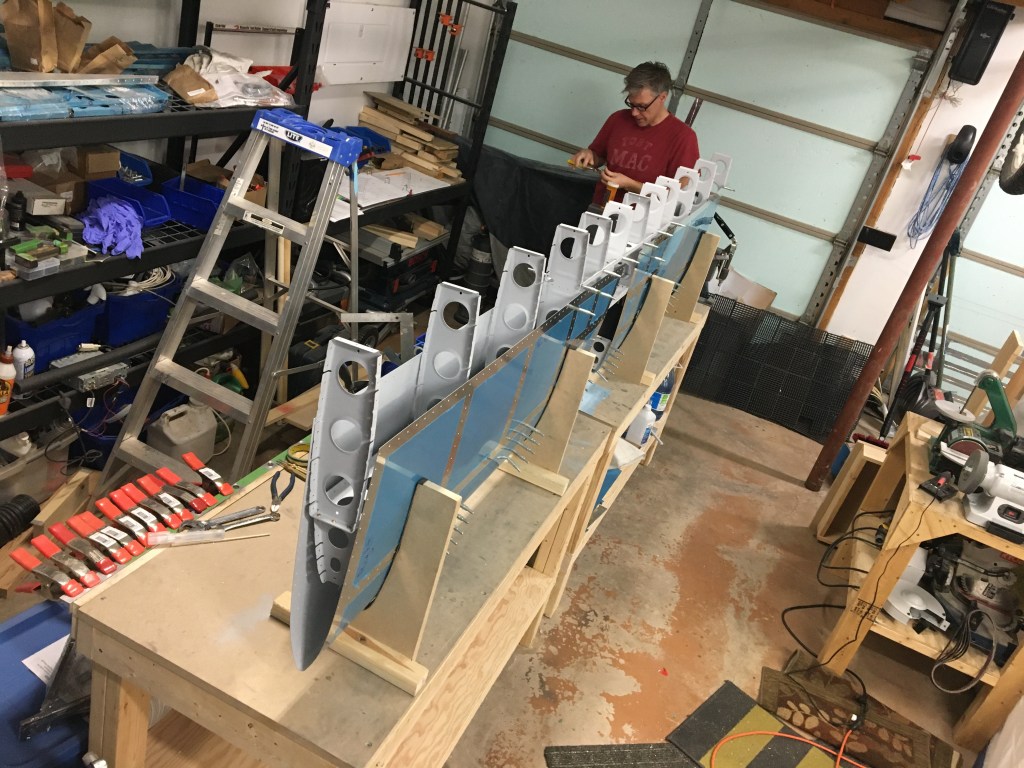
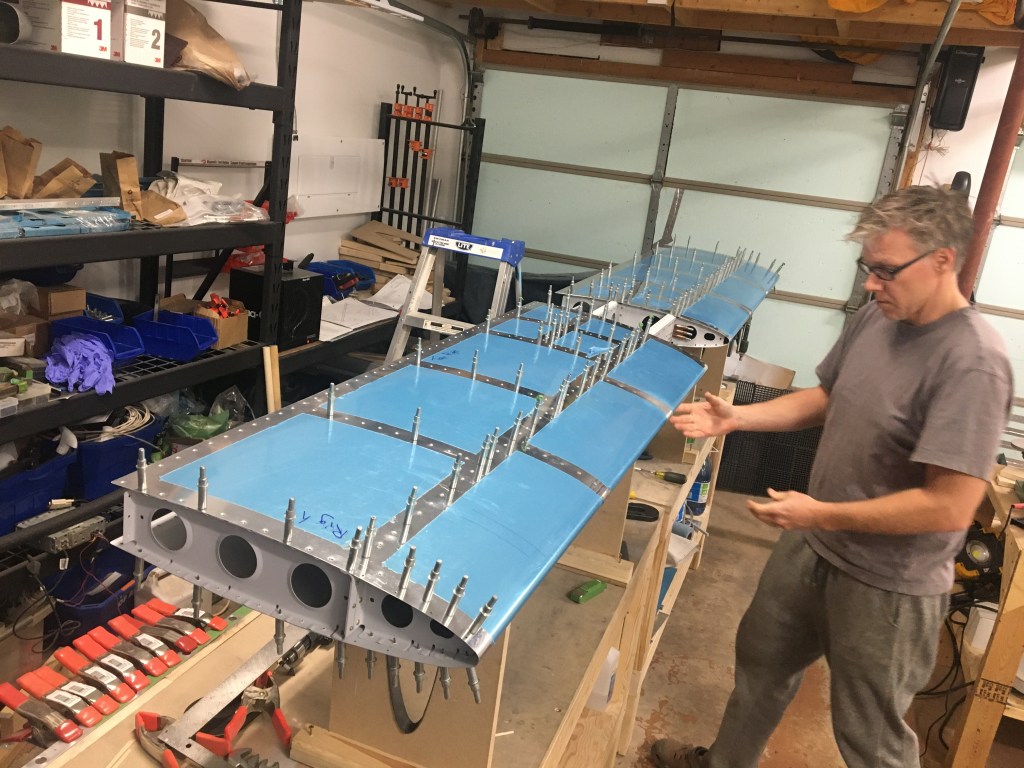
The aft fuselage with the vertical stabilizer temporarily mounted – from a flat crate to an airplane bum, what a journey this first kit has been!
Well okay… a bit more happened. I’ll do my best to recall why I took the following images but this will be primarily a pictorial entry.
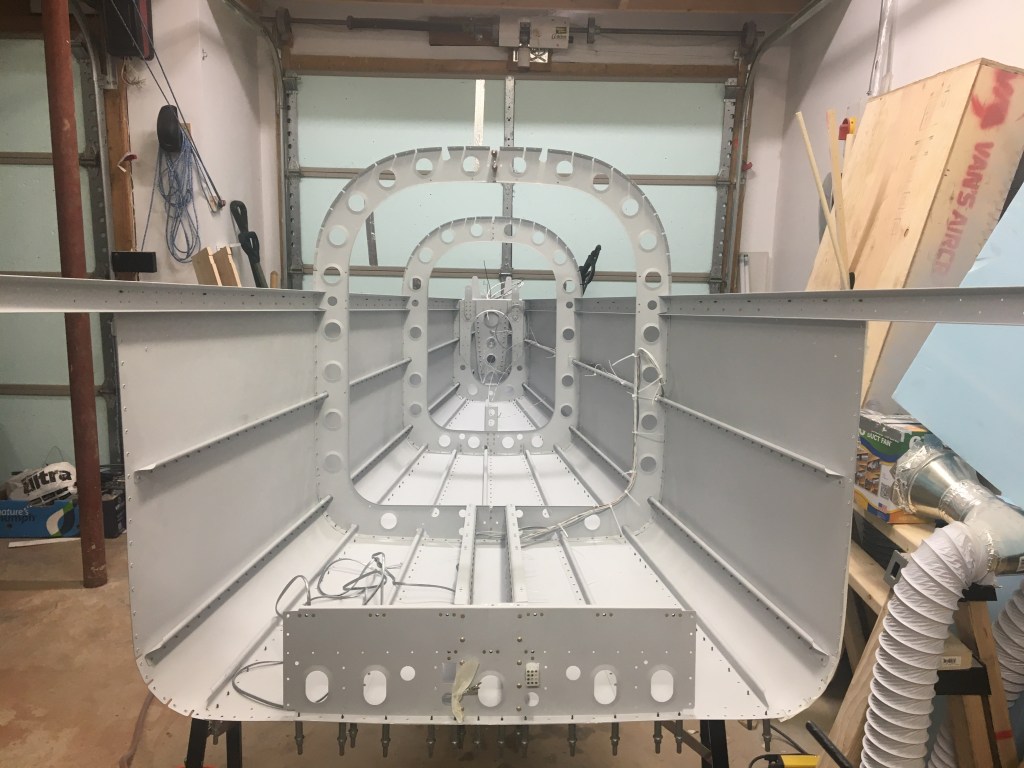
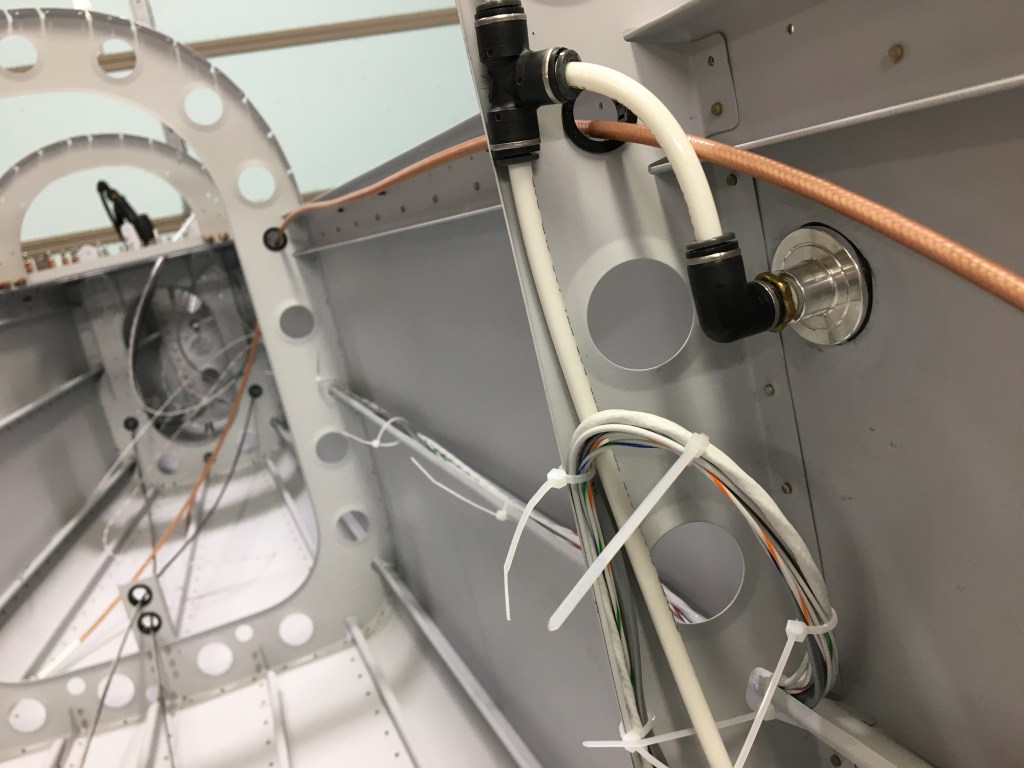
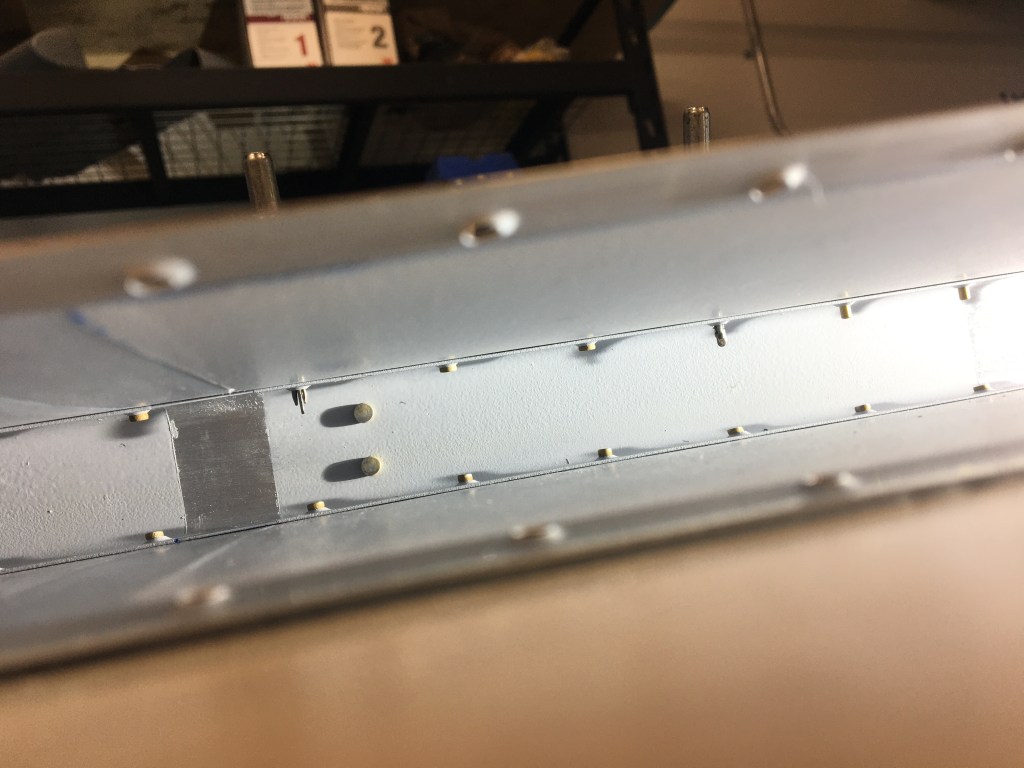
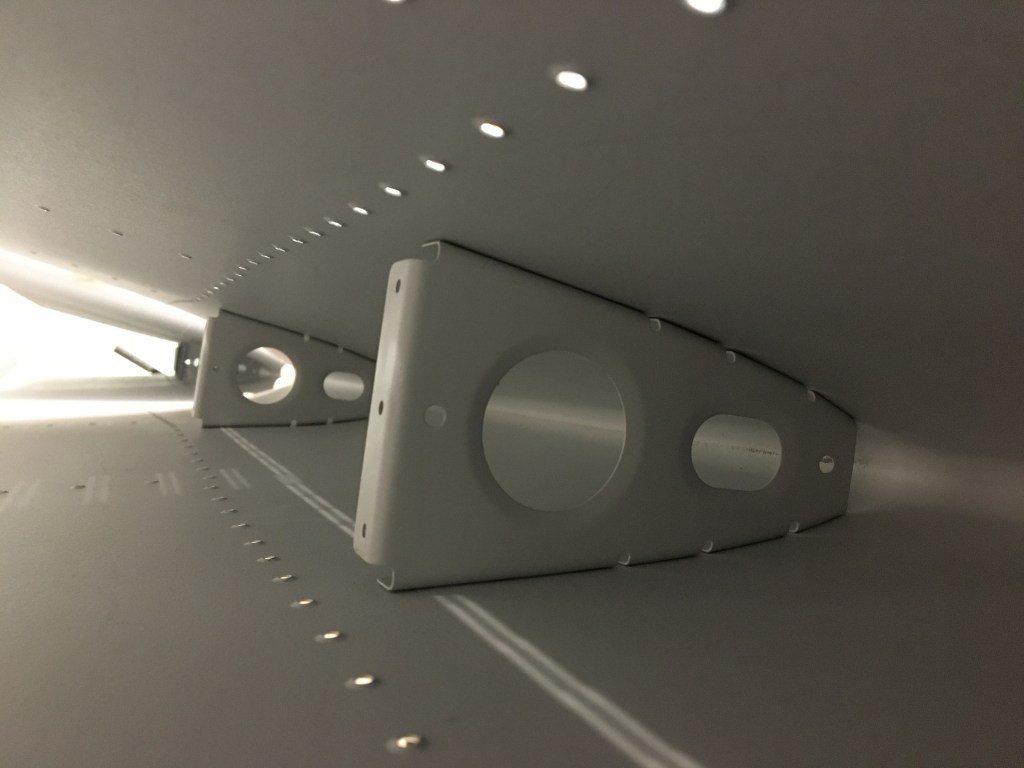
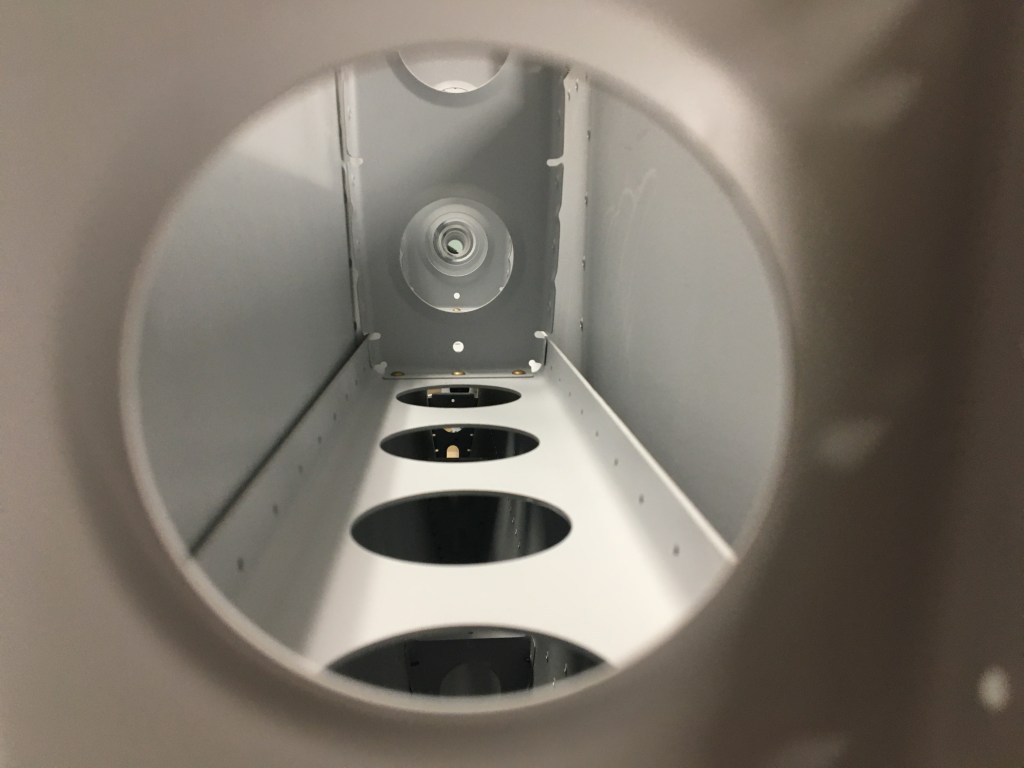
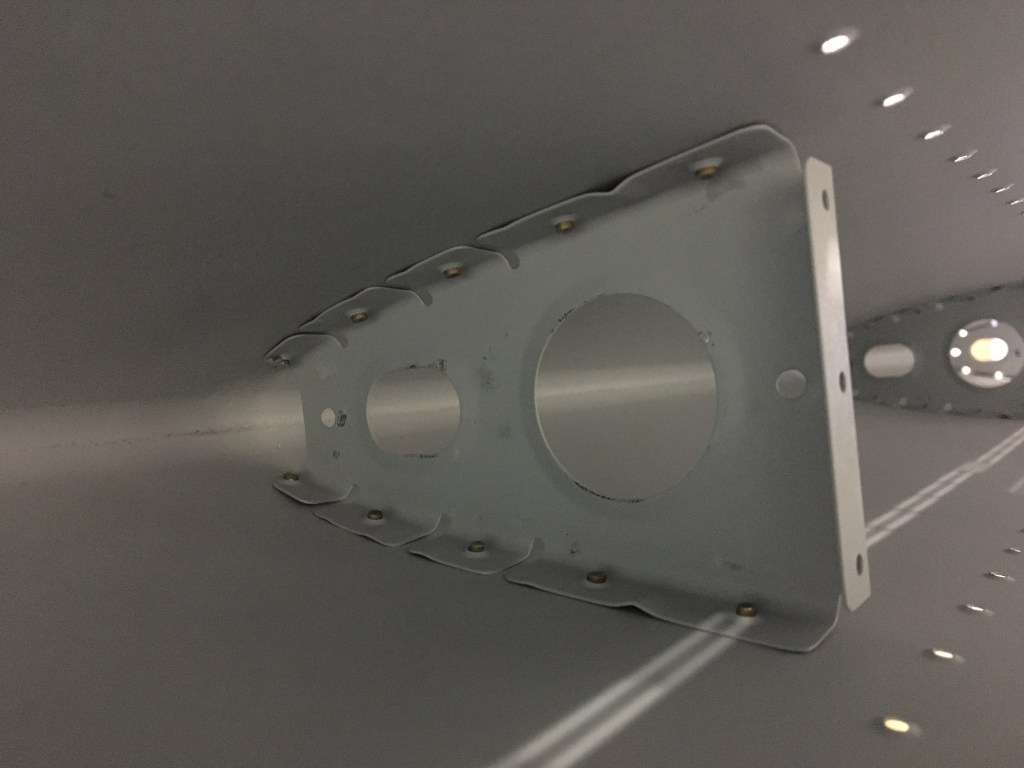
The first wires are being run for the airplane! The first image shows the wiring for tail light and elevator trim. The 2nd image is straight on view from the front of the aircraft looking towards the back. The last image is the static port, which measures airflow and is integral to the functioning of many of the airplane’s instruments – Wikipedia does a pretty good job of explaining some of this. https://en.wikipedia.org/wiki/Pitot-static_system.
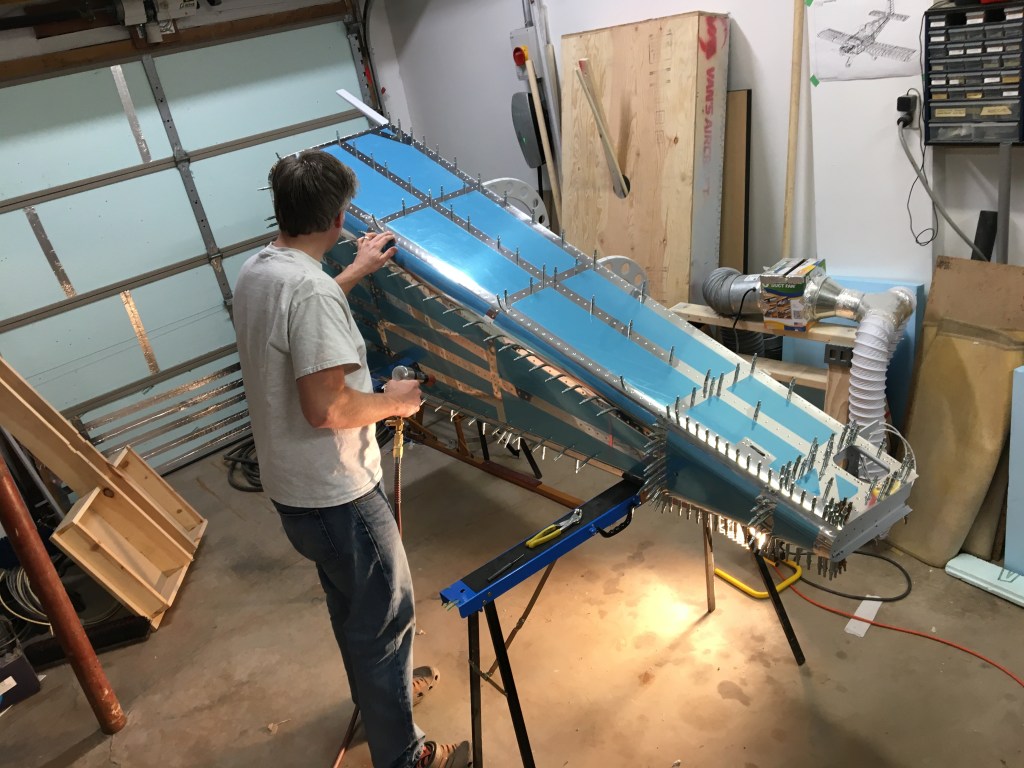
There was a lot of cleco setting and riveting… all I could think about was that movie poster from the 80s – Hellraiser.
A seriously nerve wracking move, so many things in the garage that could dent all the delicate sheet aluminum! One dent and all this would have been for naught!
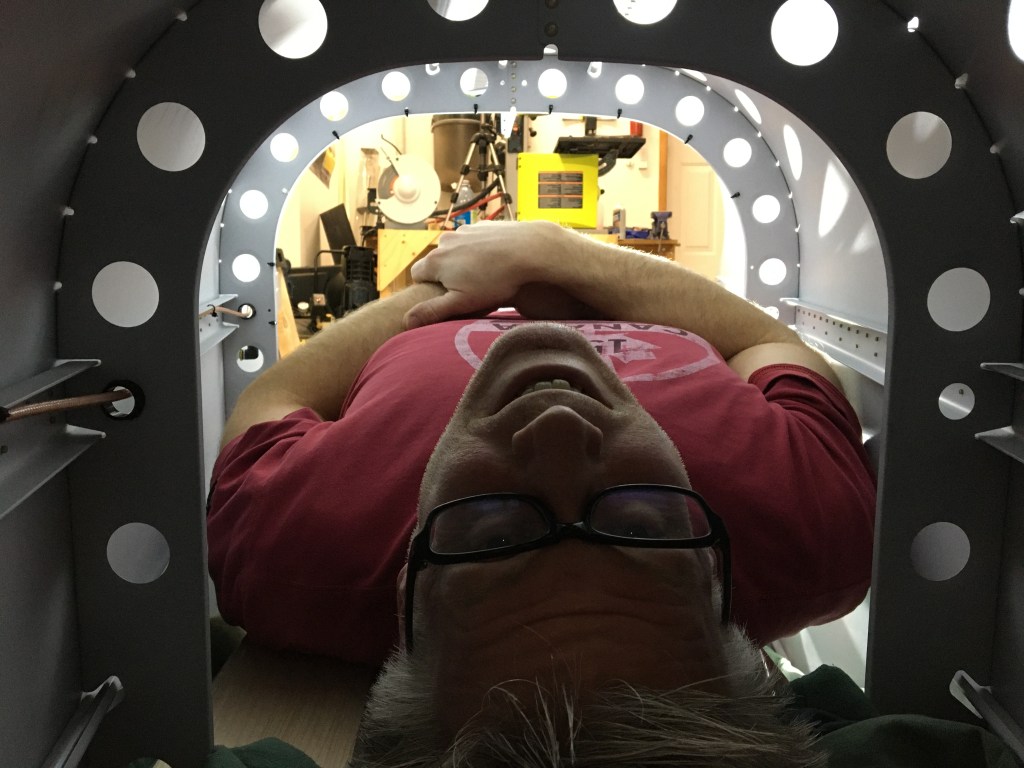
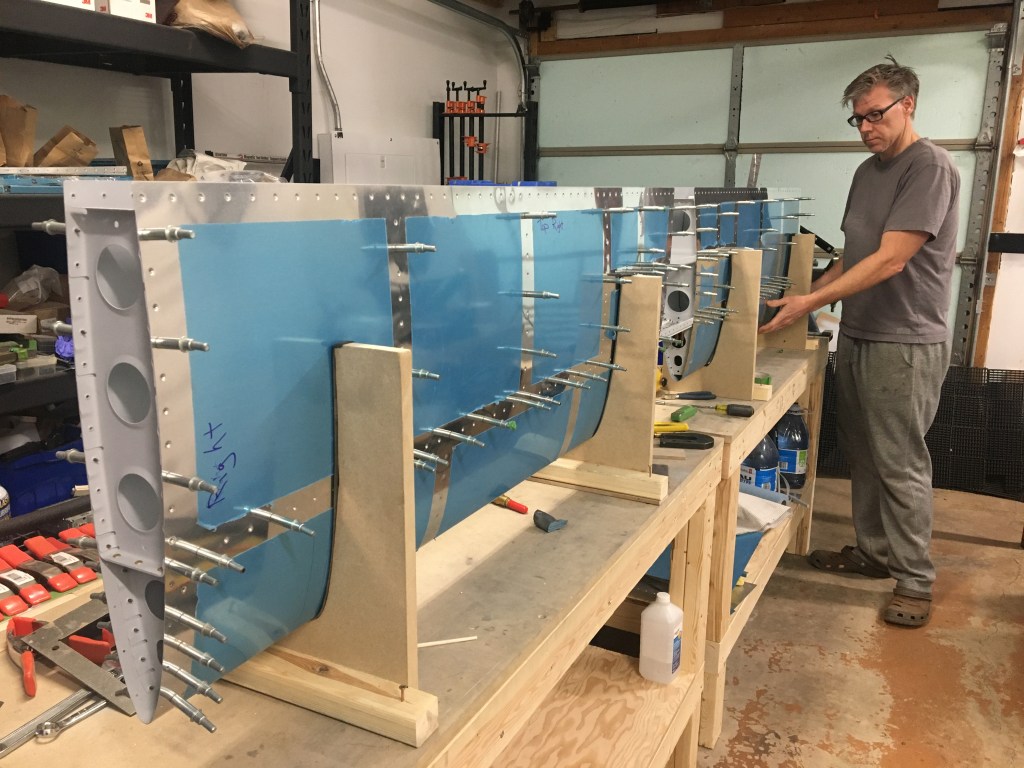
This probably was one of the toughest parts for Troy – trying to figure out how to build a platform inside the fuselage without damaging it so that he could lay inside. This was a two person riveting job as I needed to be on the outside with the bucking bar.
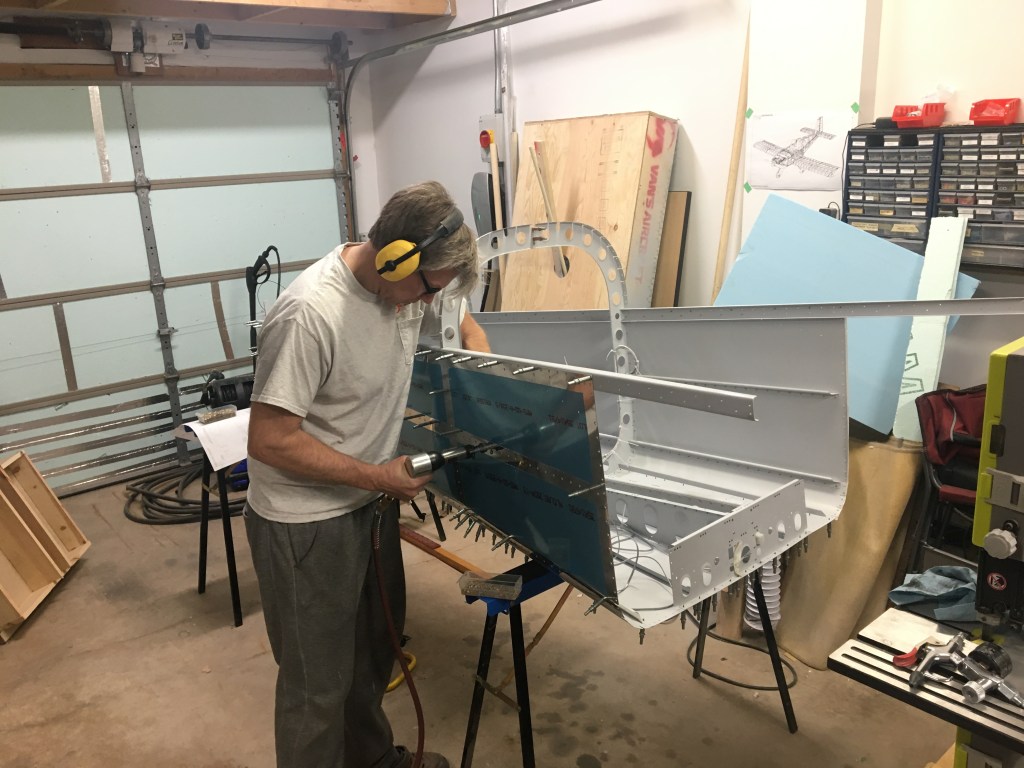
Setting these rivets required a two people and 4 hands! The next time we do this, both of us will be wearing ear protection!
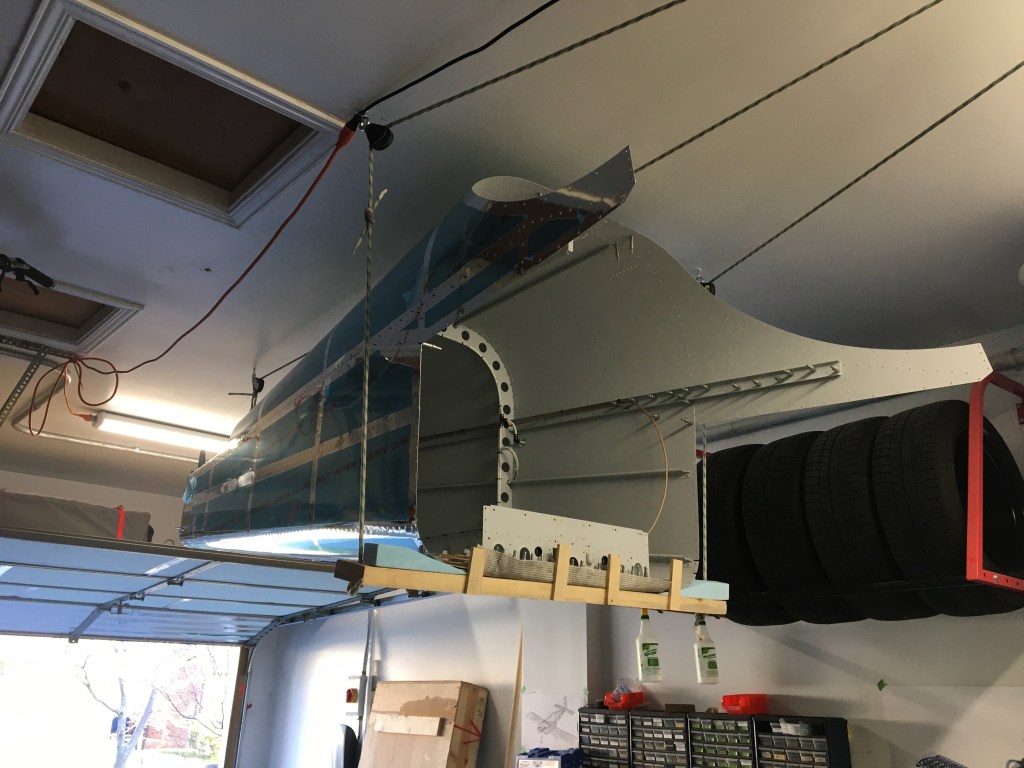
And there it was! A completed rear fuselage that is currently hanging on the roof of our garage until it’s needed for final assembly.
and now… stay tuned for the next chapter of Troy’s RV14-A build, the wings!
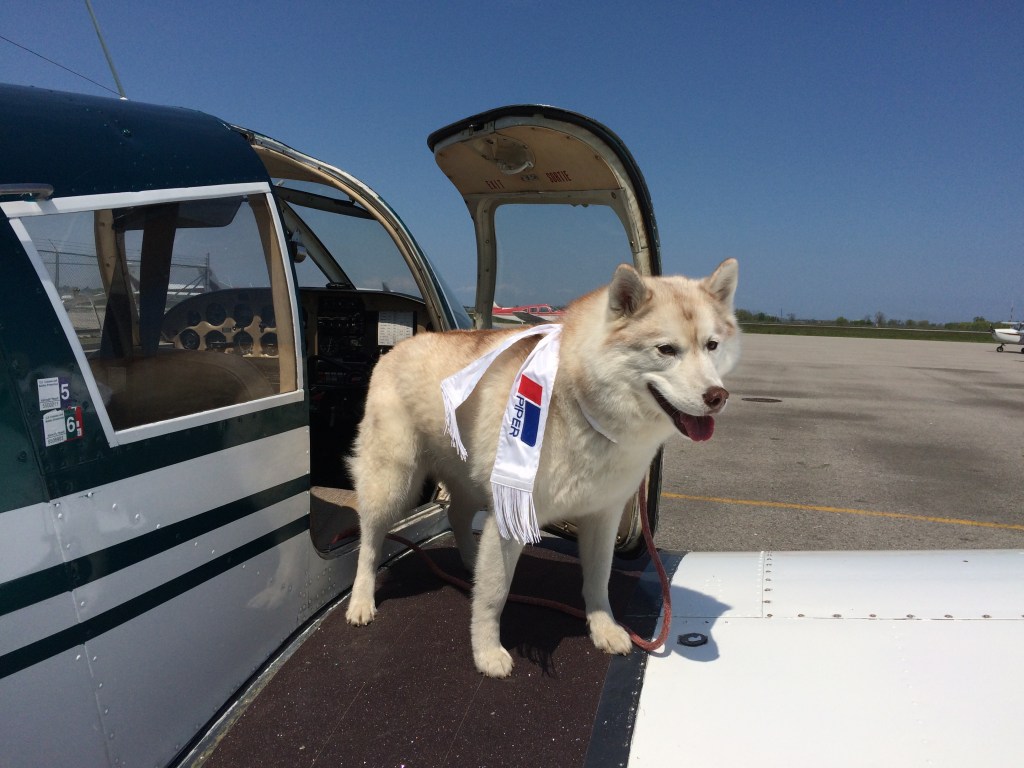
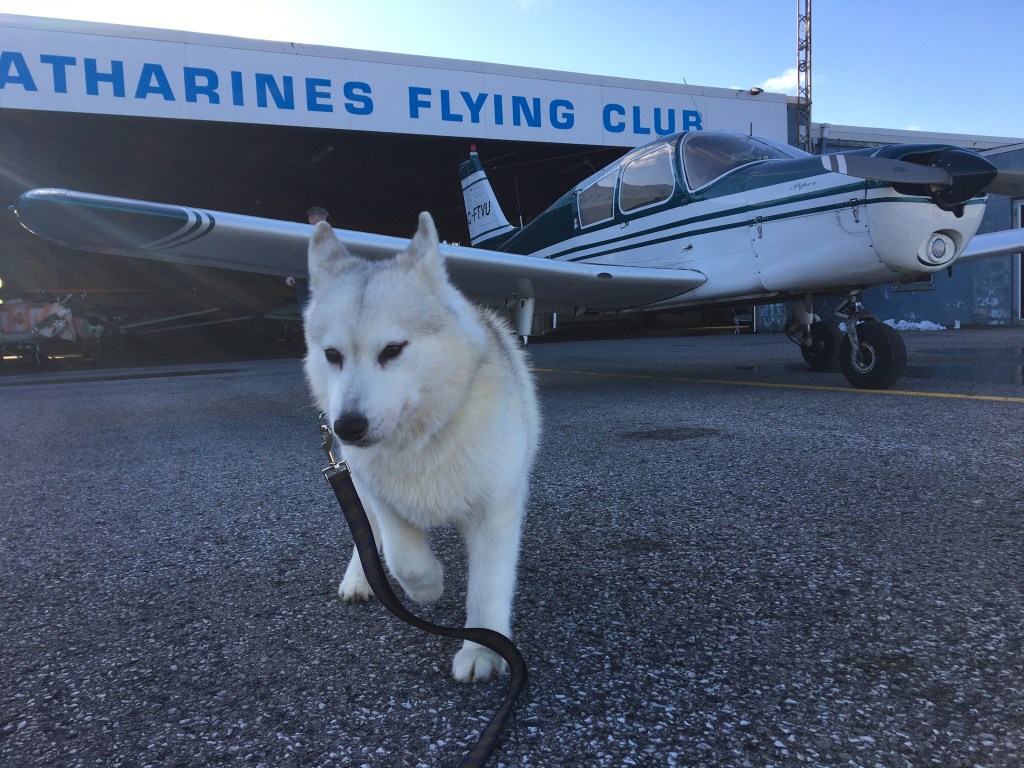
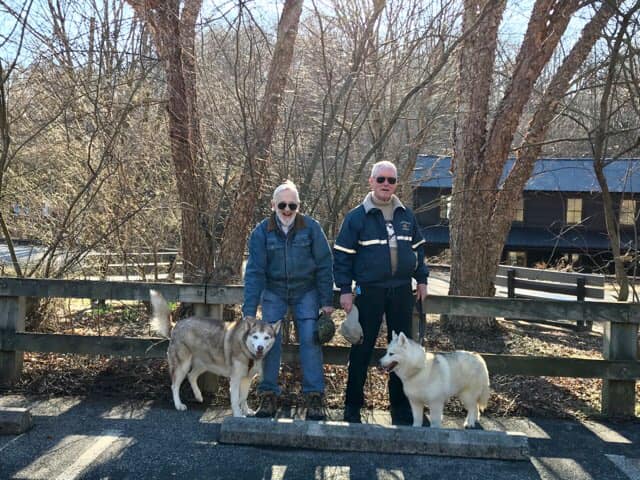
Today marks a couple of noteworthy dates – the 2021 Iditarod sled dog race begins today and today is also the 1-year anniversary of a flight Troy and I did to transport a special dog. The current section of the airplane that Troy is working on is technically where dogs would sit if we were to fly with some four-legged friends in the RV14-A. We’ve had the pleasure of taking a couple of dogs in the air with us in the Piper Cherokee – our own older female, Piper (named for the aircraft of course), and Sweetie (now known as Sandy). I actually came across an article earlier this week in Aviation Week which inspired today’s blog entry. This photo essay by Kimberly Henneman showcases the important role that airplanes and volunteer pilots play to support the running of the Iditarod race, a really insightful series of images worth sharing.
Early on in Piper’s life we exposed her to the flying club, the airport, and the feeling of grit on her feet from the wing walk. We introduced flying to her slowly, first she joined us for a couple of circuits, and then we shared increasingly longer local flights. We’ve been lucky that Piper tends to just curl up and sleep in airplanes, sailboats, dive boats, and cars.
Sandy’s flight on March 7th, 2020, was a special one for us. We had connected two good friends together to match a dog with a forever home, but transport had been a problem during the winter months. The journey connecting Ontario to Pennsylvania by car was proving difficult with timing and weather – and that’s when Troy flew in. While many pets are moving across the border daily (with more fluidity prior to the pandemic) we wanted to make sure we did it legally and compliantly. Sandy’s flight took a bit of planning because we were crossing the US / Canada border with an animal and leaving the animal in the US. All domestic pets entering the United States are required to show proof of valid rabies vaccination. With Sandy staying in the US, she was technically being imported and was required to follow state import guidelines – Pennsylvania requires a Certified Veterinary Inspection (CVI). In Canada, this document is a form from the Canadian Food Inspection Agency (CFIA) that has to be completed by a veterinarian and then signed off by the CFIA.
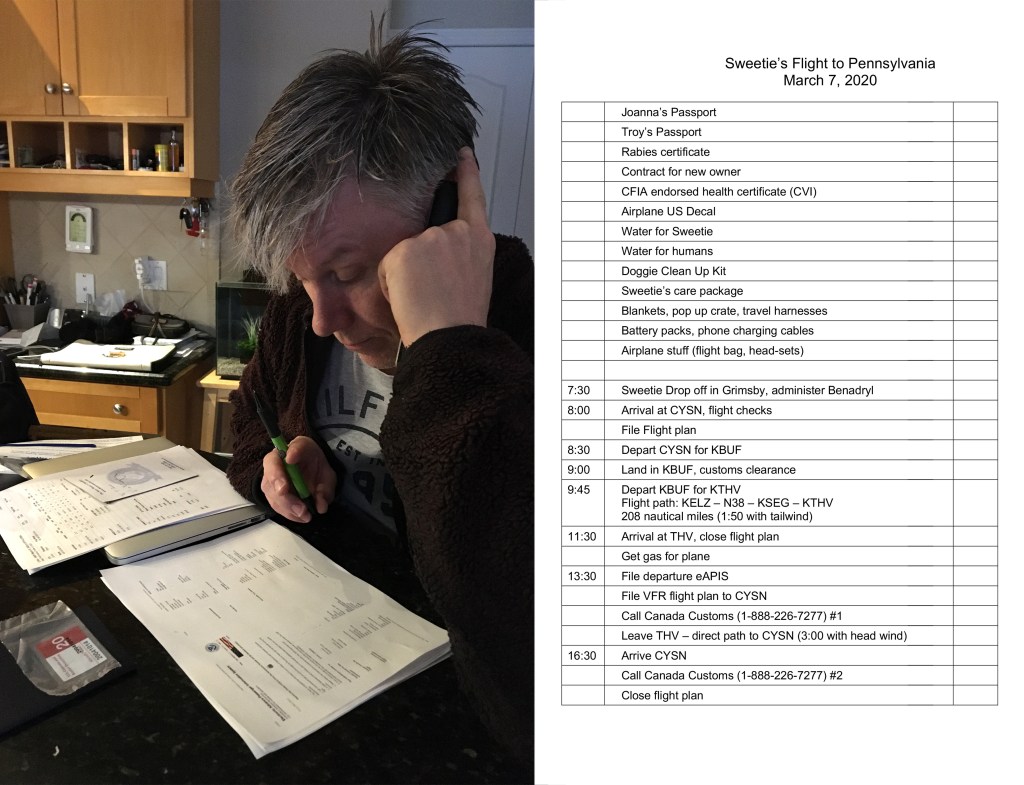
Flight planning included making sure we had all of the proper documentation for Sandy, the maps and procedures for each airport we needed to land in, important phone numbers and timelines. All of this information is shared to ensure our friends and family know where we are and if there are delays, how to work around them – including provisions for our own dogs if we aren’t able to make it home in the same day.
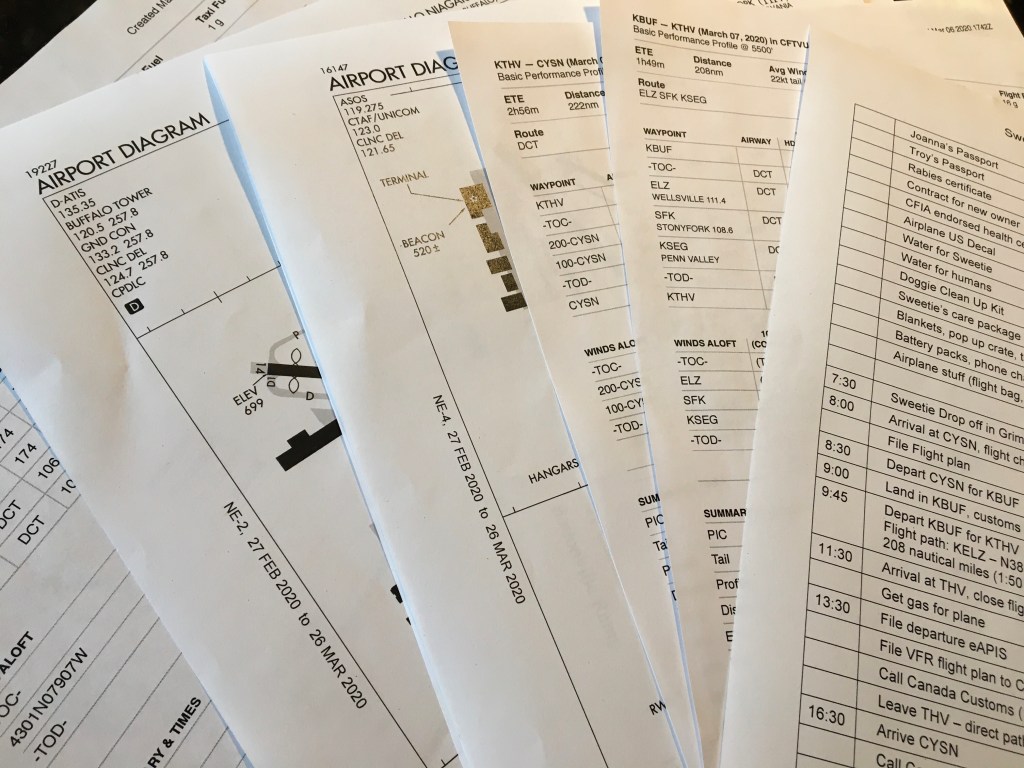
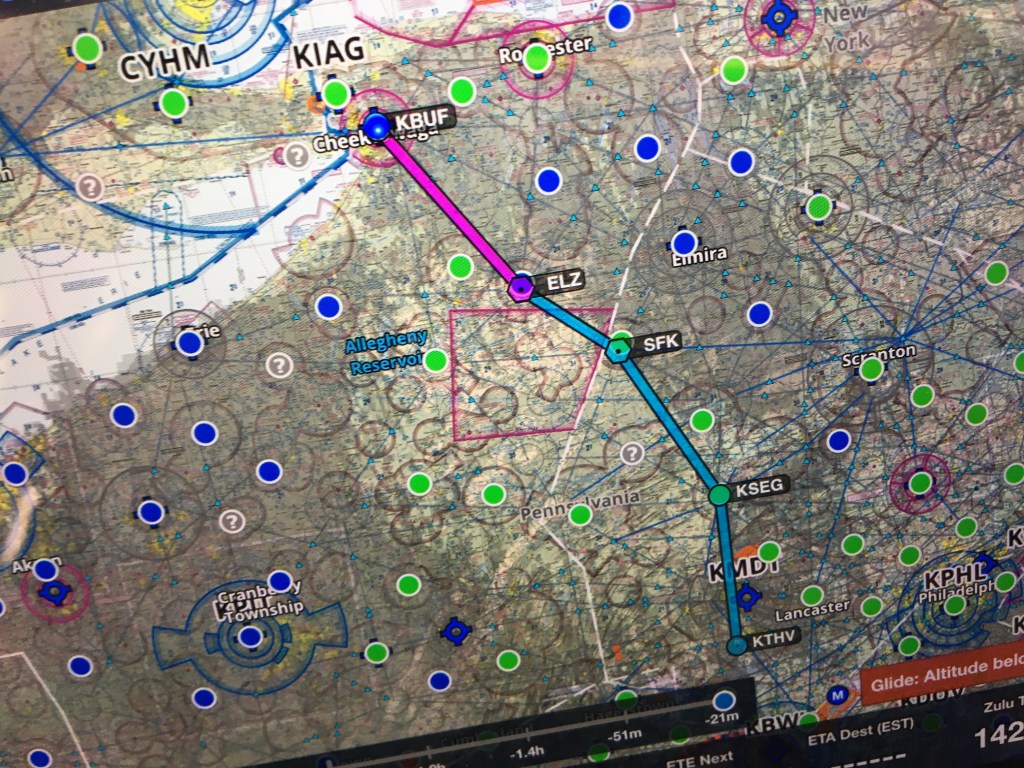
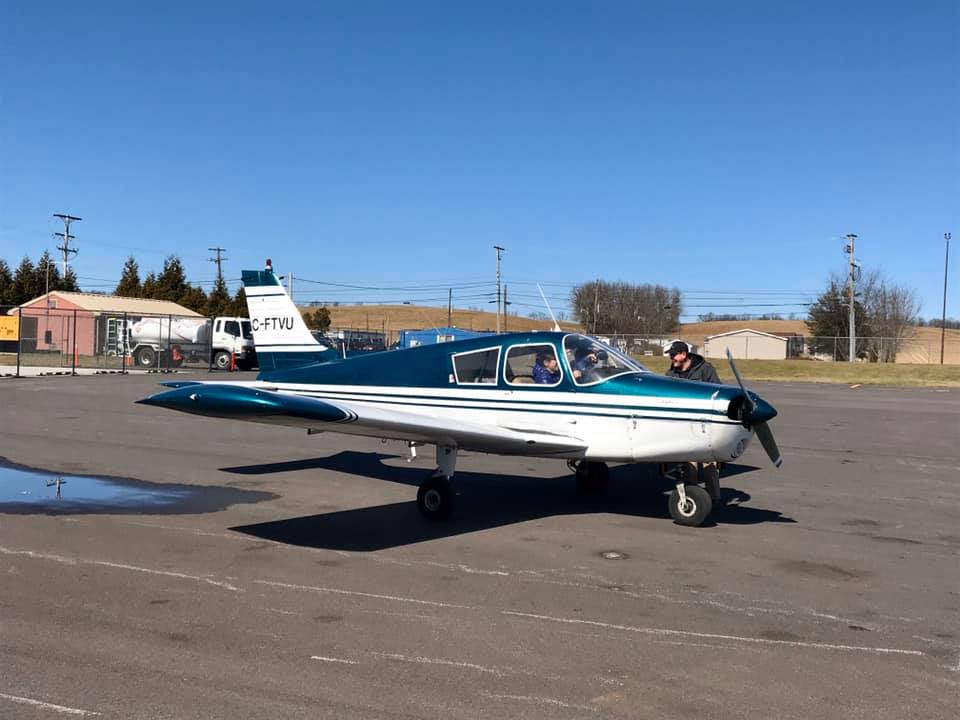
With all of Sandy’s paperwork in hand, flying logistics and weather became the next challenge. Based on the weather window – March 7th was our targeted fly date. When flying to the US, you must land and clear customs at an available port of entry – from St. Catharines (CYSN), this is Buffalo International Airport (KBUF). It’s pretty daunting to enter airspace that is being shared with jumbo jet airlines. From KBUF, we would then be flying directly to our destination of York Airport (KTHV), a journey that would take approximately 2 hours (a bit faster than the 7 hour drive).
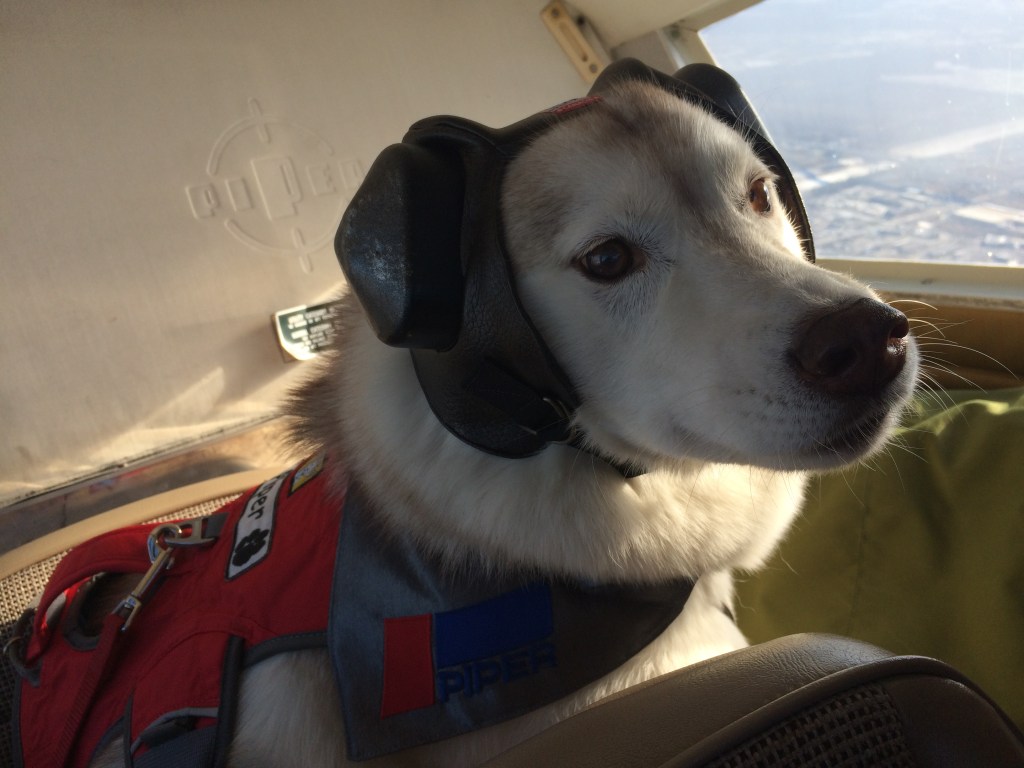
Landing in Buffalo International Airport on March 7, 2020 with Sandy in the back seat.
I remember Troy spending an hour on the phone with flight services discussing the incoming weather on the flight path we had planned. There were some icing conditions along the route that were causing some concerns. In-flight icing is one of the greatest dangers of cold weather flying because it causes airflow disruption that decreases the aircraft’s control and performance. Once we landed in Buffalo and cleared customs, it became a little bit of a waiting game to watch what the weather would do. The decision to fly or not to fly is a crucial conversation with all parties involved when evaluating safety, weather, flight risks and most importantly, pilot comfort. There is no shame in choosing not to fly, and I’ll save that particular story for another blog entry. Sandy was a hit at Prior Aviation as we waited out the weather, she charmed the staff, instructors, and customs officials. When those blue dots on the map began to change to green, we were airborne again.
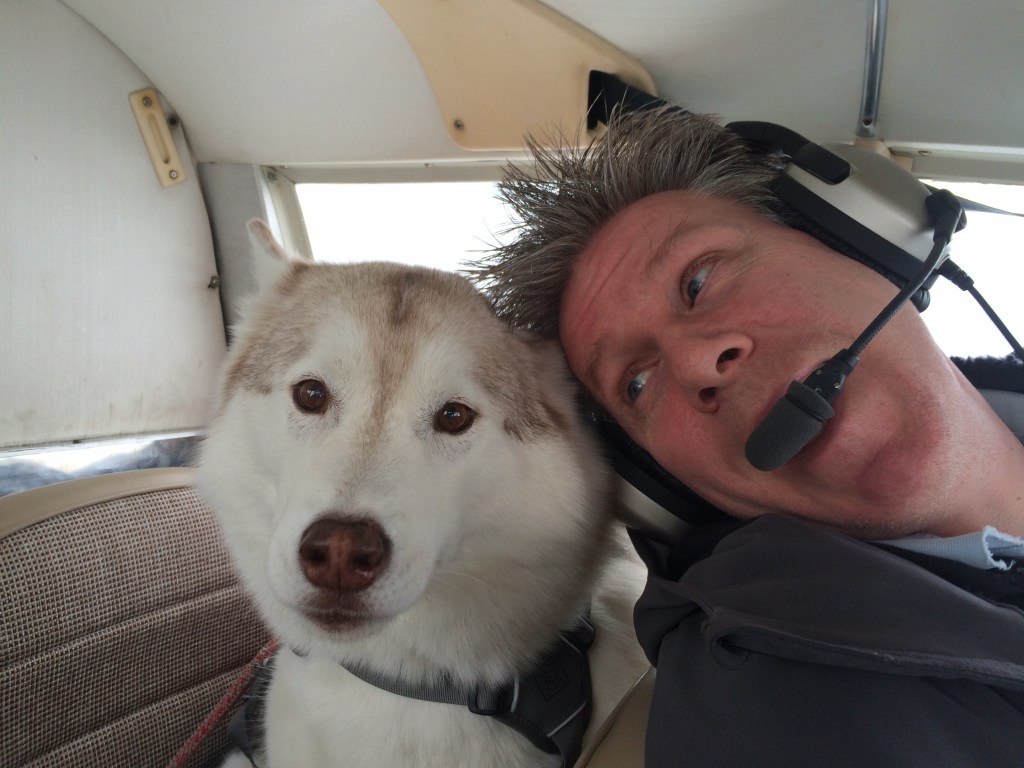
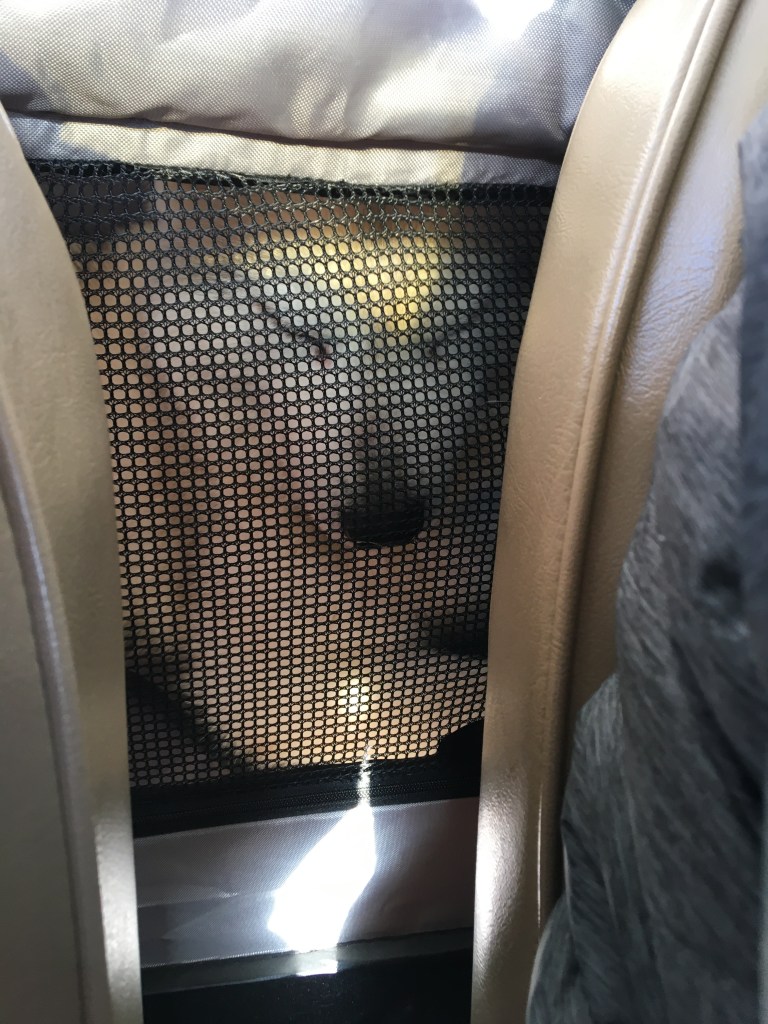
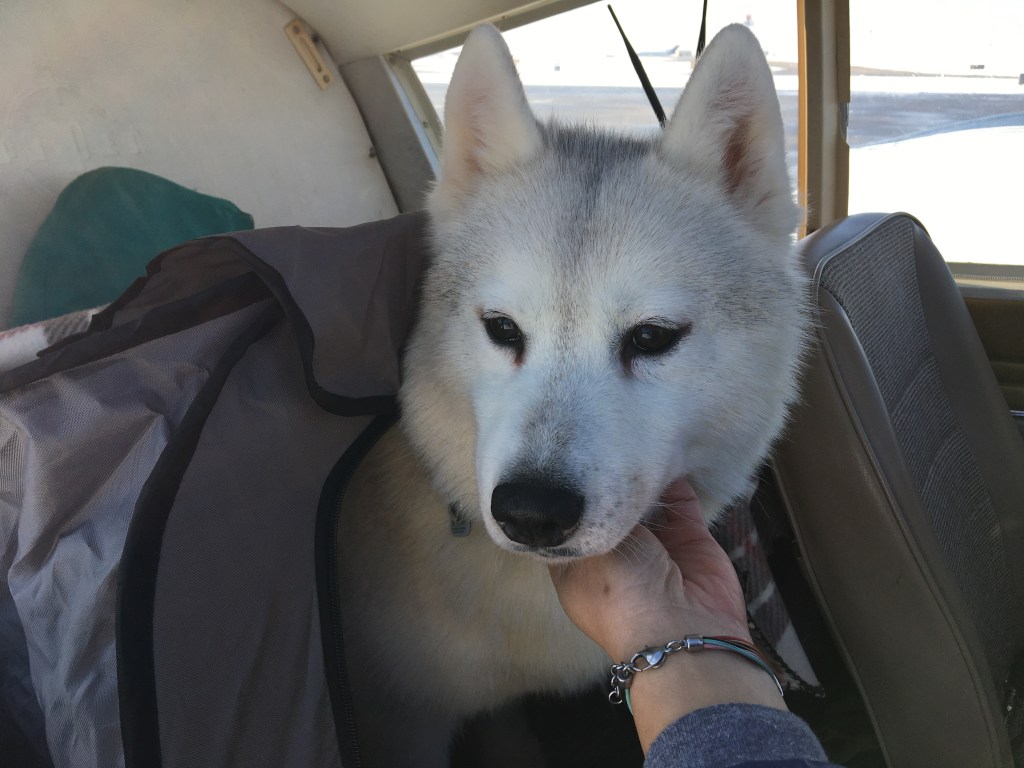
We used a soft crate in the back of the Piper Cherokee to contain Sandy for a couple of reasons: 1. This is a dog that has never been in an airplane and so containment was for the safety of Sandy and the flight itself. 2. The backseat of a Piper Cherokee really isn’t that big, so a soft crate was about all we could ram into the back. She was a wonderful passenger throughout the entire flight, only attempting jail break by sucking on the zipper when we had been on the ground in Buffalo.The arrival and friends awaiting in KTHV made the trip all worth it and more.
This particular flight will always be a treasured moment for Troy and I. While flying itself is a privilege and a joy, to be able to connect friends together through flight etches the memory in your heart. Looking back on this flight, we didn’t realize just how important this date would be. It was only a week later that the world shut down, the borders became closed, and we would be in lockdown throughout 2020. How blessed we were to have flown one year ago today. As things seemingly begin to “nose up” as the vaccines continue to roll out, I can only begin to wonder about the future adventures we might have with the RV14-A when it is completed – however, that’s a bit a ways away. Troy has at least another 1200 hrs of work ahead.
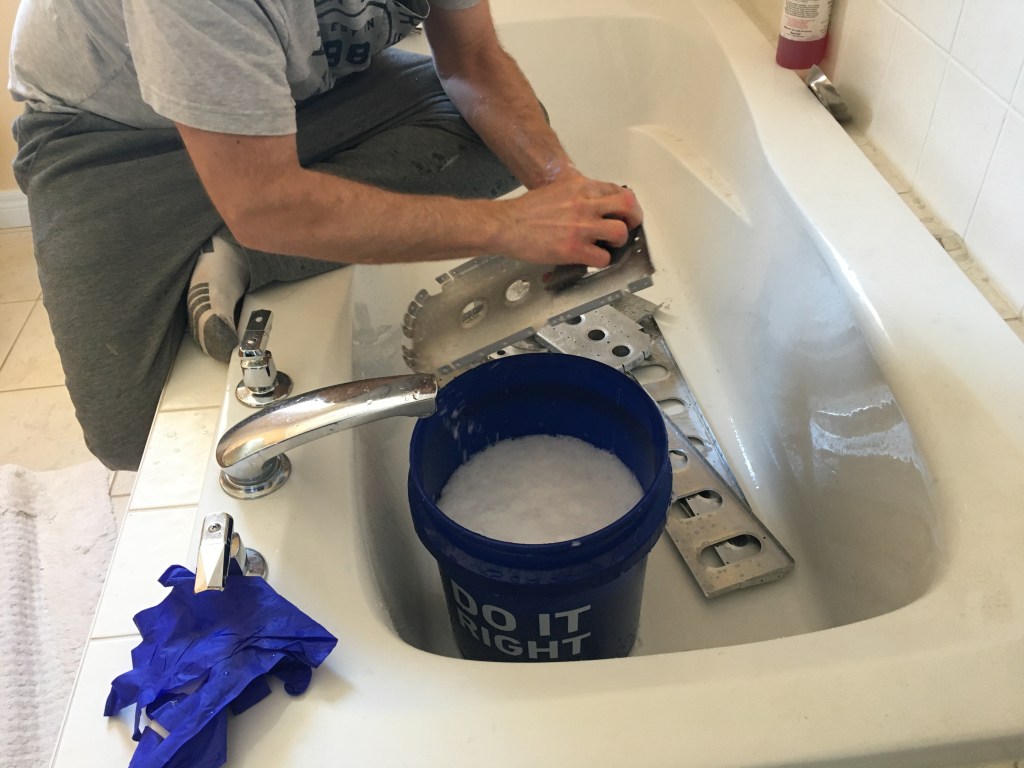
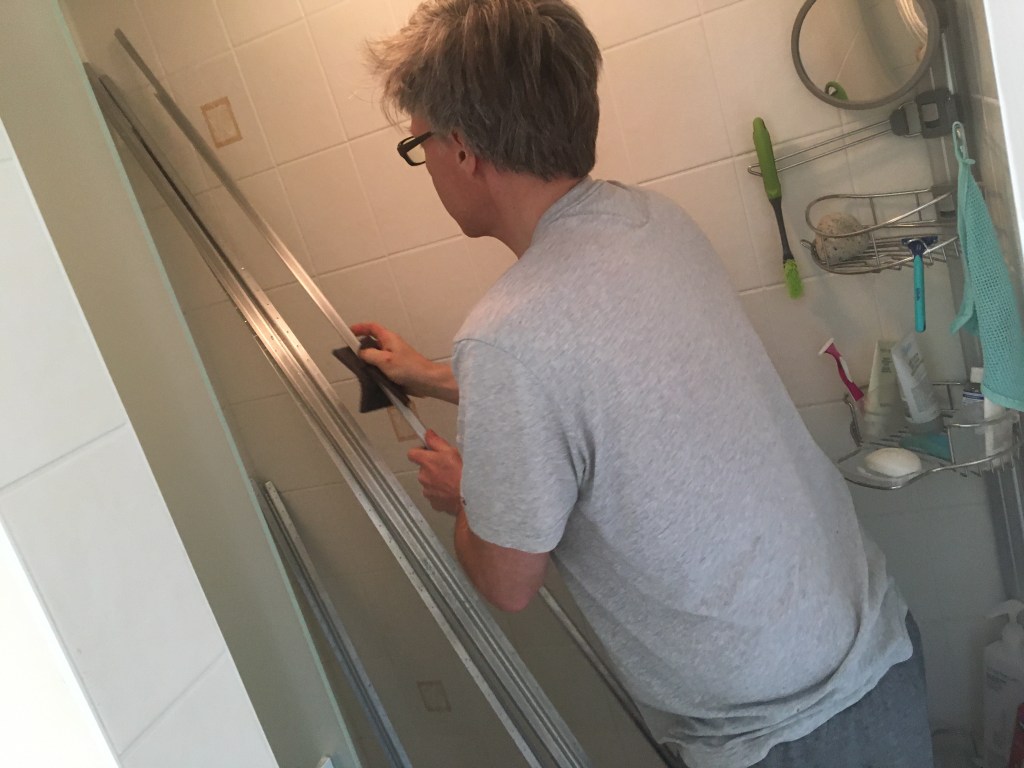
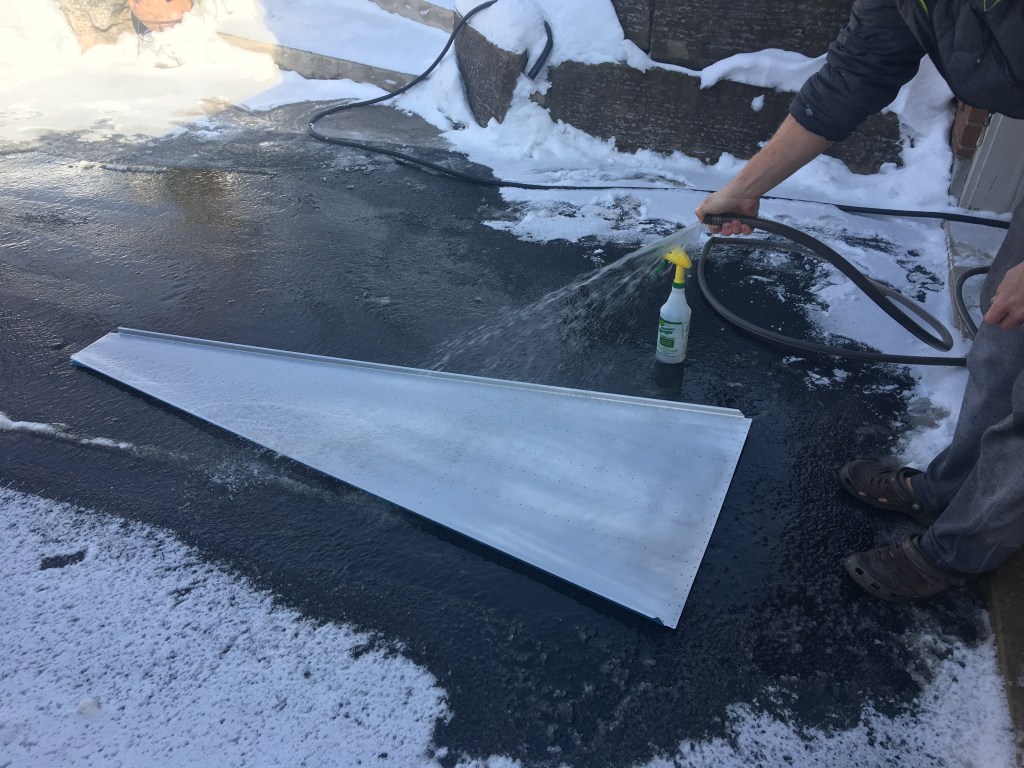
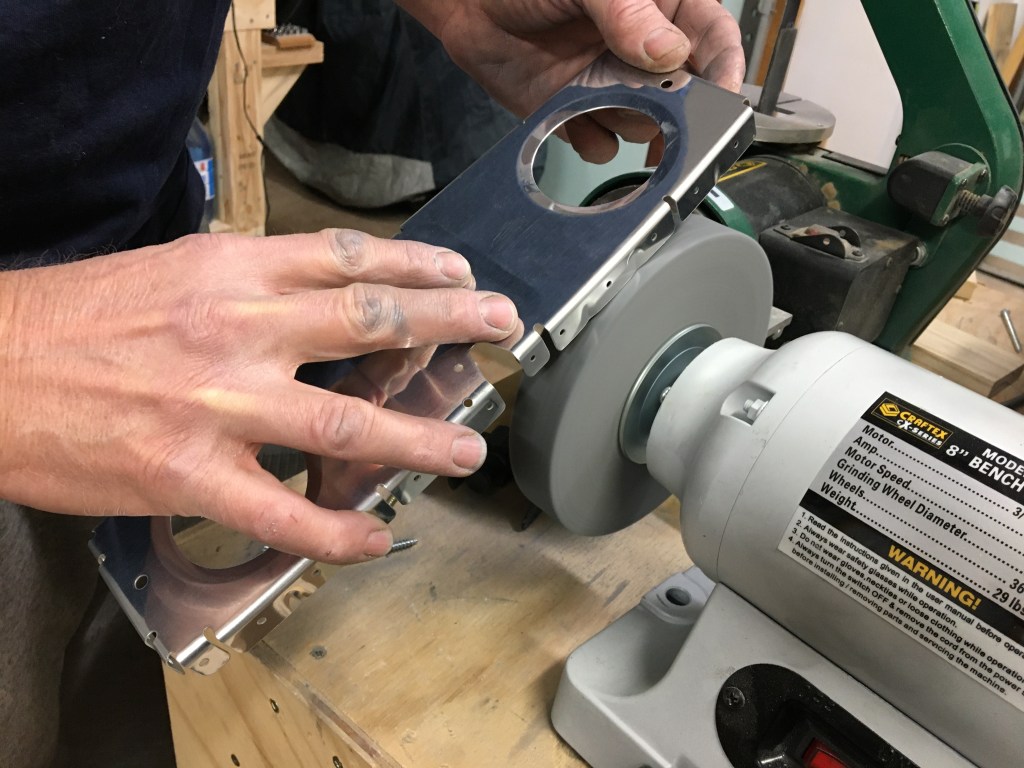
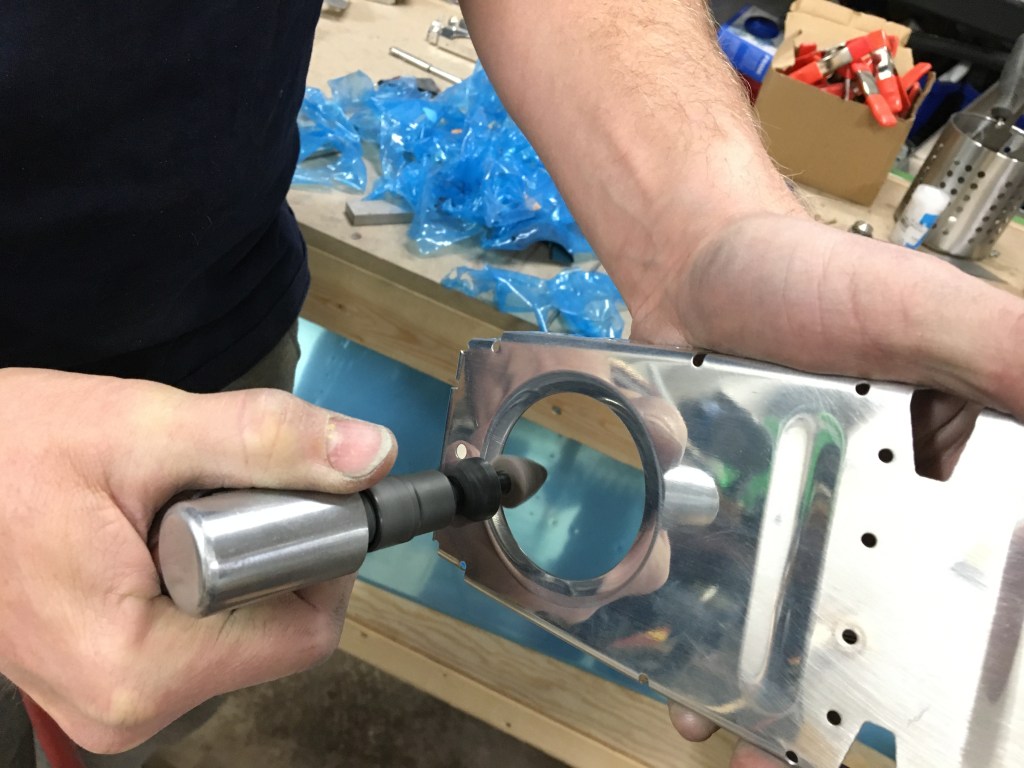
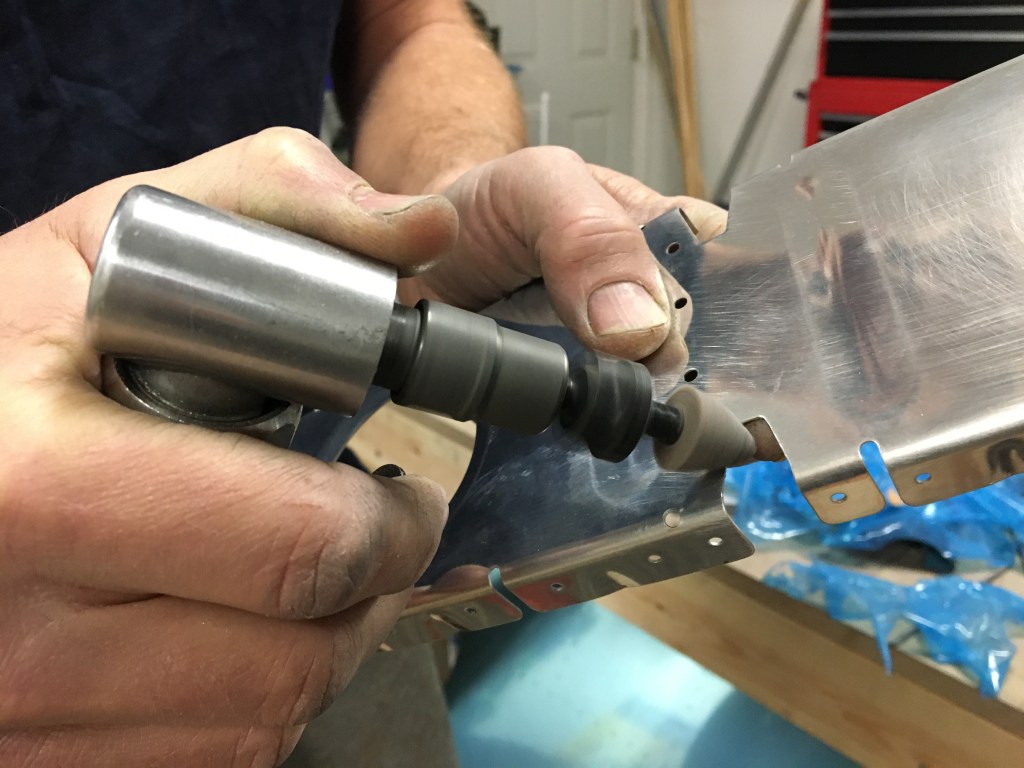
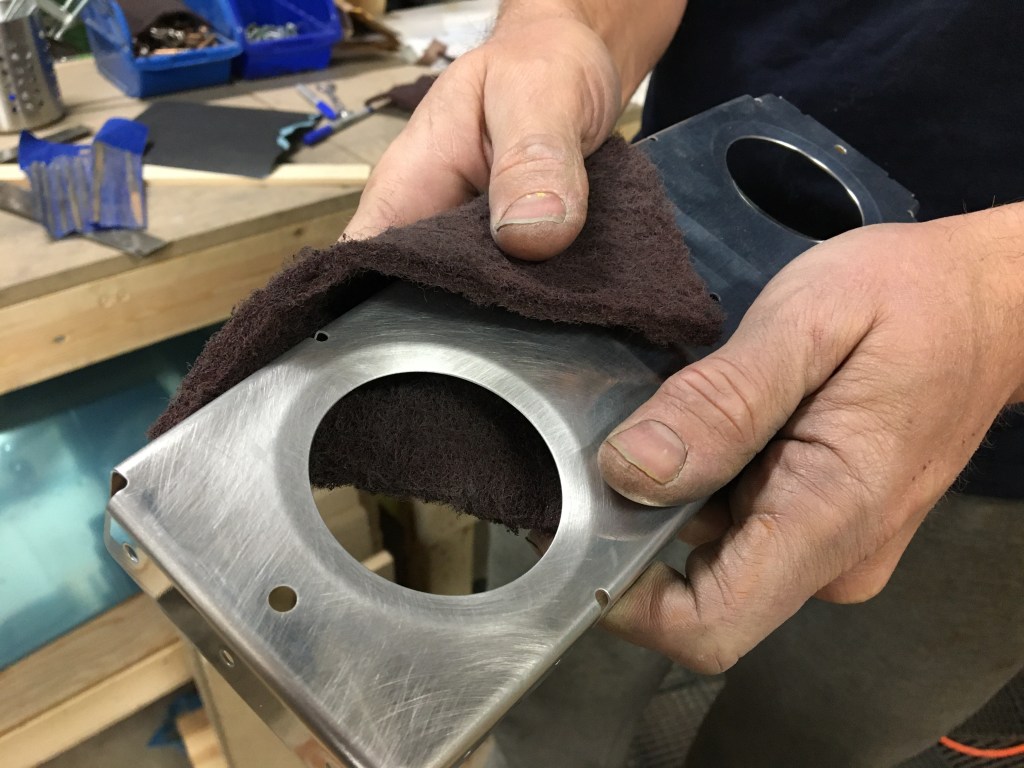
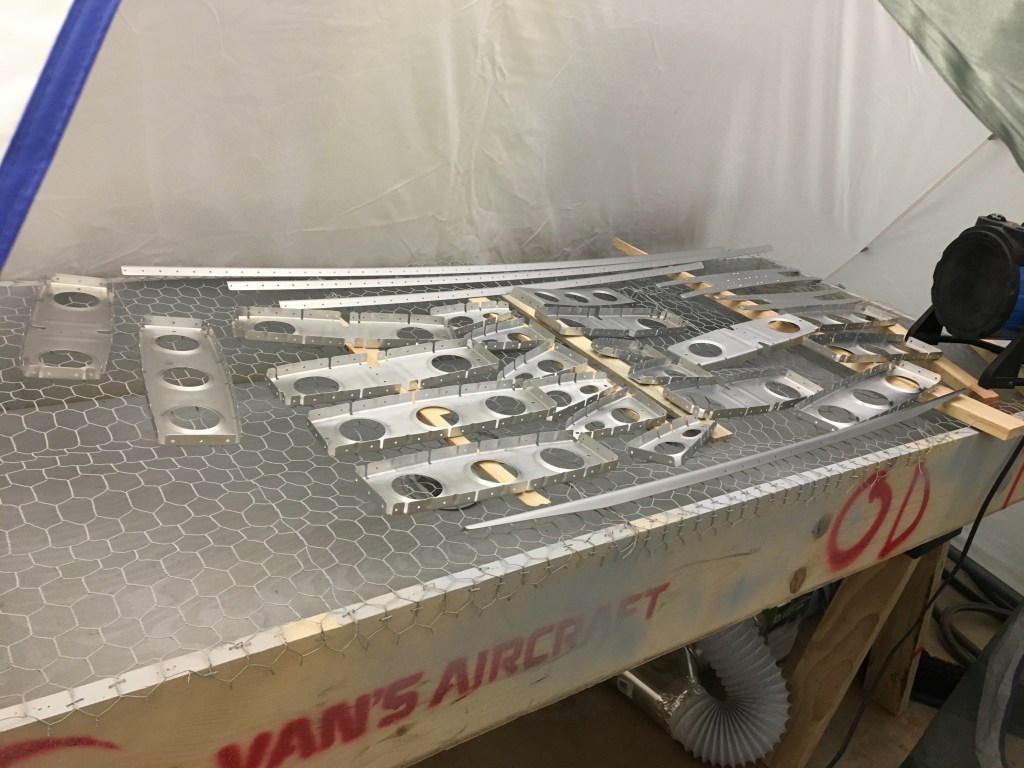
Along the same lines of winter flying and icing with Sandy – one consideration of building an airplane in Ontario, in the dead of winter, is “how am I going to wash and prepare all these huge surfaces when it’s -10C outside?”. You take a bath and shower with the pieces that can fit, and then, like with flying, you wait for a window where the weather will cooperate.
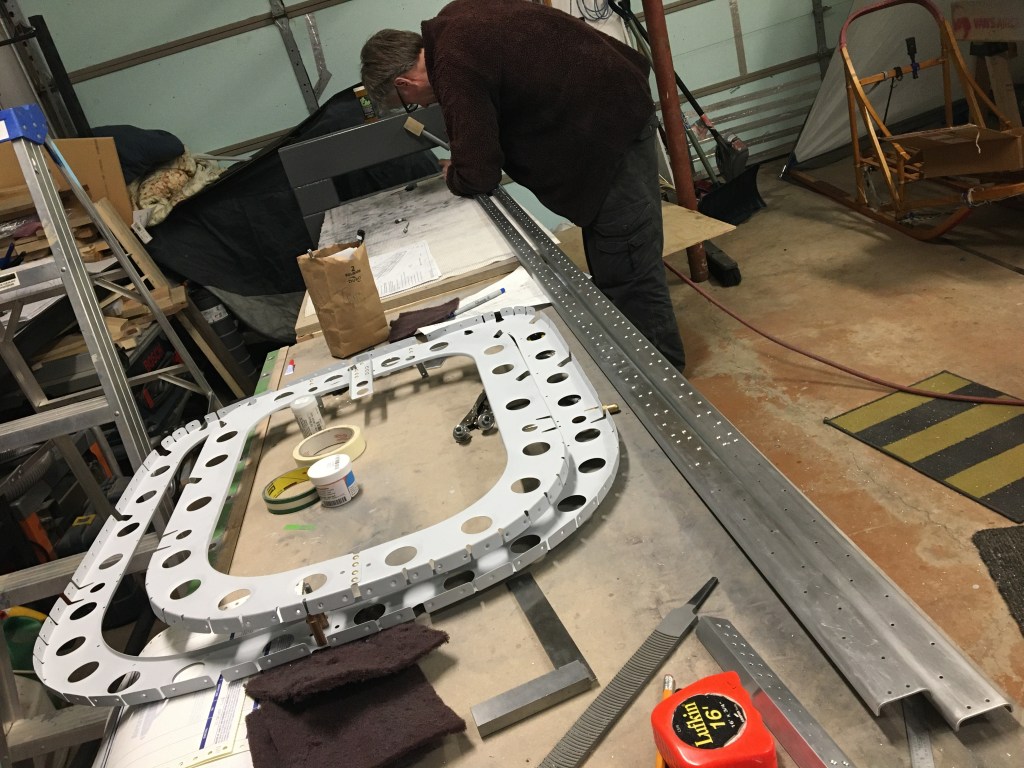
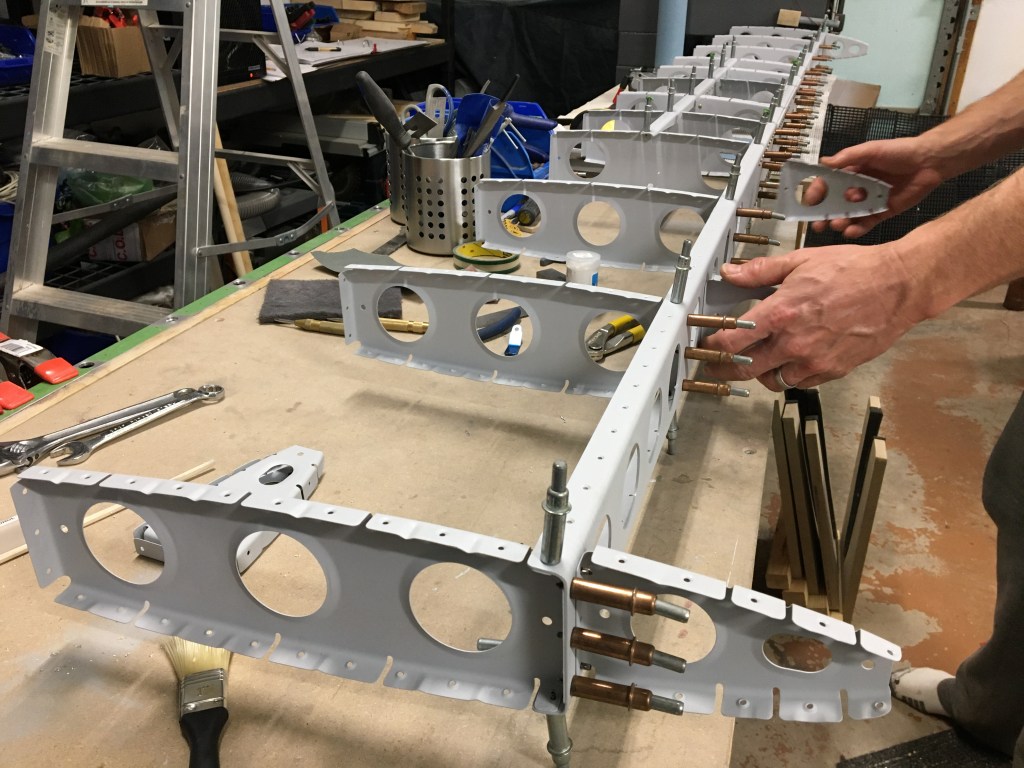
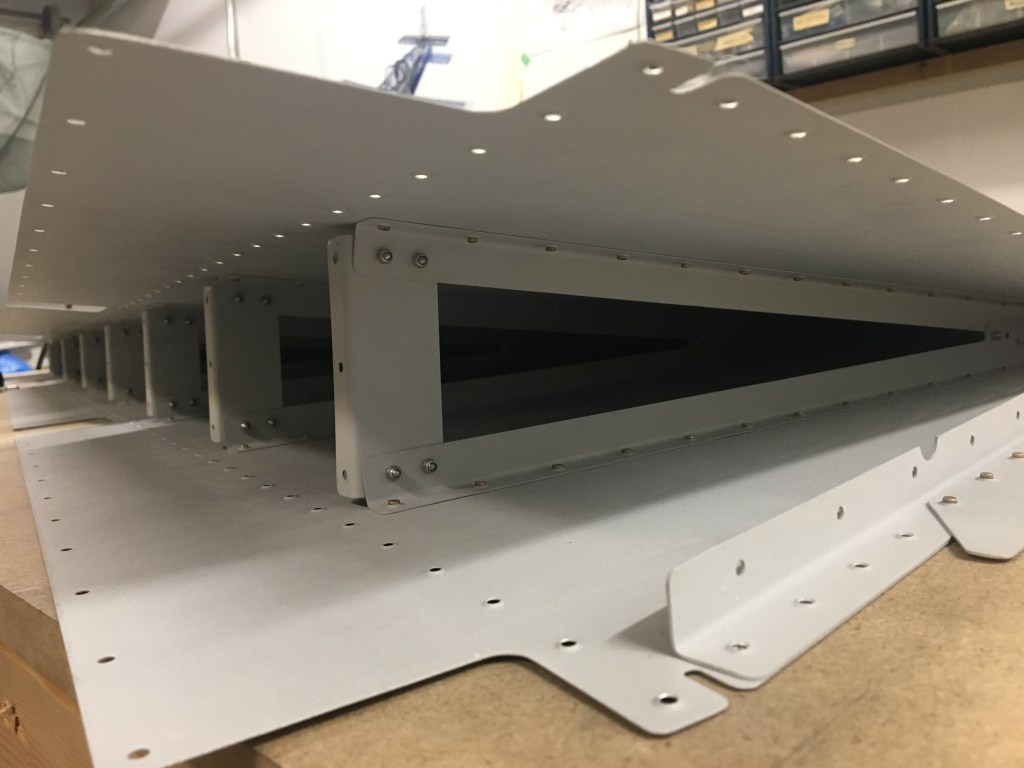
The fuselage of the empennage is coming along nicely… and it’s HUGE. This really puts into perspective just how big this airplane really will be when you mentally start assembling the other completed components and quickly realize the garage is too small. More to come!
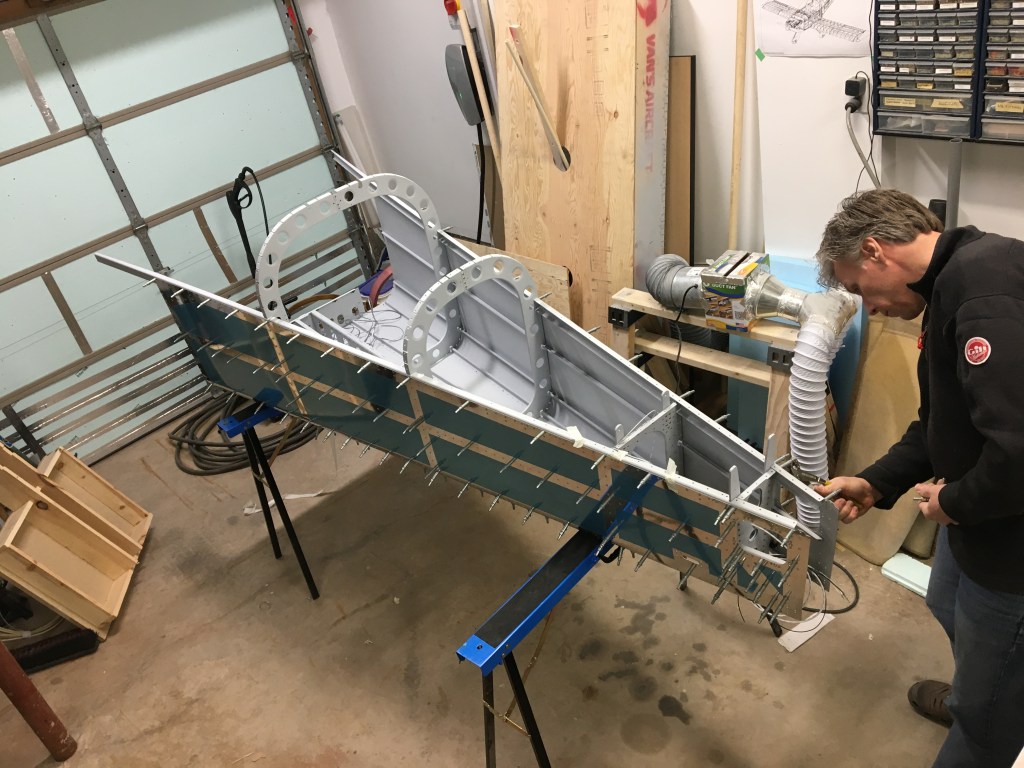
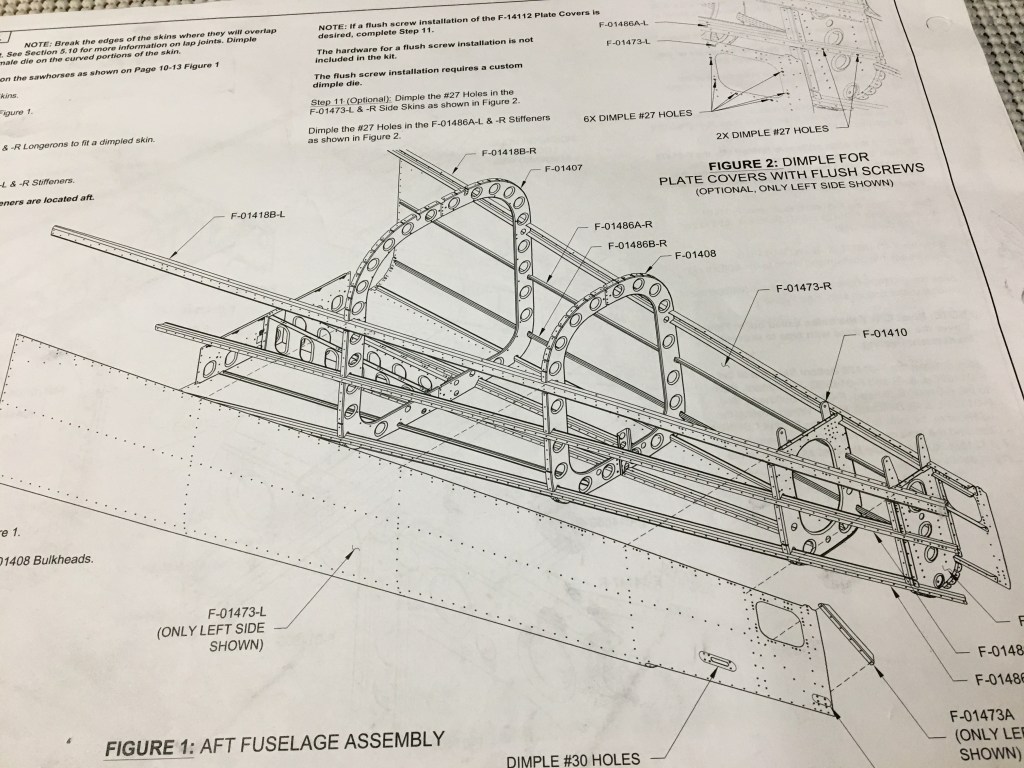
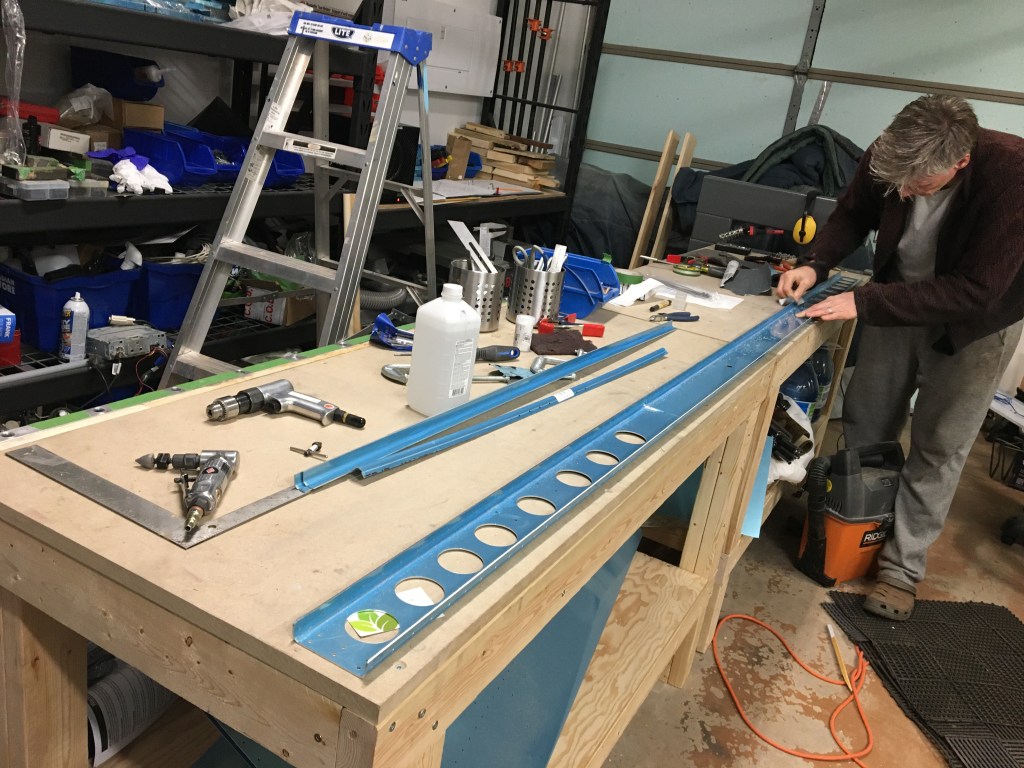
The beginnings of the assembly of the aft fuselage. To give some size perspectives – the longerons are approximately 10.5 feet long.
It was a tough slog after the Christmas holidays – gone were all the gifted baked goods and the monotony of adulting returned, much like the movie Ground Hog Day. Both Troy and I had some RTFM moments during our own holiday projects – mine didn’t have additional cost and were reversible with my Jekca dog kit. Troy, however, has now become a regular at Aircraft Spruce, they recognize his car the minute he pulls up for curb-side replacement part and new tools pick up. Also, the “I drilled my finger” has become a routine occurrence that is unceremoniously shrugged off now.
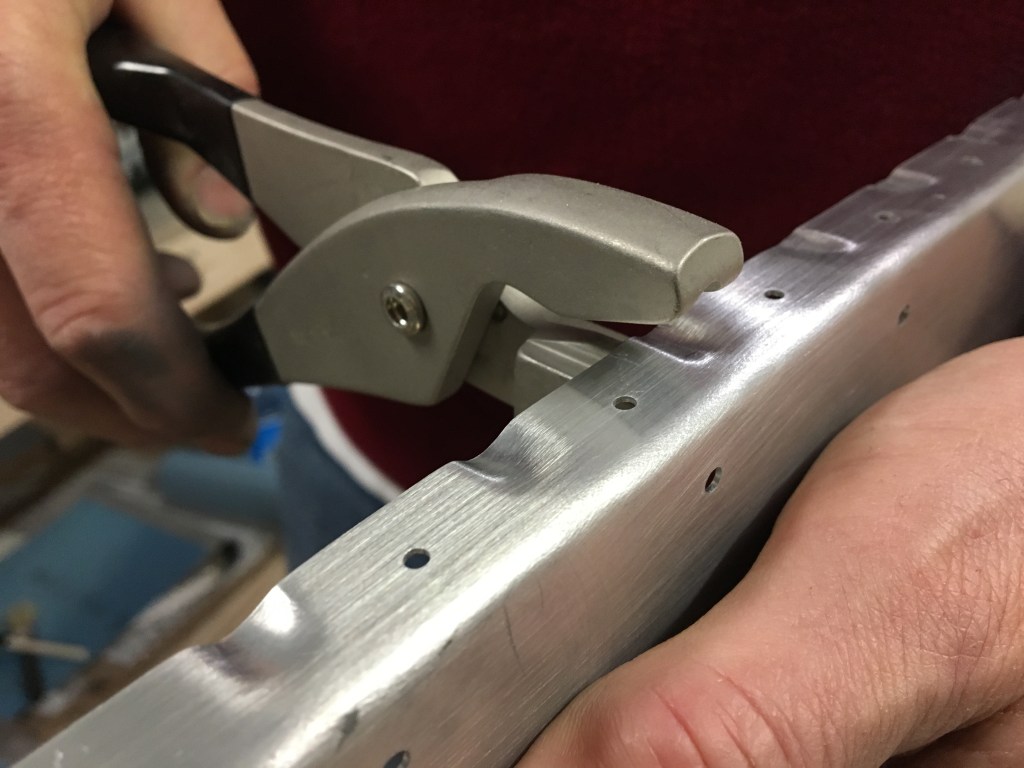
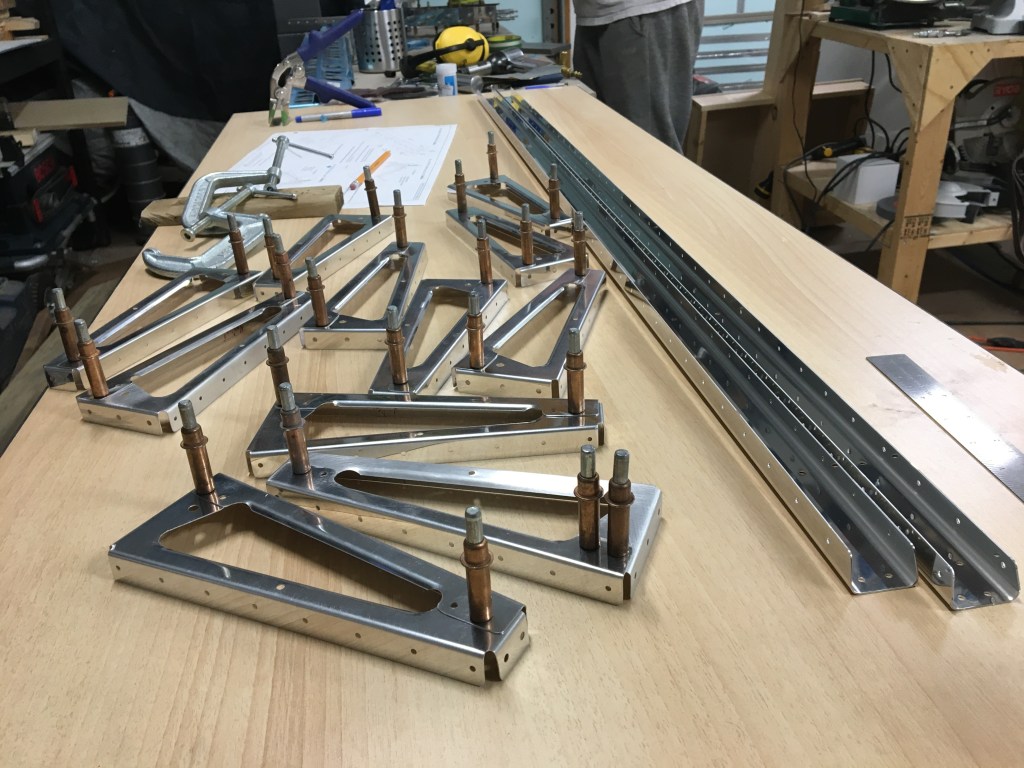
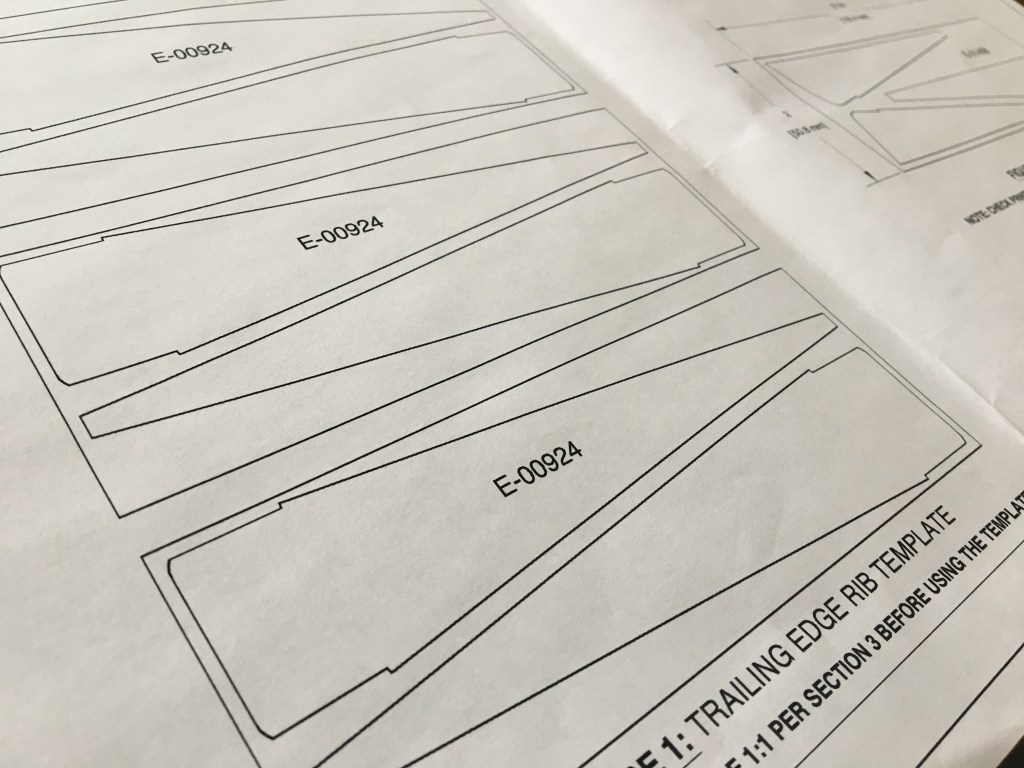
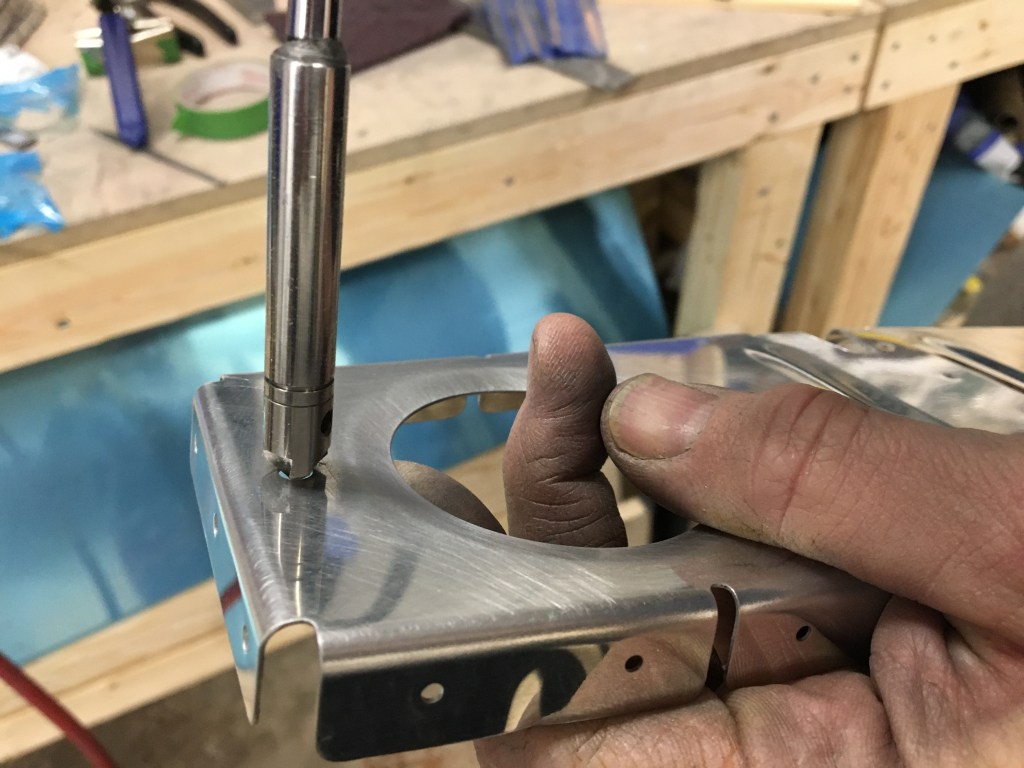
The tip rib is a flat piece of metal with edges that are bent at 90 degrees all around however the large surface needs to be flat and lay flush to the rib that it will ultimately be riveted to. In order to flatten this, a pair of fluting pliers is used and small dents are placed along the folded edges to assist in reshaping the surface of the tip rib. It’s sort of like taking the wrinkles out of a bed sheet that is draped on a bed. This is a great video demonstrating fluting: https://youtu.be/z6llywjGgxA?t=100
The next part of the plane that Troy has been working on since the last post is the elevator. This part of the plane has received some media attention in recent years. System malfunctions related to the elevator controls caused the fatal crashes of Lion Air Flight 610 and Ethiopian Airlines Flight 302, leading to the grounding of the Boeing 737 Max aircrafts in 2019.
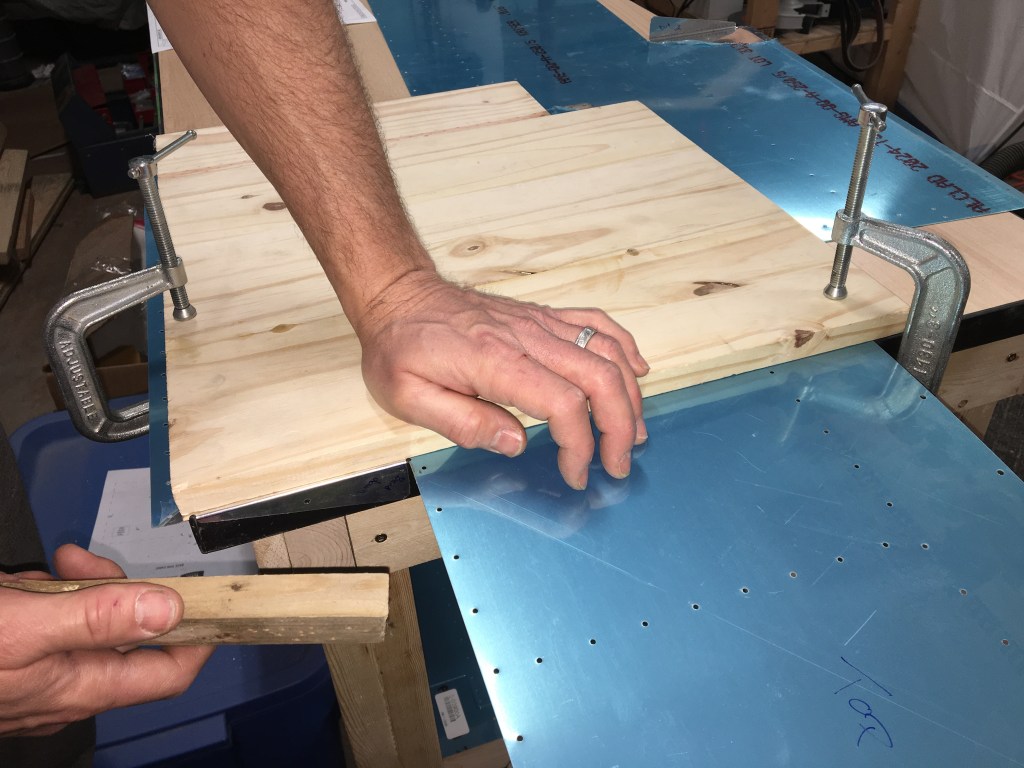
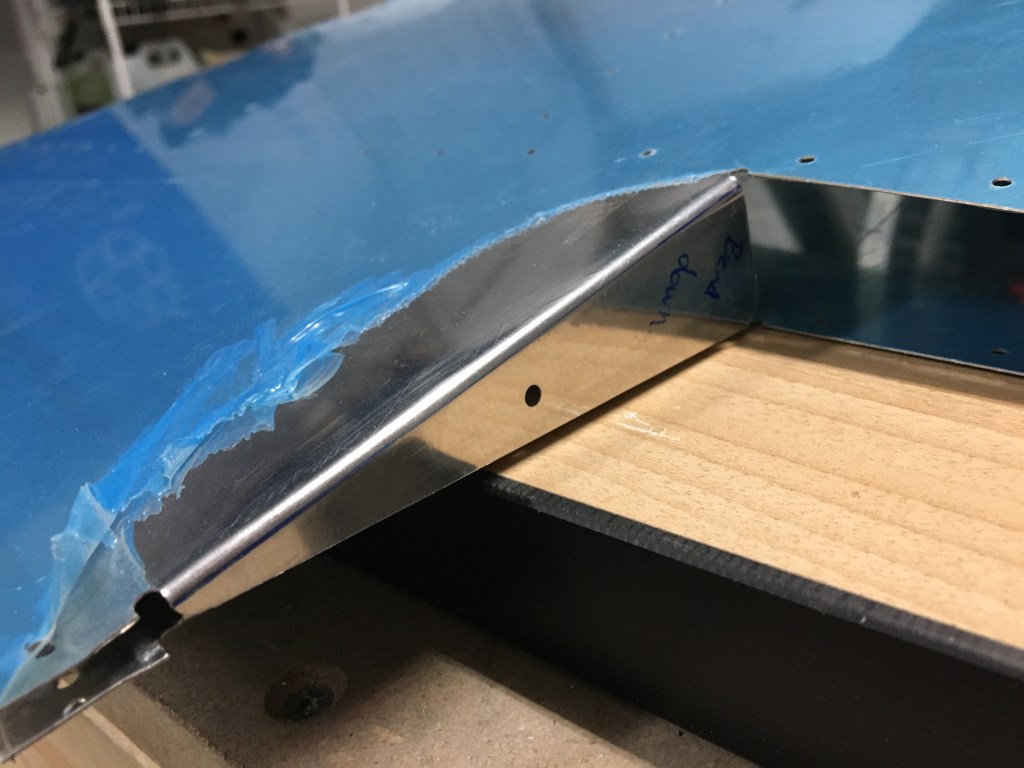
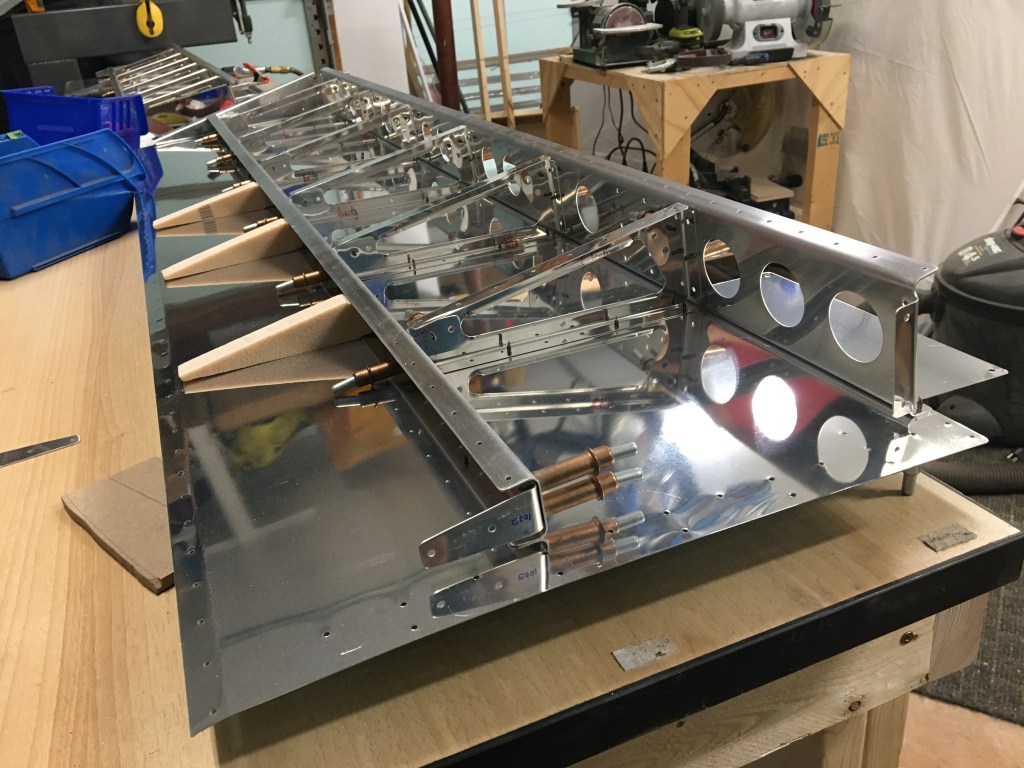
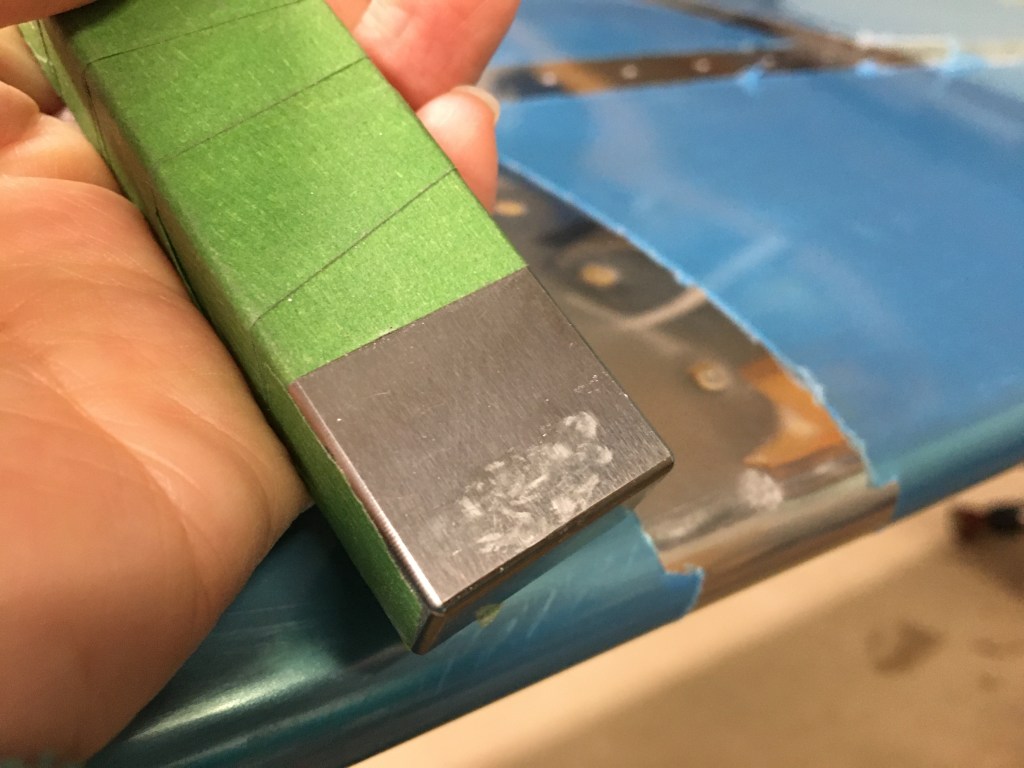
TOP ROW: Bending the edge of the elevator where the trim tab will fit – this process seemed a little mundane compared to the other steps – clamp part down with wood, apply pressure with block of wood, boom. BOTTOM ROW: fitting all of the stiffeners together with the spar and subsequently cleco-ing them to the elevator skin.
The position of the elevator changes the amount of lift forces on the horizontal stabilizer, ultimately controlling the airplane’s pitch, or simply – this is your nose up or your nose down control. Dr. Sbaitso’s grandson does a great job of explaining the various primary control surfaces in this video and specifically the elevator here. Fun fact, I’m actually proudly geeking out over the fact that I know who Dr. Sbaitso is and Troy doesn’t.
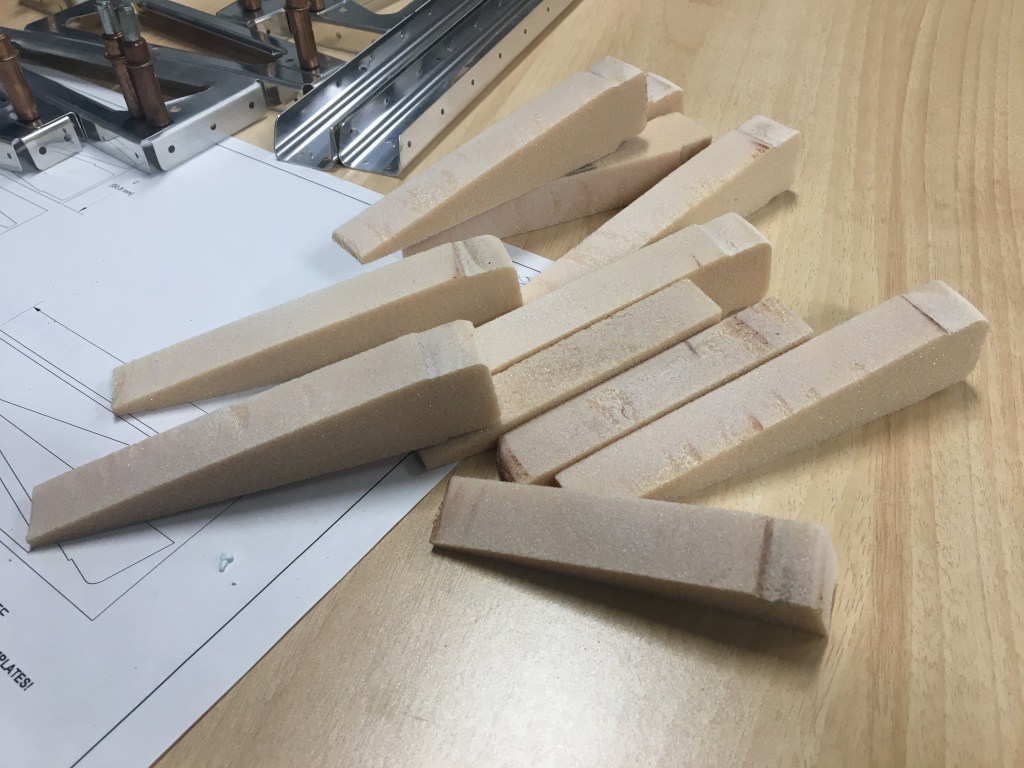
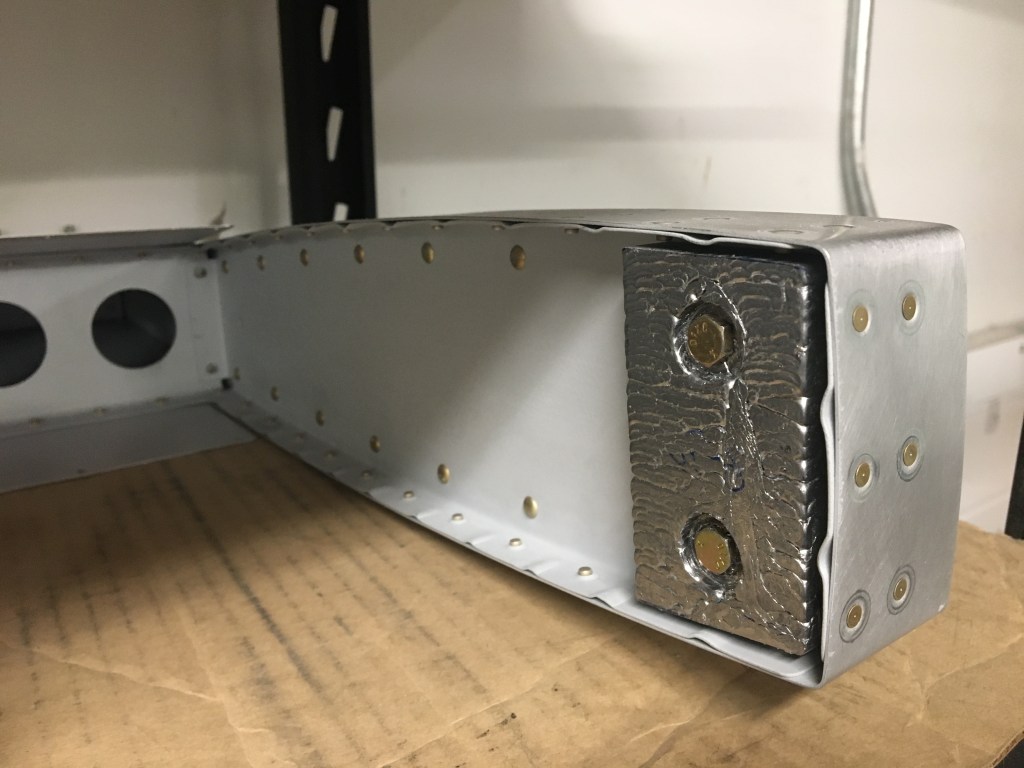
TOP ROW:The elevator also contains specially cut pieces of 80 kg/m3 density PVC foam to add structural stability to the elevator while keeping the entire part extremely light. Ironic, because the elevator also has approximately 3 kg of lead added to it. BOTTOM ROW: Lead weight is added to the elevator to balance the control forces on the elevator around the pivot point, the hinge where the elevator attaches to the horizontal stabilizer.
There have been multiple news articles on the 737 Max and interestingly, a plethora of personal home flight simulator videos on YouTube of people making their own episodes of Mayday. Another fun fact – Mayday episodes were frequently filmed at Brantford Airport – a fantastic breakfast destination in 2019 PC (Pre-Covid). A faulty sensor believed that the airplane’s nose was pointed higher than in actuality, leading to the automated system (MCAS) changing the position of the elevator, forcing the nose down, and ultimately into an uncontrolled dive. Thankfully, Troy’s RV-14A does not have an MCAS system. There is however, in this part of the kit build, the first implementation of electronic components – the trim servo.
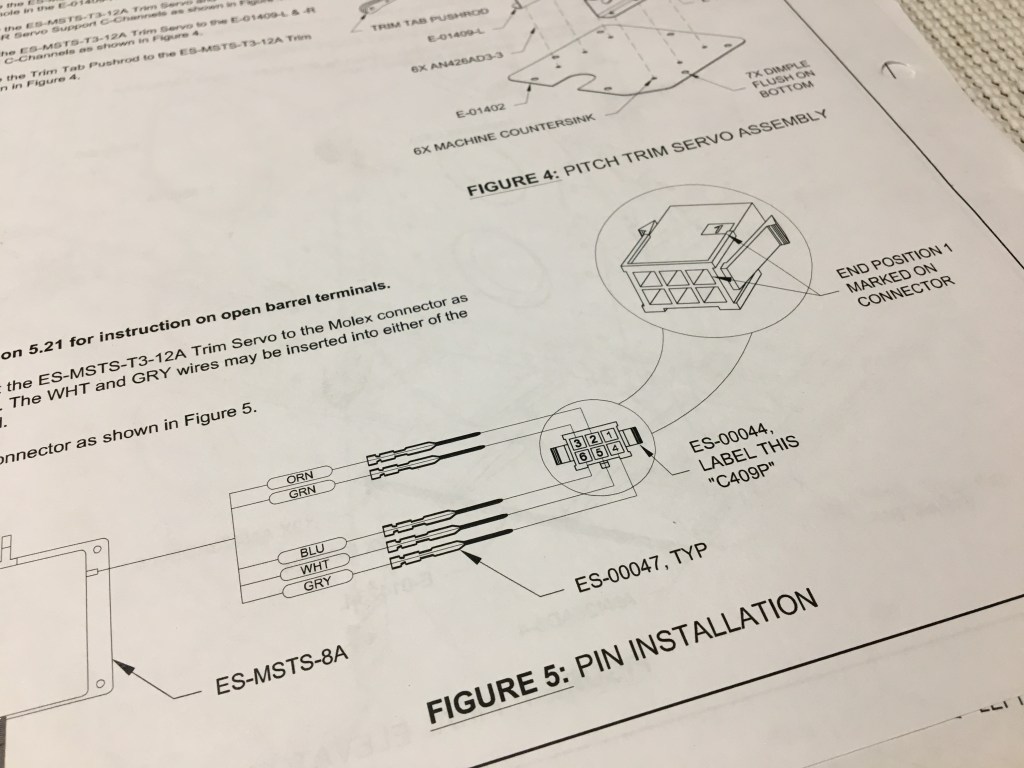
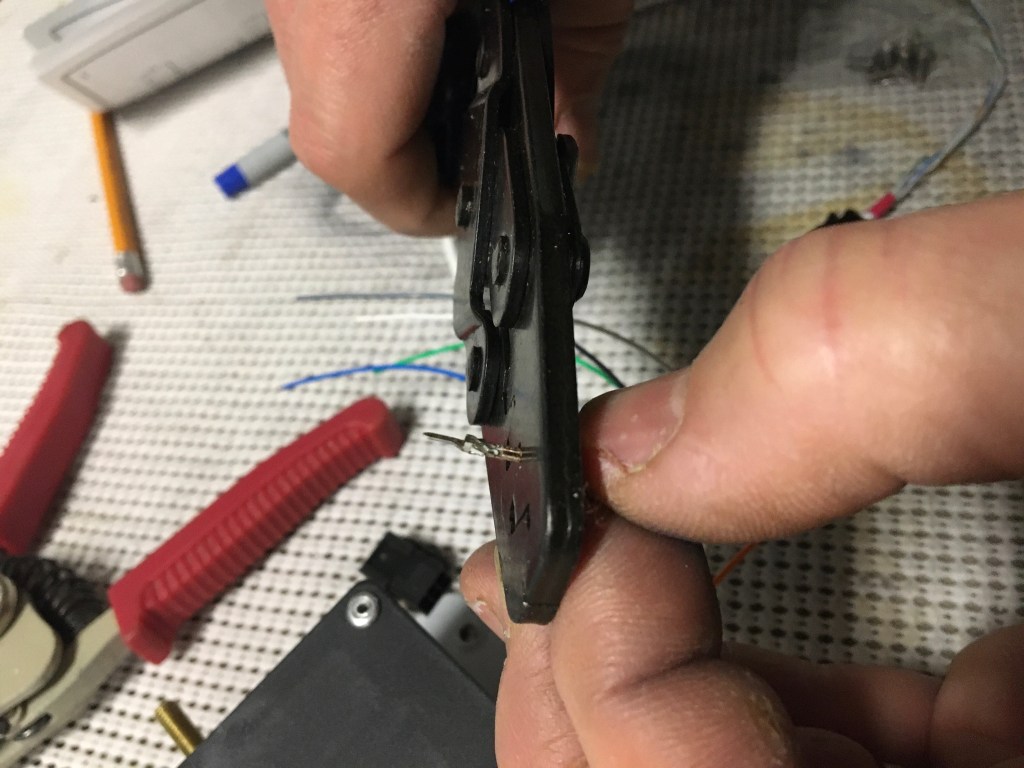
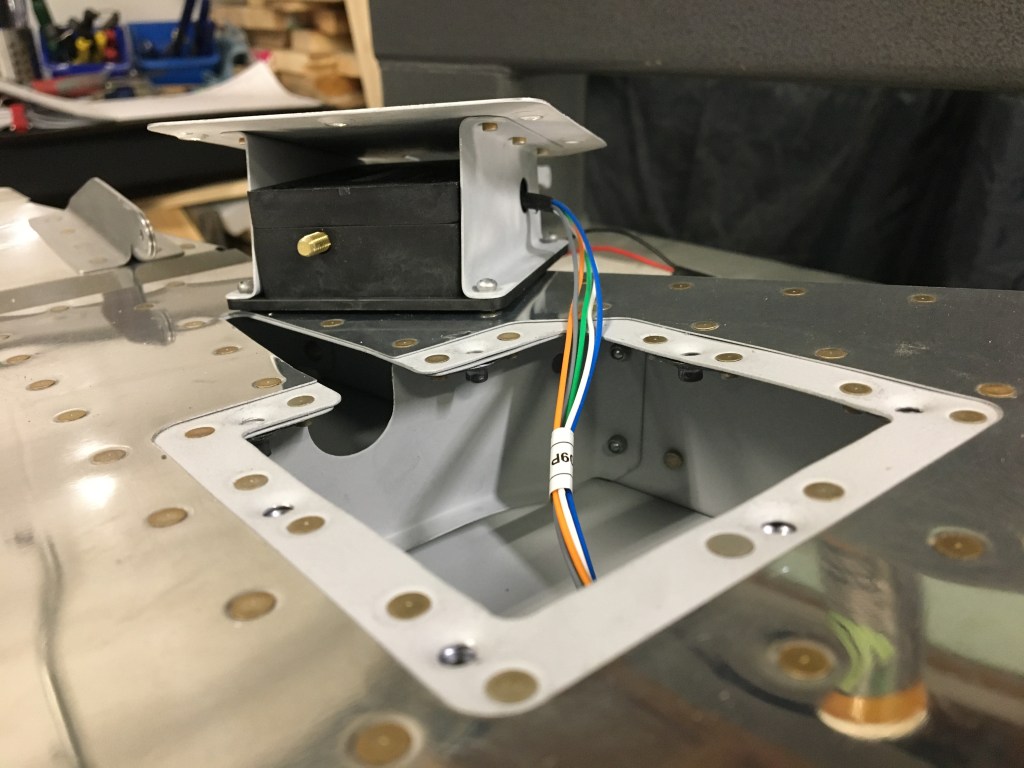
Assembly of the trim servo involved crimping a connector pin onto 5 coloured wires and inserting them into the connector – which will eventually run to the control button on the control stick.
The trim tab actuator rod is made up of 3 pieces of aluminum that had to be cut with the bandsaw, deburred, double flush riveted and then primed.
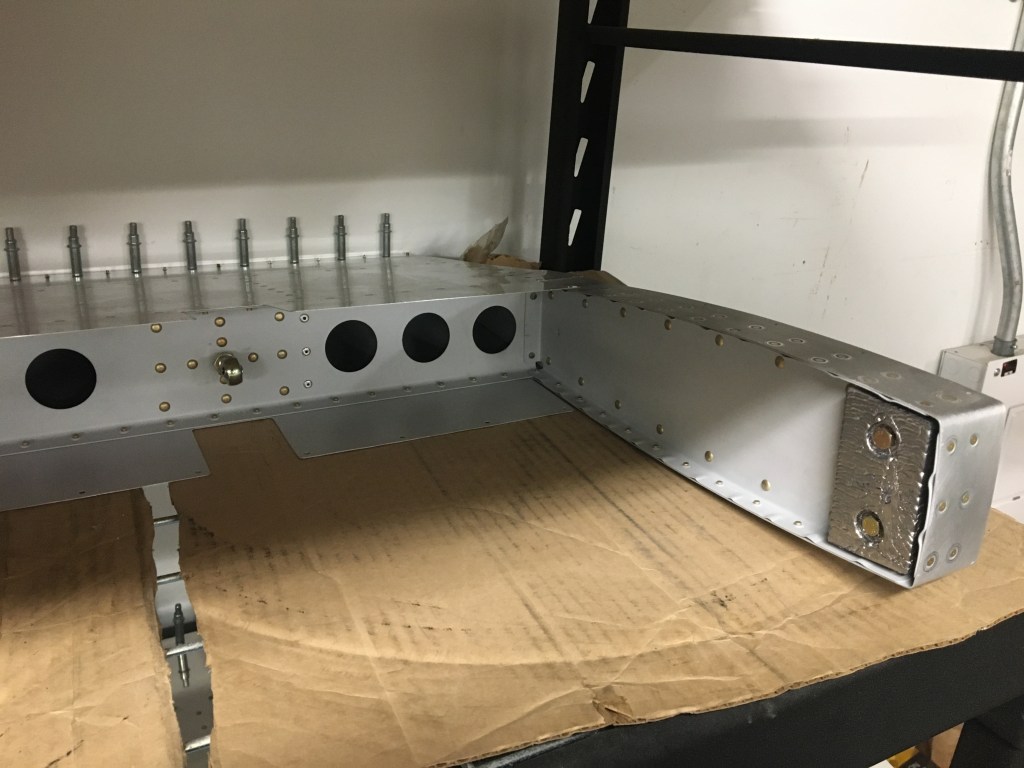
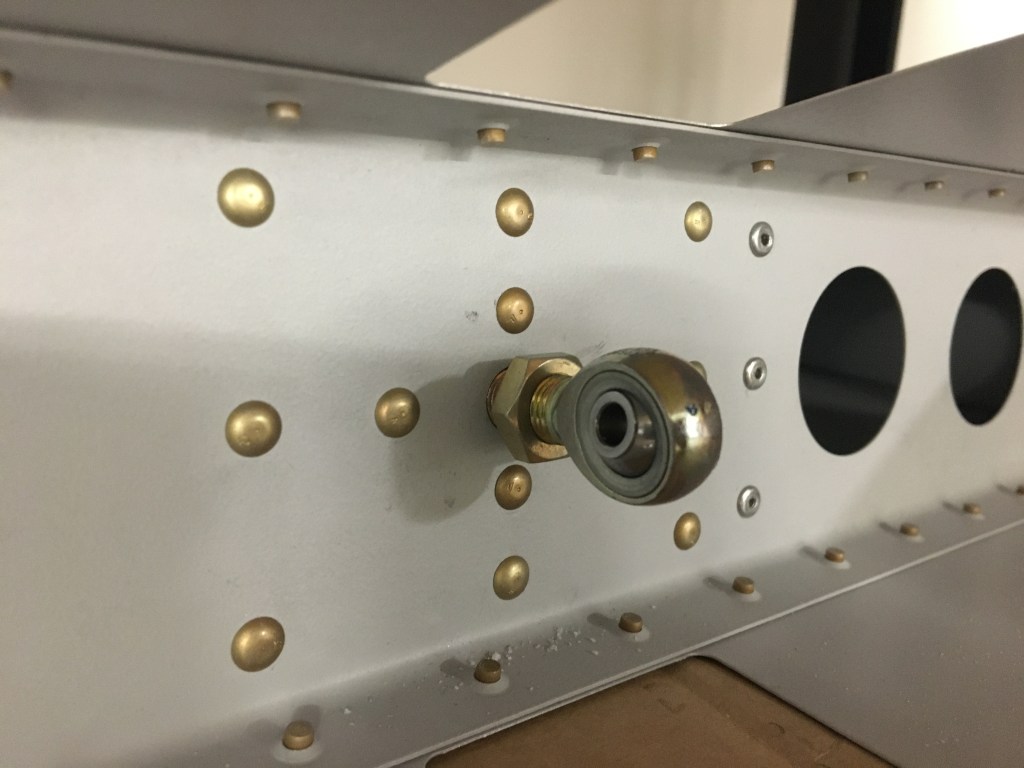
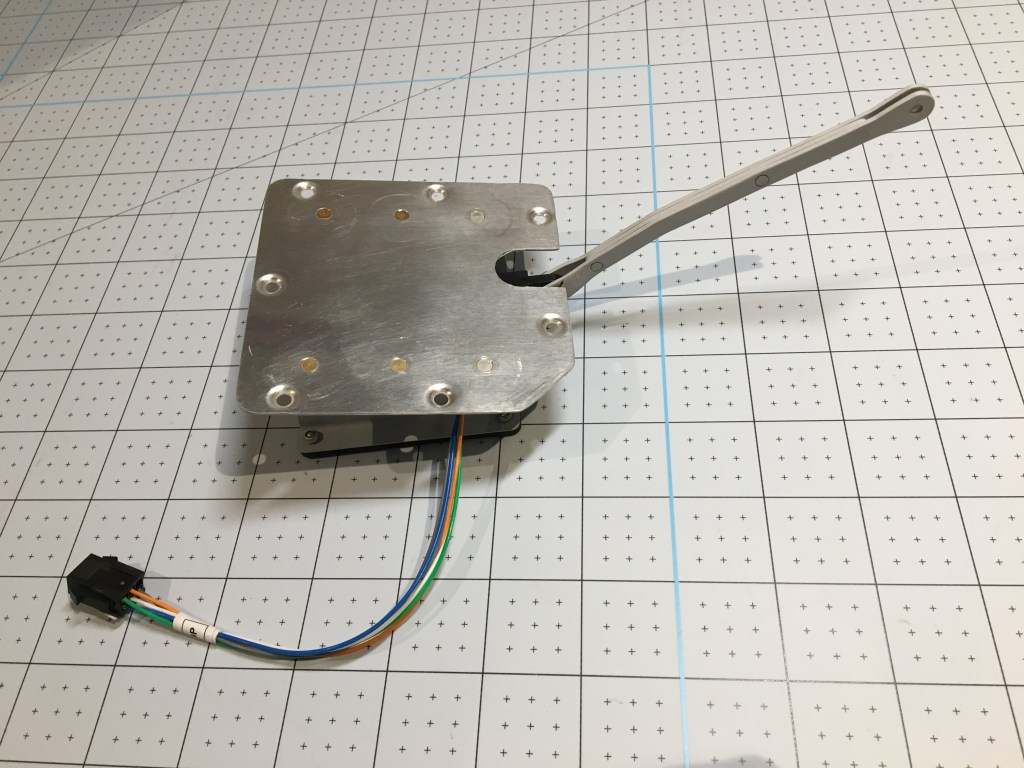
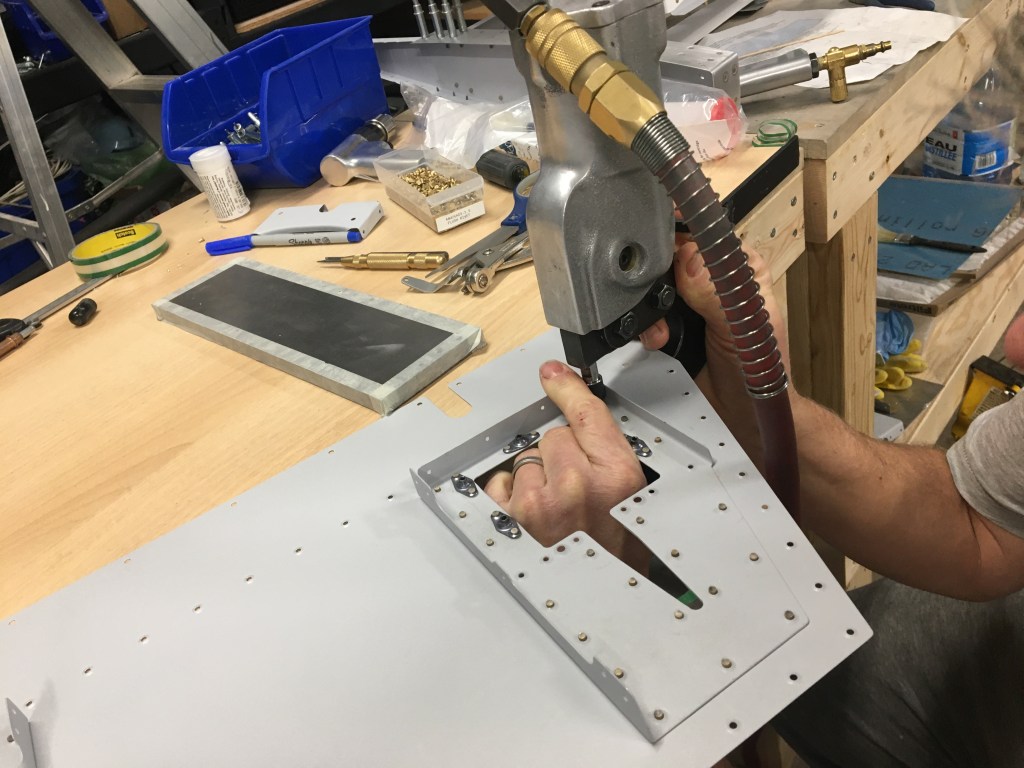
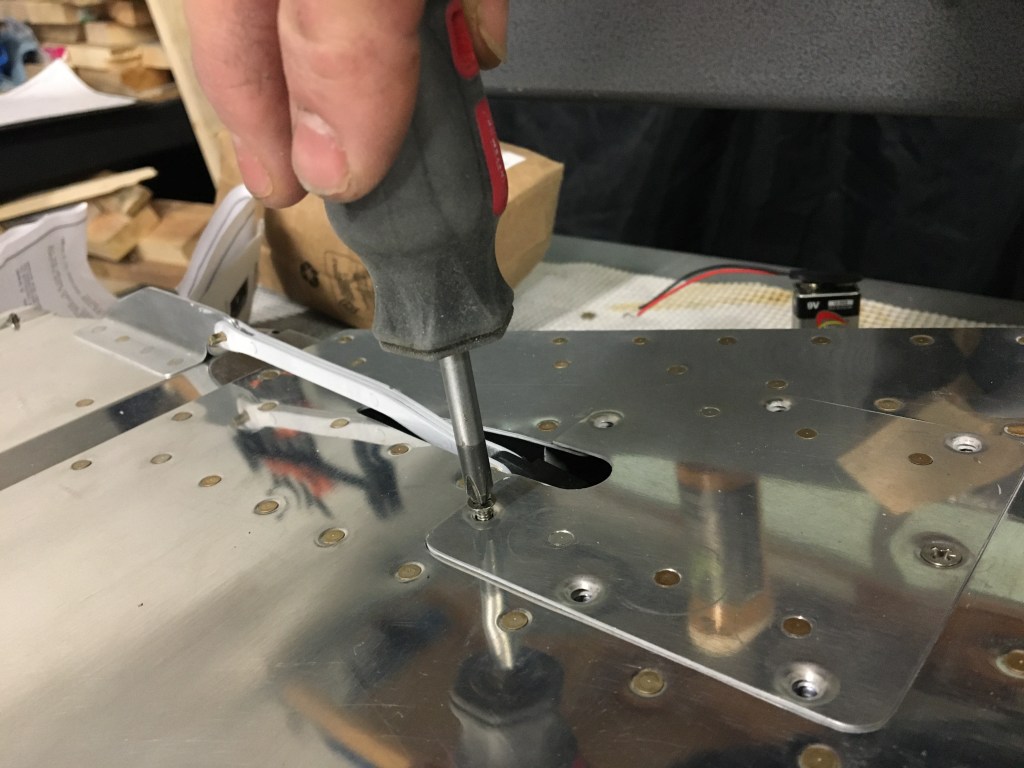
There were a few tight spots to rivet in the elevator since the trailing edge tapers down to a knife’s edge and wow – look at that, the first use of screws! A nut plate is riveted into the area where the trim servo lives so that Troy can have easy access to the electronics if there are ever any issues.
As the pieces are coming together I’m still wondering where everything is going to be stored. The vertical stabilizer and rudder are in Troy’s basement office, the horizontal stabilizer is mounted to the wall in the garage, the elevator parts at least can be stored in halves on shelves (the assembled length is nearly 10 feet)… but ooh, the next part, the remaining empennage fuselage – it’s not flat. Mark my written word, February 20, 2021, I’m still expecting to see parts on the dining room table even though Troy denies that eventuality.
Here’s the trim tab in action as it’s connected to the elevator. The trim tab helps maintain the pitch of the airplane without having to constantly adjust the elevator.
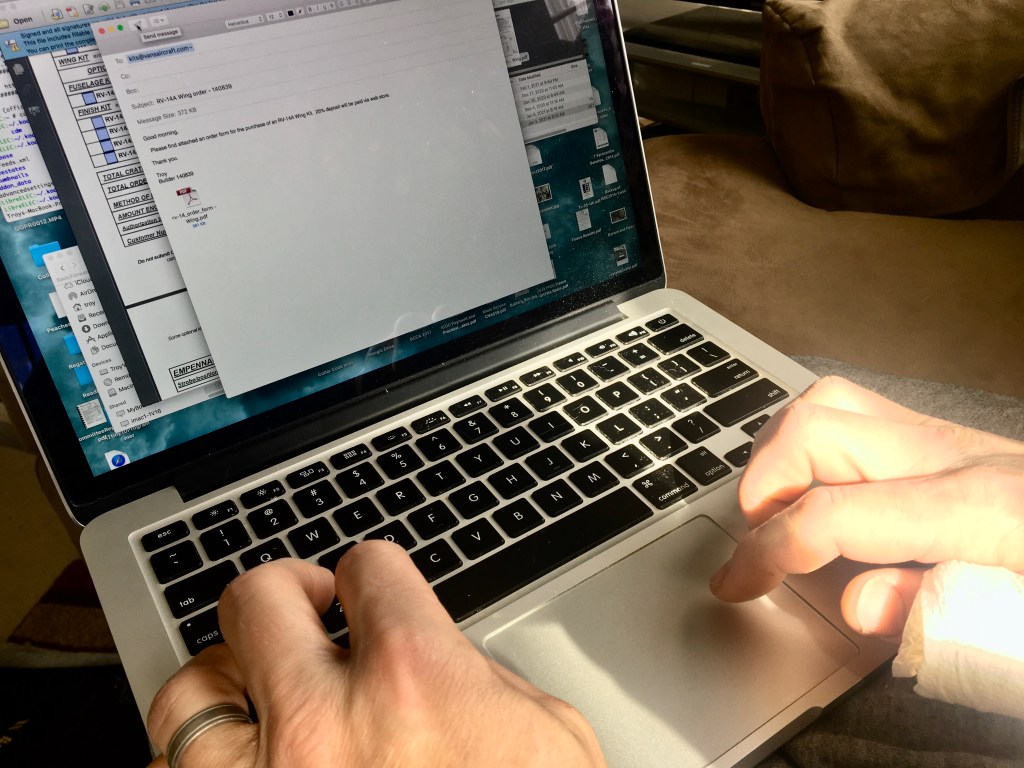
I struggled with how to close off this particular blog entry, it’s slightly doom and gloom with the 737 Max references. I thought about possibly playing off the term “nose up” and how we might begin to start to “nose up” this year as we witness the (hopefully positive) effect of the global vaccination efforts. Just as I was writing this paragraph, Troy announces that he’s pushing the send button to submit his order form for the next kit – THE WINGS. There is at least a 5 month lead time right now with the factory. Oregon has had a bit of a rough 12 months with wild fires, Covid-19, and now power outages from recent snow storms. It is exciting to think about moulding and shaping with your hands, the power of flight – so let’s keep our noses up as we continue into 2021.
Sending off the order form for the Wing Kit to Van’s Aircraft – and yes – notice the paper towel wrapping Troy’s right thumb? He cut himself on a piece of fuselage this morning.
I wake up each morning, push the “small coffee” button on our Miele machine, the first of many caffeinated offerings to the small monkey in my head. As the robotic noises click and buzz in a familiar ring-tone fashion, I survey the wondrous spread of gifted baked goods, choose a cookie to shove in my mouth, and proceed to cut a piece of Farm Boy gingerbread loaf that will serve as breakfast. The saving graces to my waist line are the incredibly stretchy pair of sweat pants I’m wearing and that the pile of Christmas baked goods is dwindling as the remaining days of 2020 tick away.
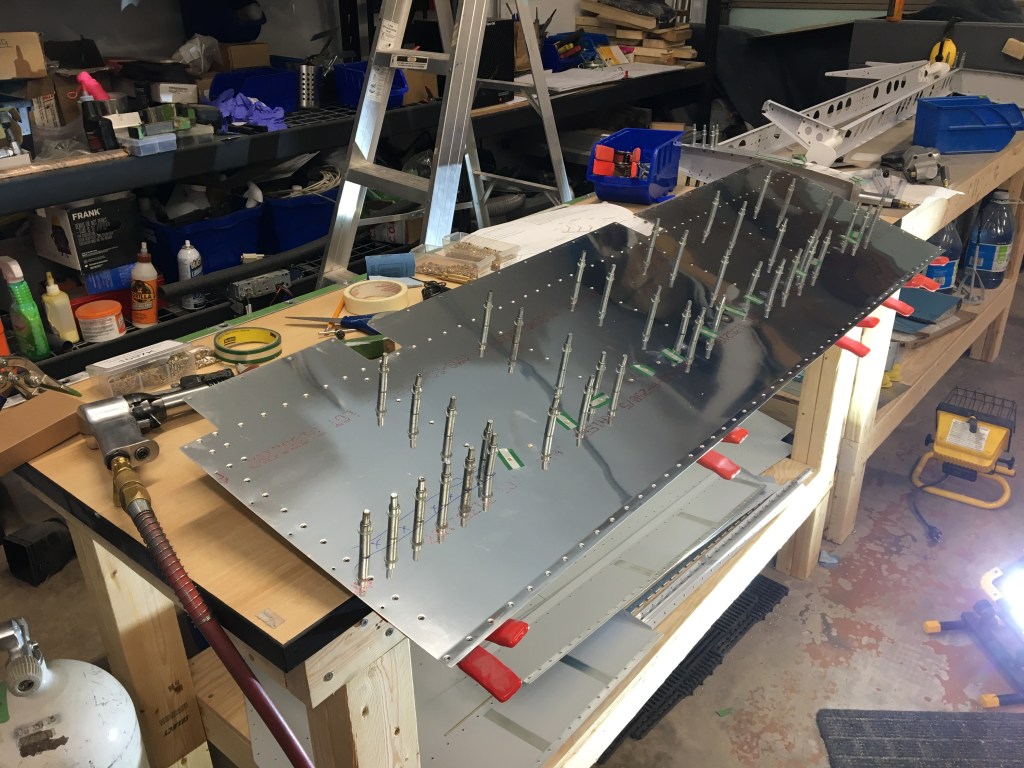
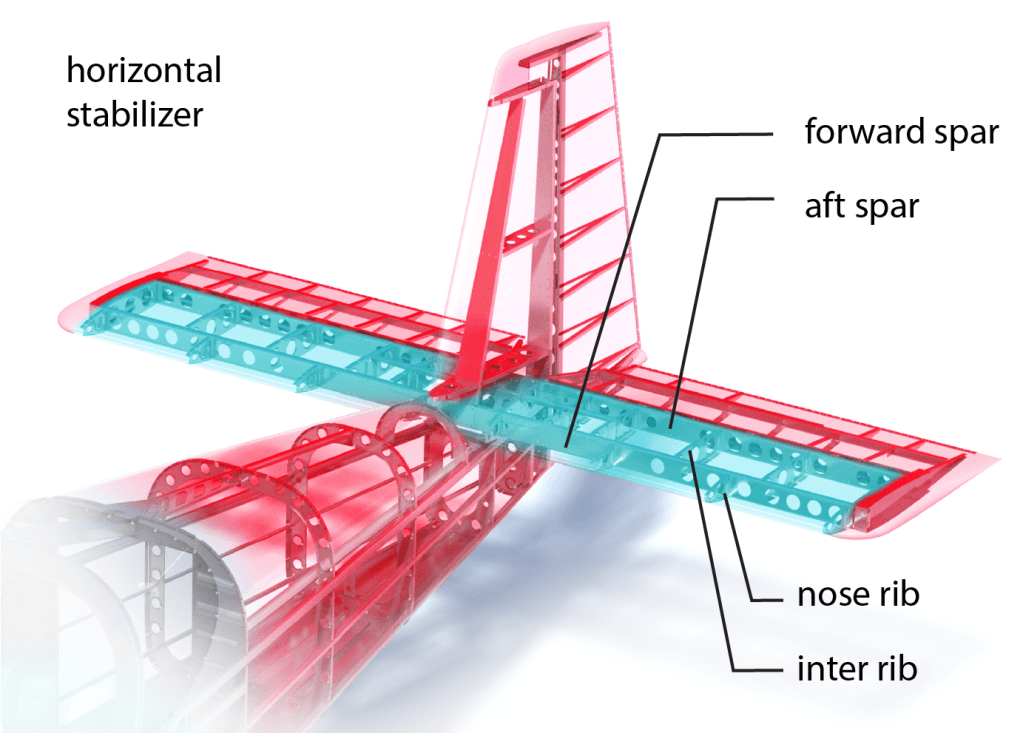
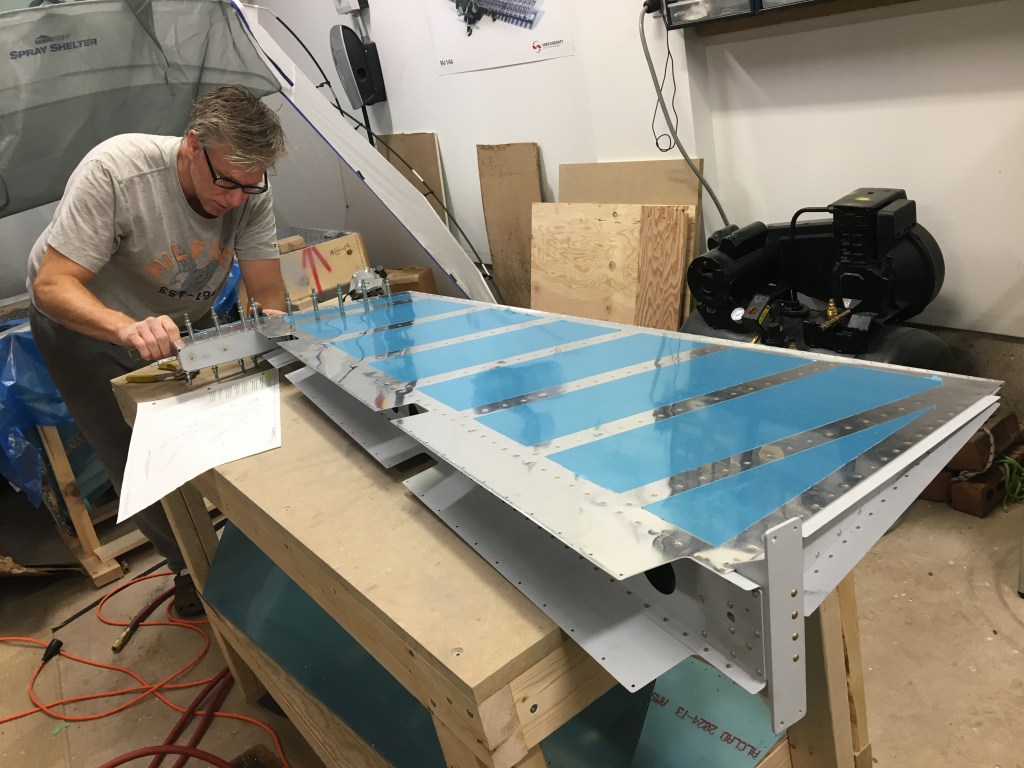
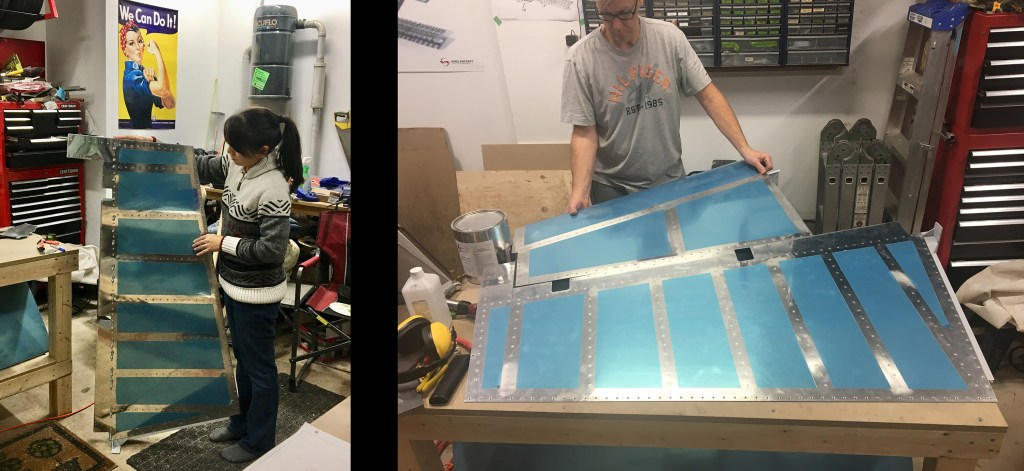
Work began on the next part of the empennage, the horizontal stabilizer (H-stab), around December 10th. The preparation of all the pieces involved smoothing out every single edge of every single piece of the H-stab, rivet hole preparations and setting our favourite friends, the Cleco clamps.
As Troy continues to assemble pieces of the airplane in the garage, I’m wondering – in addition to where he’s planning to store all of these parts – how heavy is this thing? These are rough numbers, but the total airplane will be about 1240 lbs (or roughly 560 kg). The engine alone will be 350 lbs (~ 160 kg), the landing gear and brakes another 150 lbs (~ 70 kg), add another 100 lbs (~ 45 kg) for “other stuff” and the remaining ~ 50% of the total weight is comprised of the structural aluminum pieces Troy is feverishly sanding or polishing. When the kit was first unpacked in the garage, Troy had held up one of the spars and asked me if I knew why the holes were called lightening holes. The first thing that came to mind was, “must be something related to lightening strikes and dissipation of the electricity”. Yeah, no. The holes just “lighten” the structural components. That almost felt like it a weird joke and needed a ba dum chh.
The horizontal stabilizer is 9.5 feet (~ 3 meters) long, there’s probably around 1000 rivets that will be set to assemble all of the pieces together. I still wonder where Troy is going to store this piece when it’s completed.
You’ll recall in Beer Fridge: Part 2 I touched briefly on the subject of priming and weight – where the choice to prime and the type of primer used become factors when balancing corrosion and final weight of the aircraft. Just how much of the airplane weight is the primer? We weighed three small ribs before and after priming and the primer added an additional 5% weight. Troy, being the physicist that he is, rambled on and on about X% of the pieces being primed on both sides and Y% of the pieces are only single side primed – as you can see I tuned those details out. For all intents and purposes (funny enough I had typed out “intensive purposes” first and spell check was angry with it, learned something new) – the primer is roughly 25 lbs (~ 11 kg). But then you throw 350 lbs (~ 160 kg) of people into the front seats, fly somewhere for lunch, pack in about 5 lbs (~ 2 kg) of food and maybe 10 lbs (~ 5 kg)of local wine, a few pounds / kilos here and there are negotiable on short local flights.
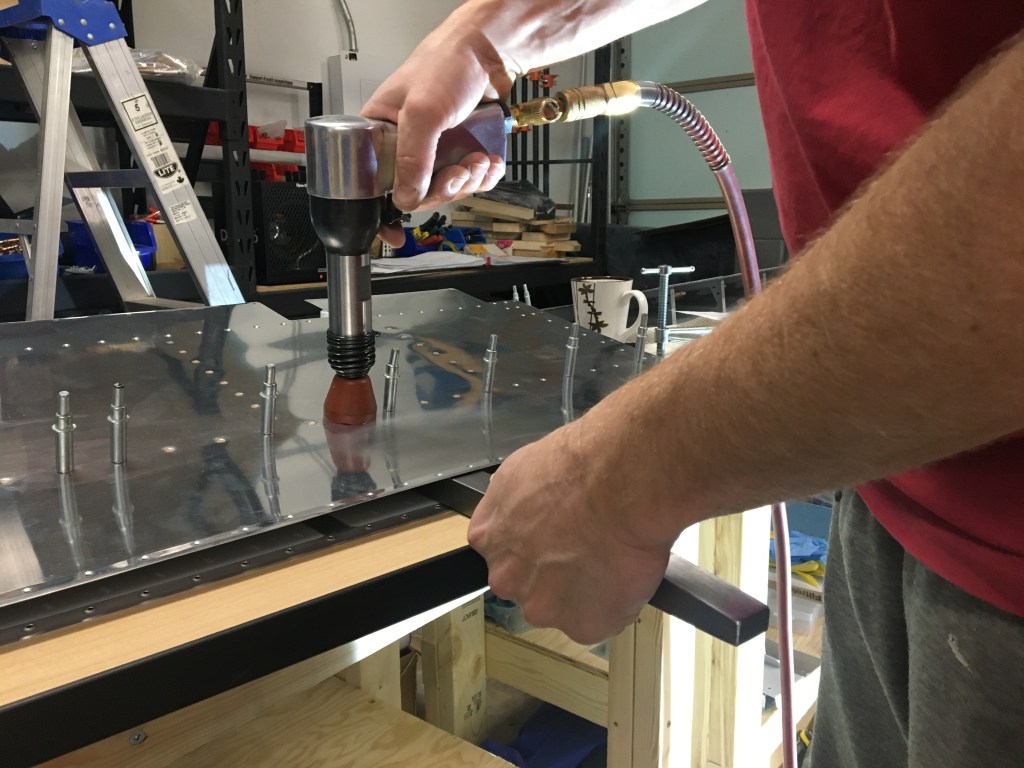
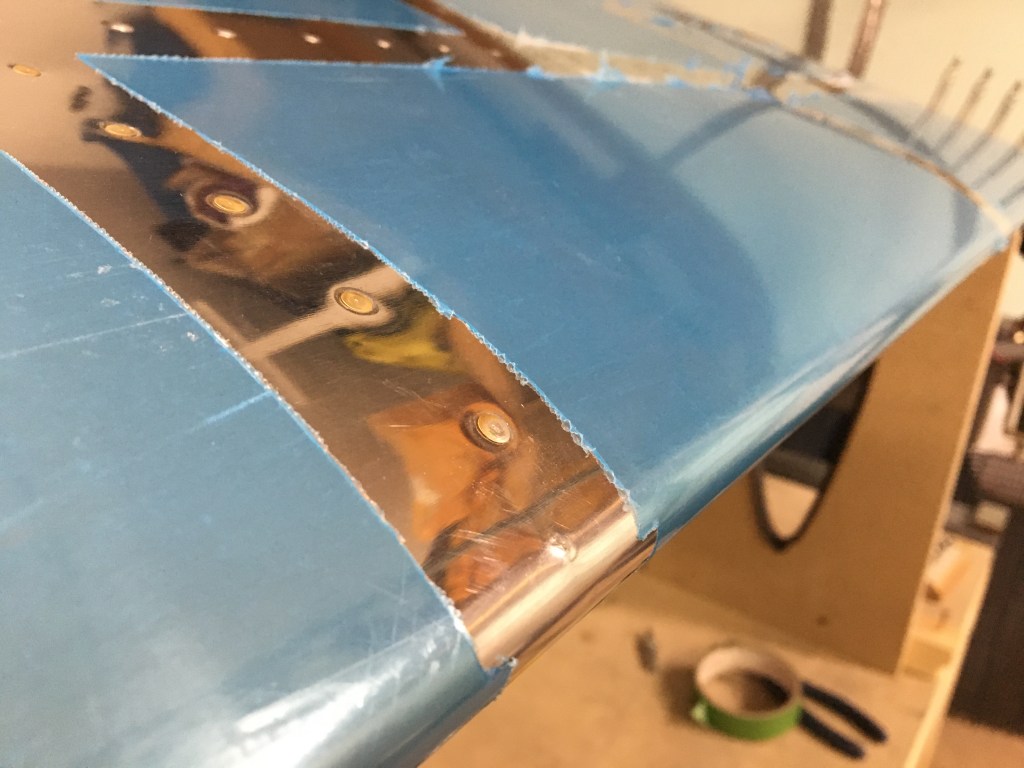
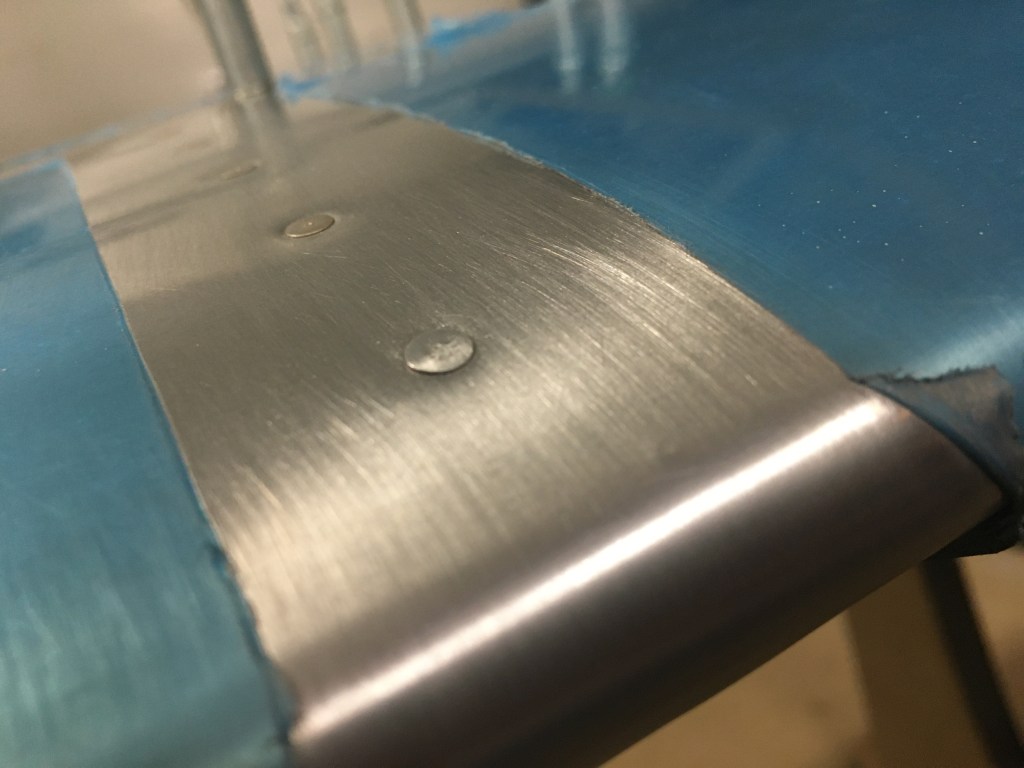
There had been a serious “oh F*$K” moment this week when Troy’s tungsten bucking bar accidentally left dents in the skins after riveting in a series of very tight spots. This is a huge concern because the weakened metal could one day become a source of stress fractures. To replace the skins the cost would have been over $200, and two weeks lost work. Thankfully the small dents could be gently encouraged back to their destined shape, this surface will one day be primed and painted for additional coverage.
So what this really comes down to is – how many people can Troy’s airplane safely fly? The gross (flyable) weight of the RV14A is 2050 lbs (~ 930 kg): fully fuelled tanks weigh 300 lbs (~ 140 lbs), the plane at 1240 lbs leaves roughly 510 lbs (~ 230 kg) for passengers. General rule of thumb – when flight ready, this plane will be able to take two 200 lb (~90 kg) individuals and their luggage… or basically, Troy, myself, the two dogs, no luggage. Apparently we all need to stop eating holiday treats.
It’s been nearly a month since my last post and I’ll be honest – after spending my entire day in front of a computer adulting – it’s been tough to scrap my butt back into a chair with a keyboard in the evenings. My afterwork glass of wine intake has also increased in both frequency and quantity leading to Netflix being the only pixels I tolerate. Queen’s Gambit, by the way, was really beautiful – SPOILER ALERT – only slightly tainted, in my opinion, with the faint sprinkle of a Disney flavoured lead up to the ending. Lately, when I poke my head out the garage door, Troy’s usually sanding, scrubbing, or filing a piece of metal and both the radio and compressor are blaring loudly. He’s done quite a bit in a month but there’s also been a pause in the build.
As you know, we live in a part of the world where “winter is coming”. Despite adding insulation to the garage doors, additional heat would be needed in order to keep the airplane workshop at a comfortable temperature in the coming months. Bringing in an additional 100 Amp service to just the garage required the power to be turned off to the house for most of a Friday. Preparing the garage for this work meant pausing any new progress on the airplane and moving all of the delicate sheets of aluminum out of the way.
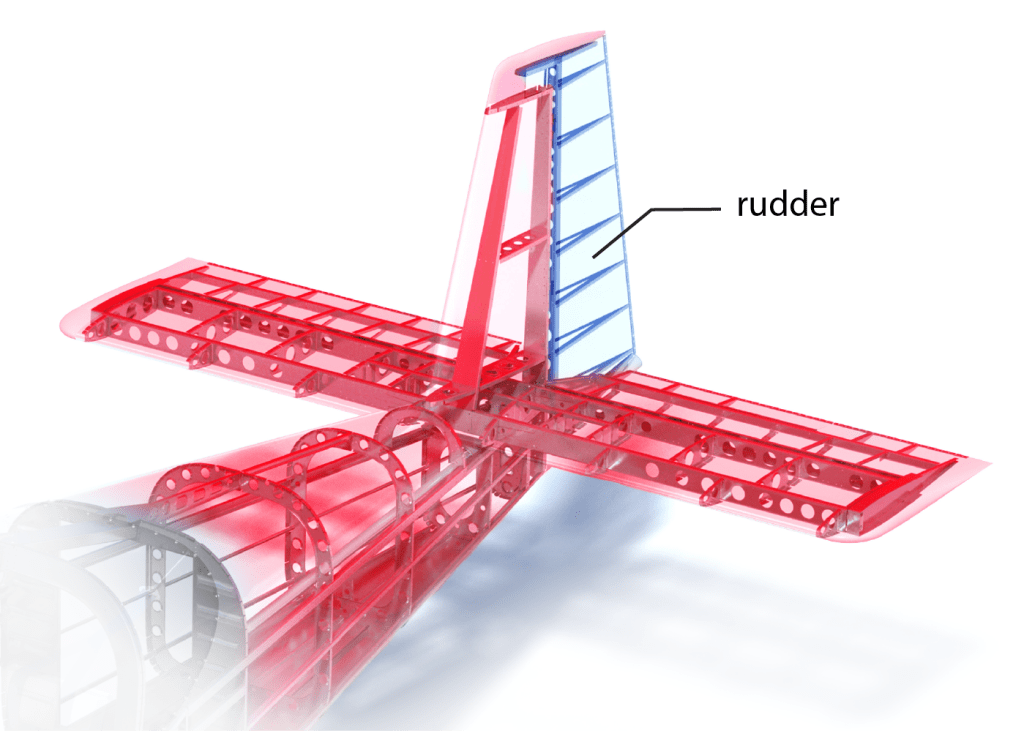
Prior to bringing more power to the house – Troy had actually completed the bulk of the vertical stabilizer and rudder assembly.
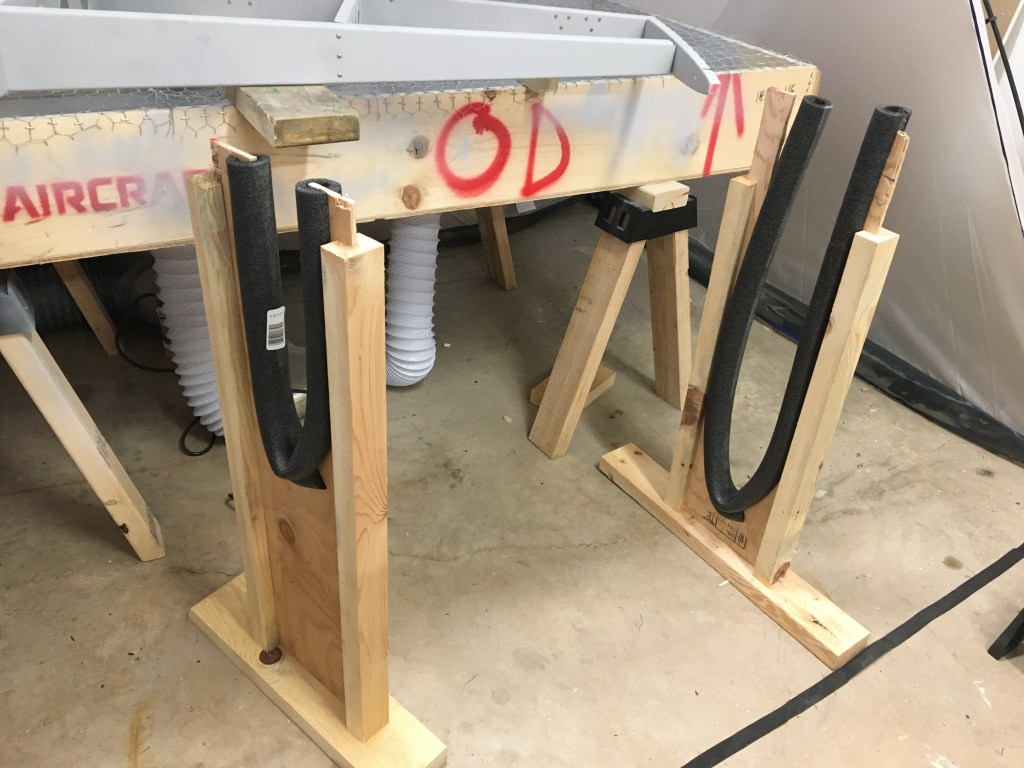
c
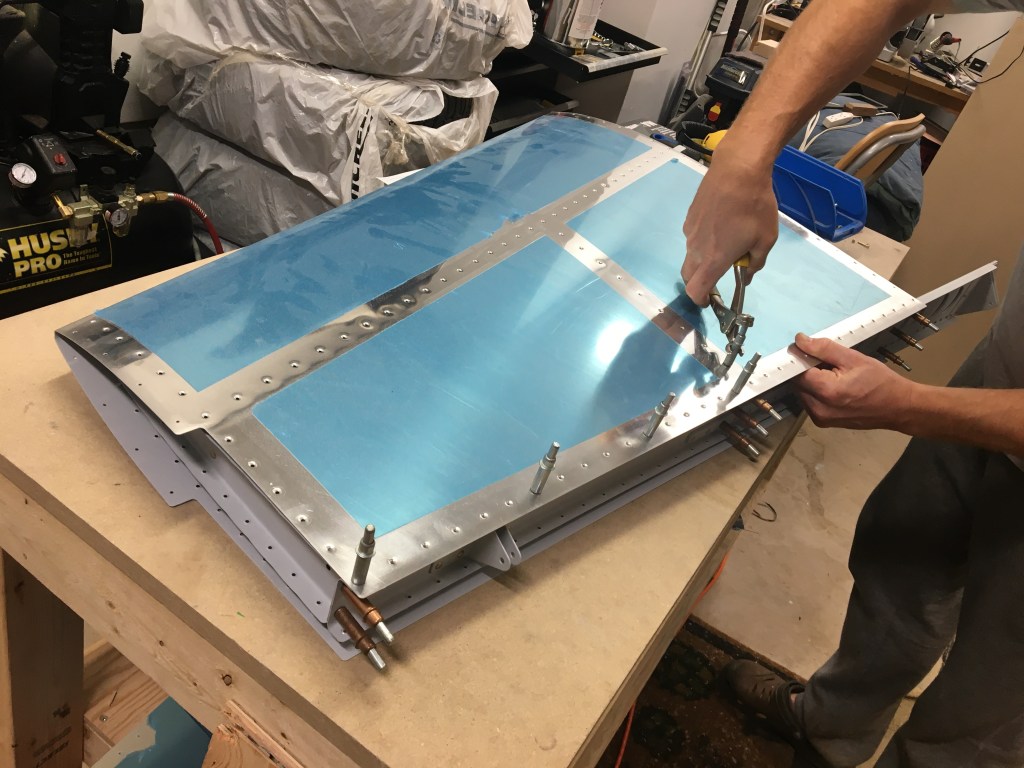
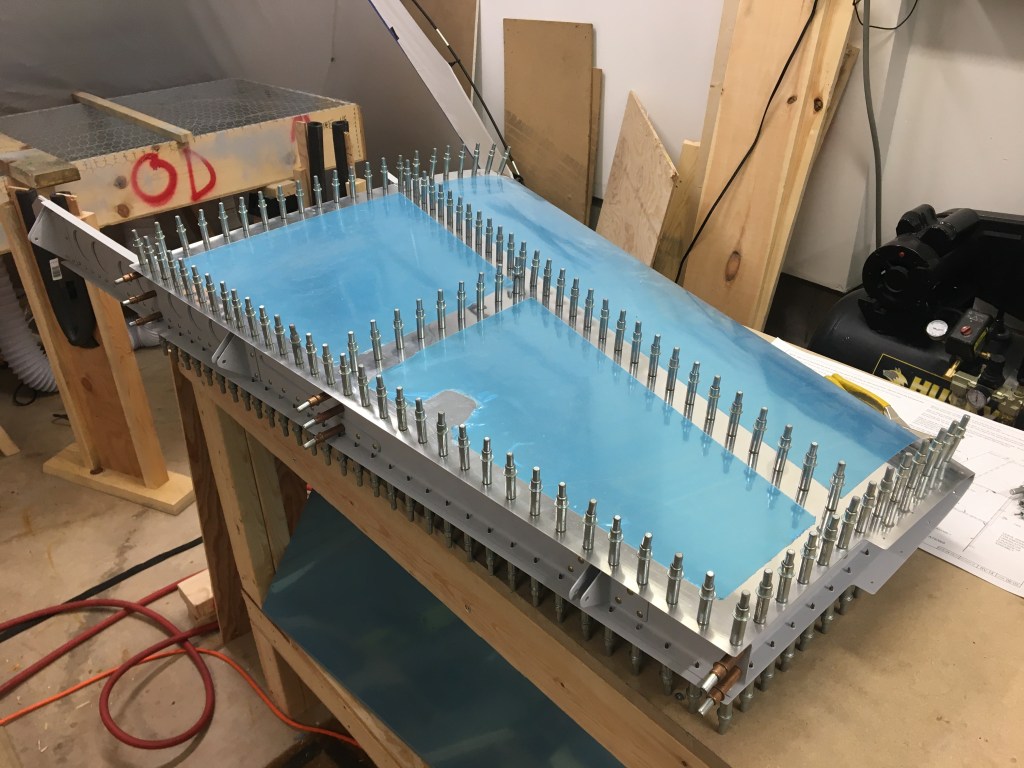
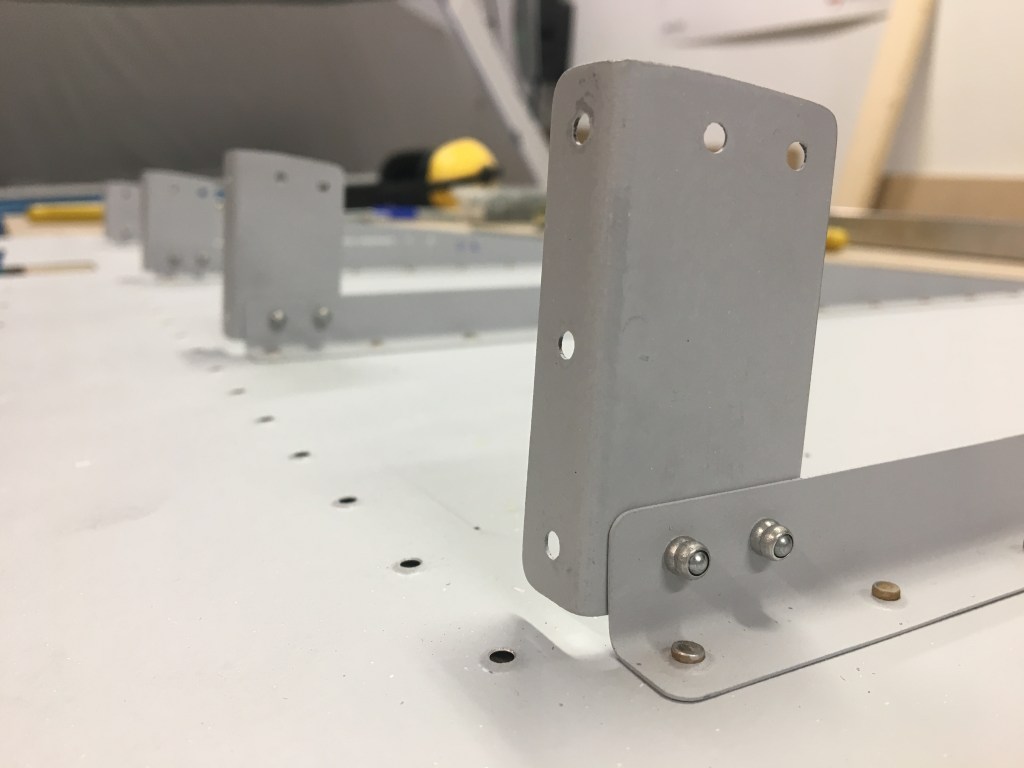
In addition to building the airplane, Troy’s had to build a number of things that are needed to facilitate certain steps. One of these included a cradle to hold the vertical stabilizer. Wrapping the carefully prepared skin to the spars and ribs of the stabilizer is a delicate procedure, lining up each of the holes and placing a Cleco clamp to hold parts in place. You can appreciate the precision needed as there is no room or flexibility for fudging hole placement.
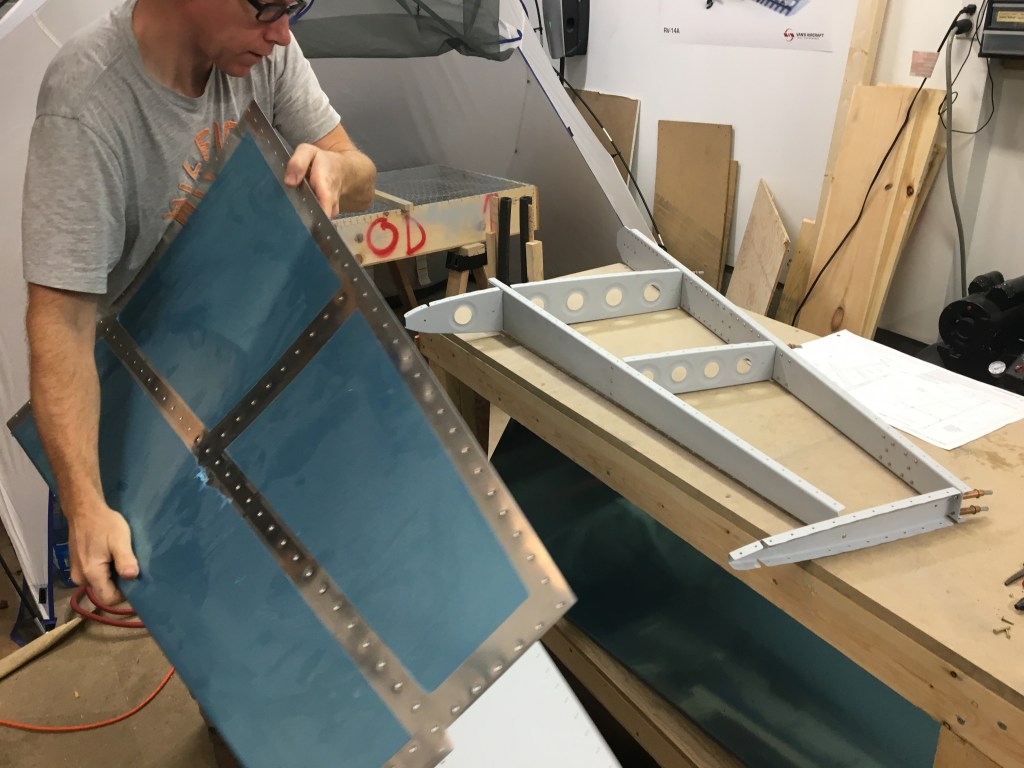
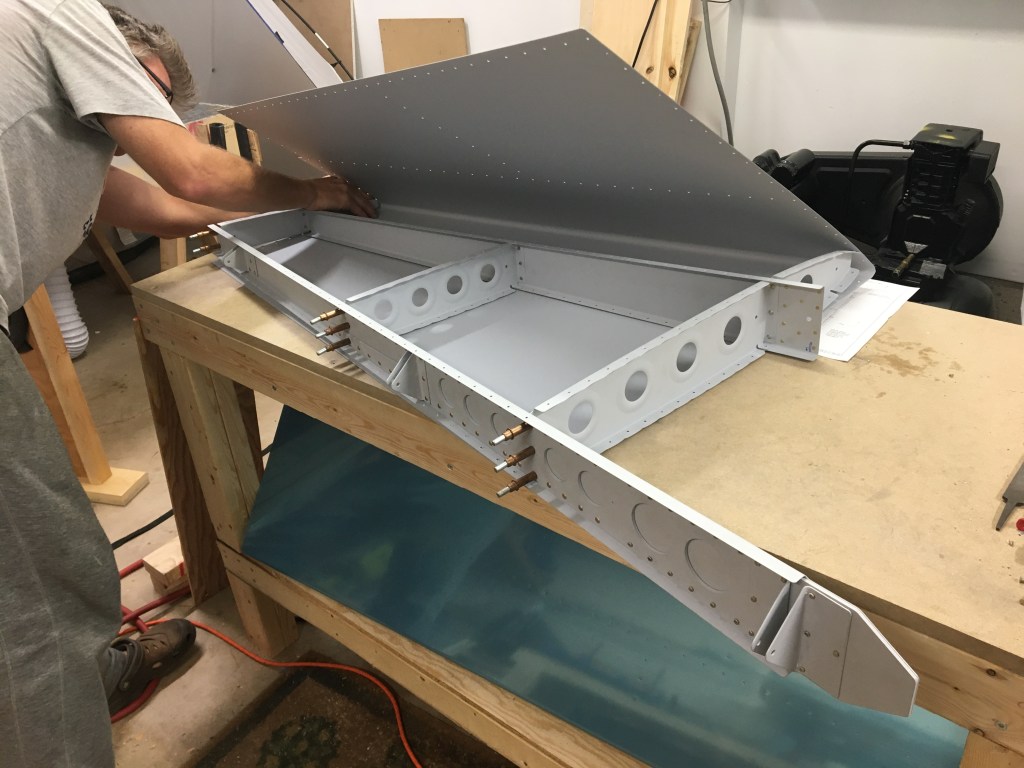
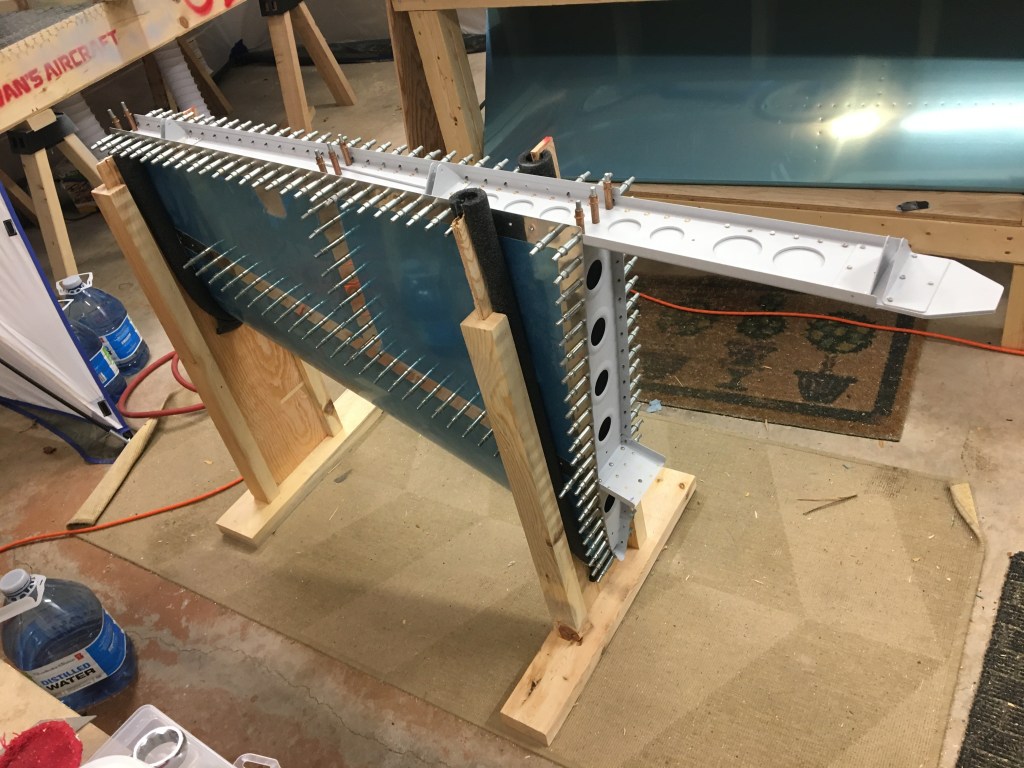
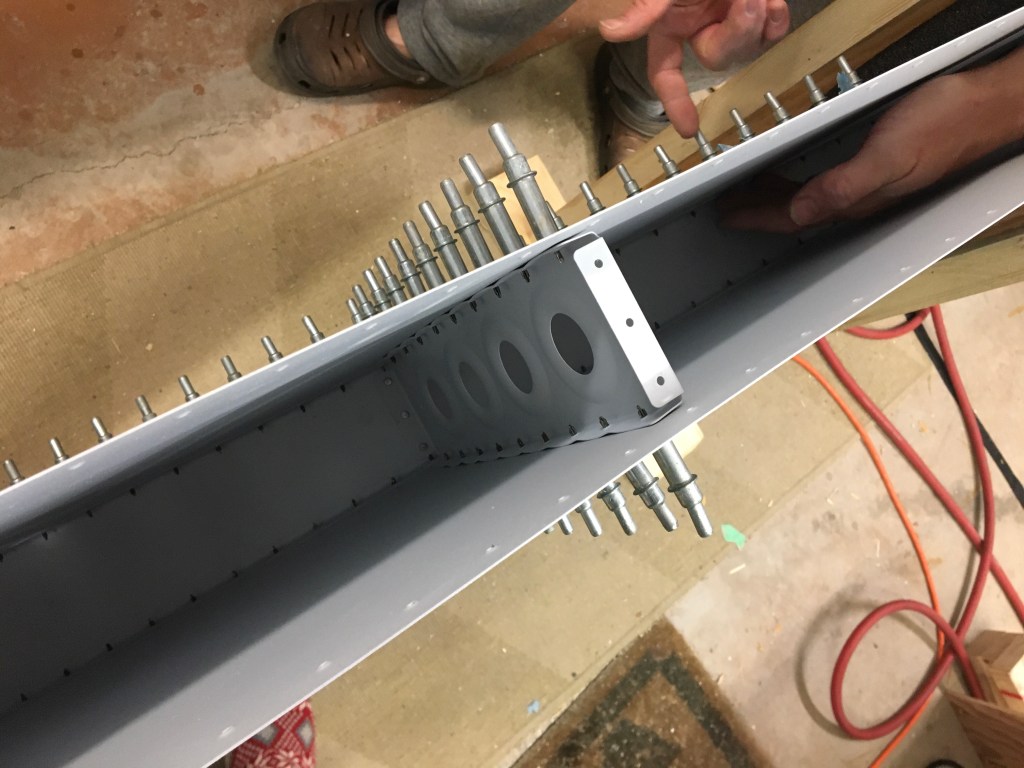
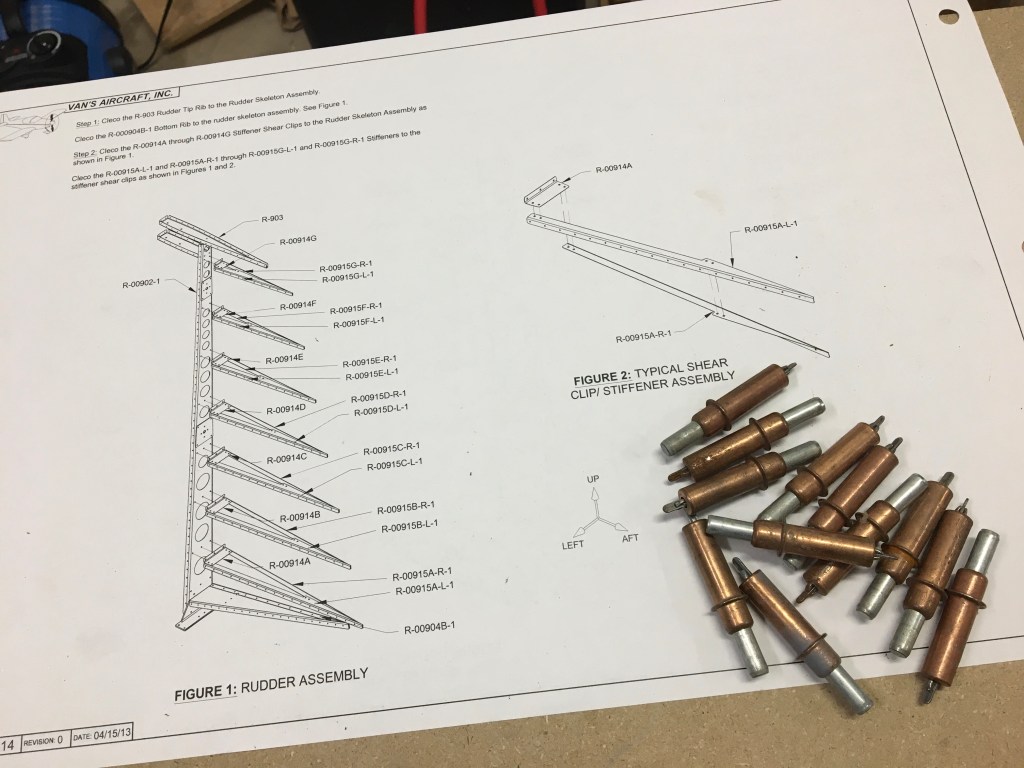
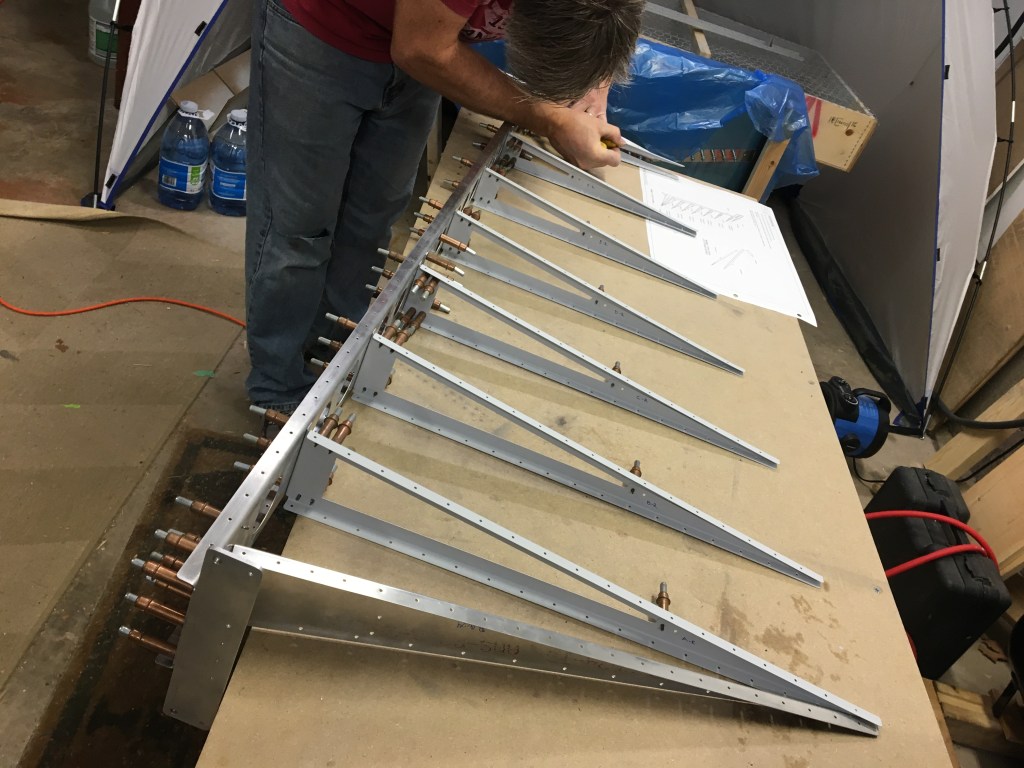
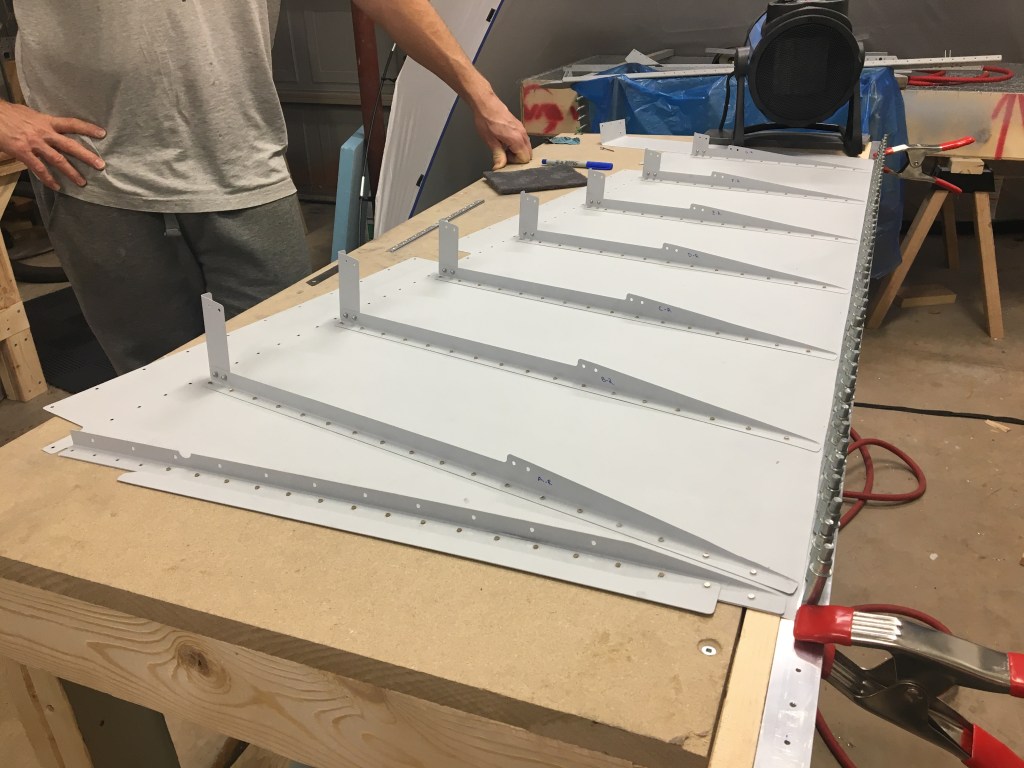
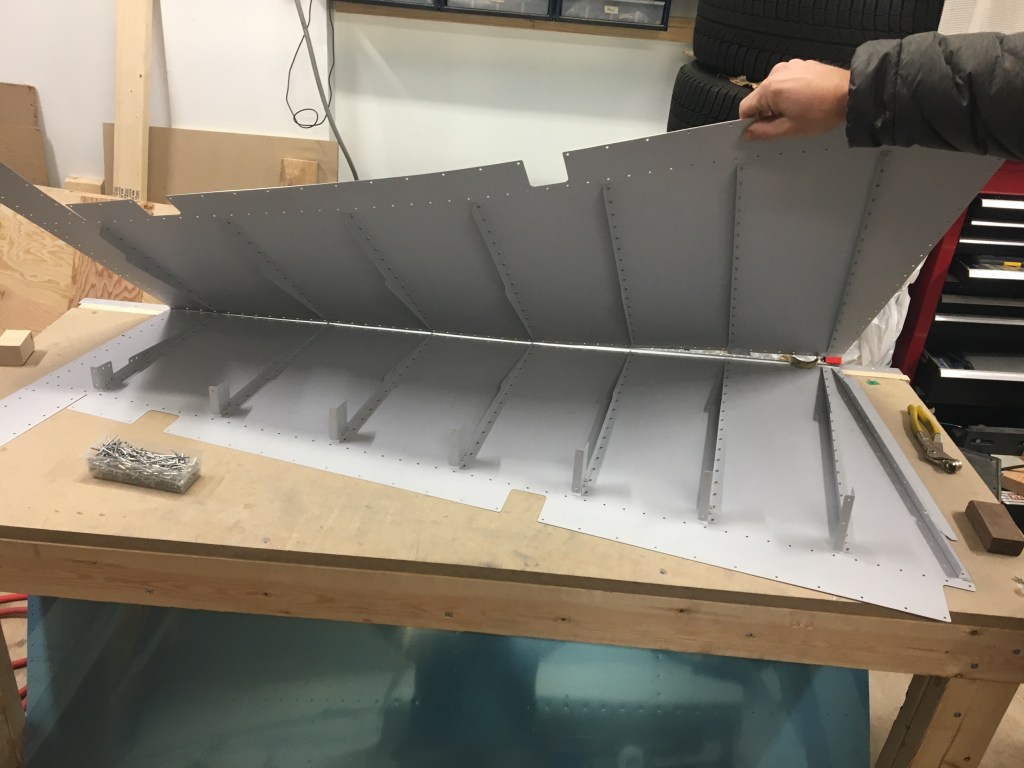
The rudder – recall that before these photos – every piece is drilled, de-burred, dimpled, primed. The structural support inside the rudder is made up of stiffeners (which are those long thing pieces attached to the skin) and a shear clip – two stiffeners and the shear clip form the triangle support inside the rudder. The knife edge to the rudder utilized double flushed rivets applied with an angular squeezer – a very important detail to ensure smooth airflow during all phases of flight.
After the team of electricians completed their task, we also needed to find a garage door repairman and have the side of the house re-sodded due to some collateral damage (which the electrician graciously covered). To add salt to the wound, the heater didn’t work when Troy plugged it into his newly powered workshop. After exchanging the heater at our local Canadian Tire, a second failure to launch led to the head electrician coming back out to the house to connect some wires his underlings did not. 100 Amps directly to the garage meant his car charger, heater and tools could all be powered safely, while also preparing for the day that I perhaps may switch over to an electric vehicle.
After that ordeal, I looked at Troy and said, “so technically, now, you actually CAN have a beer fridge out here.”